Summer makeup | Charlotta Eve x Rouge ‘N Apples

rouge n apples charlotta eve

beauty blogger summer makeup

bronzy cool smokey eye

This post is a collaboration between me and another blogger – gorgeous Eleni from Rouge ‘N Apples.

I first got to know this beautiful fellow blogger on Instagram. I loved her photos and the positive attitude, that somehow comes through the posts. I then found her blog, which is as lovely. Eleni writes a beauty blog, which has great in-depth reviews of beautiful products. I’m always drooling over the beautiful luxury products she has! She’s a Greek living in London and I love to read about her travels as well. We share the love for sea as well as makeup.

It would be cool, if you could show some love for Eleni on her blog and on her Instagram.

Eleni’s blog: Rouge ‘N Apples
Eleni’s instagram: @rougenapples

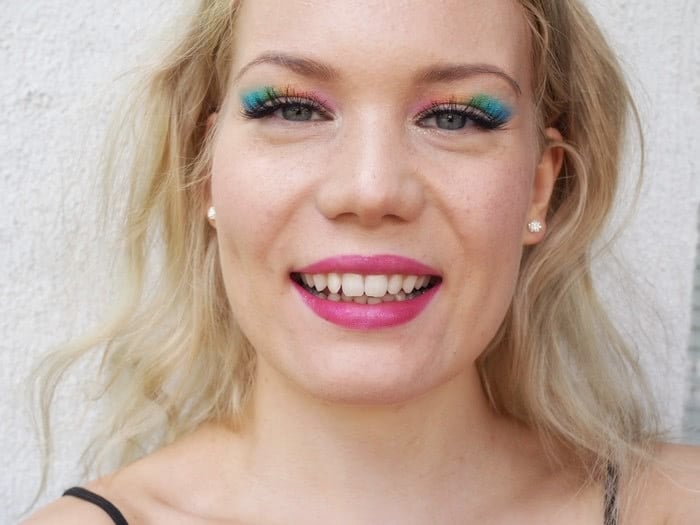
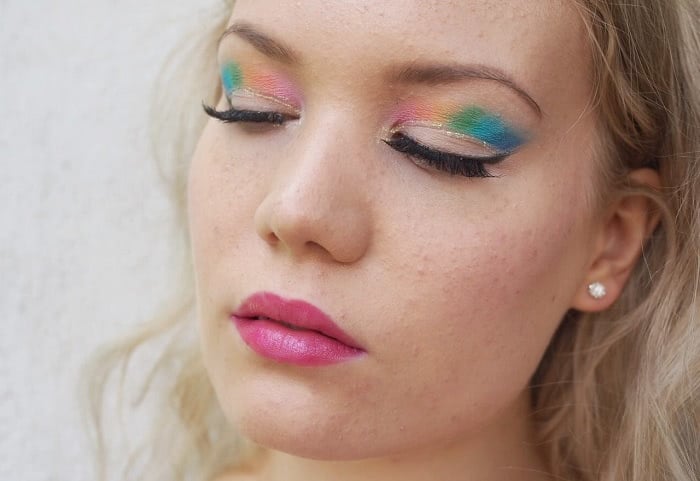
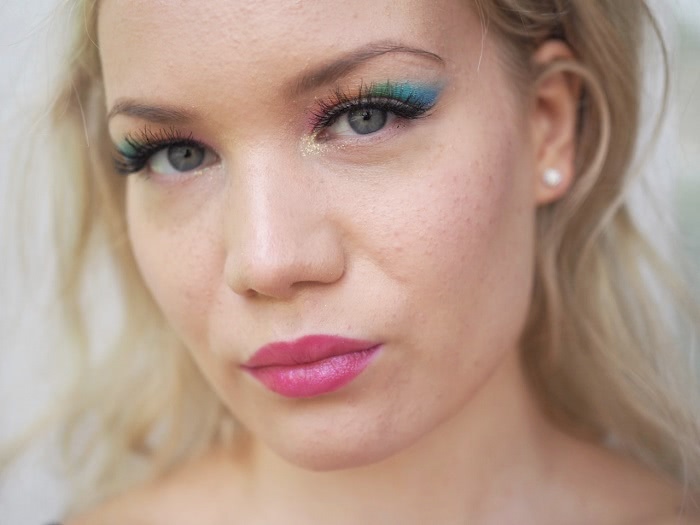
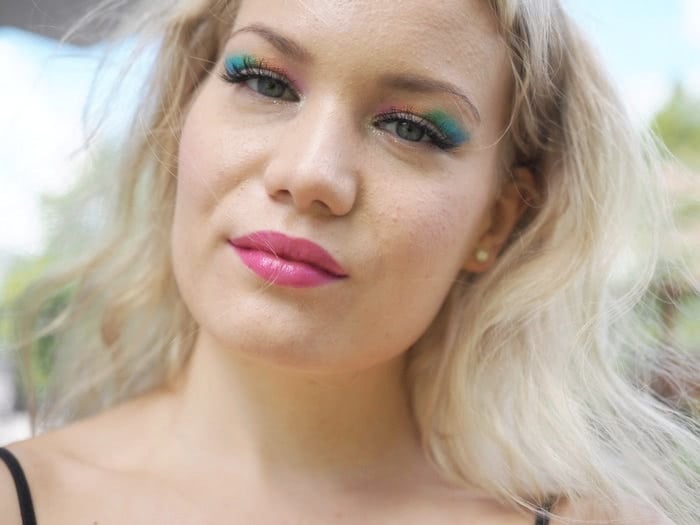
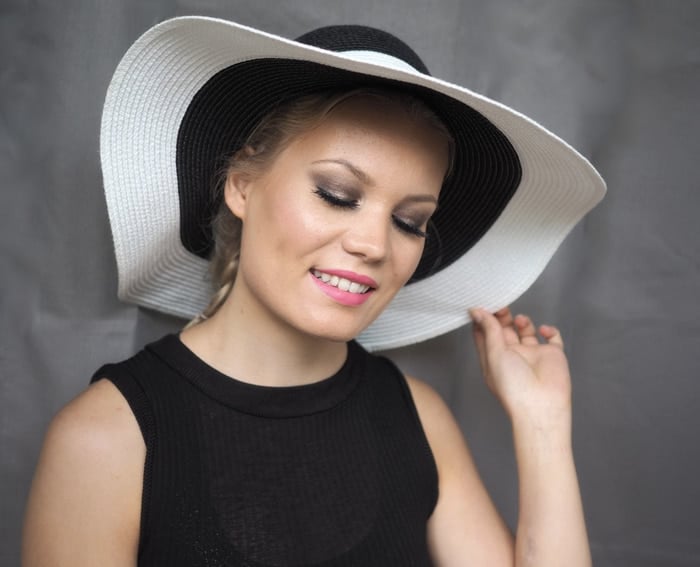
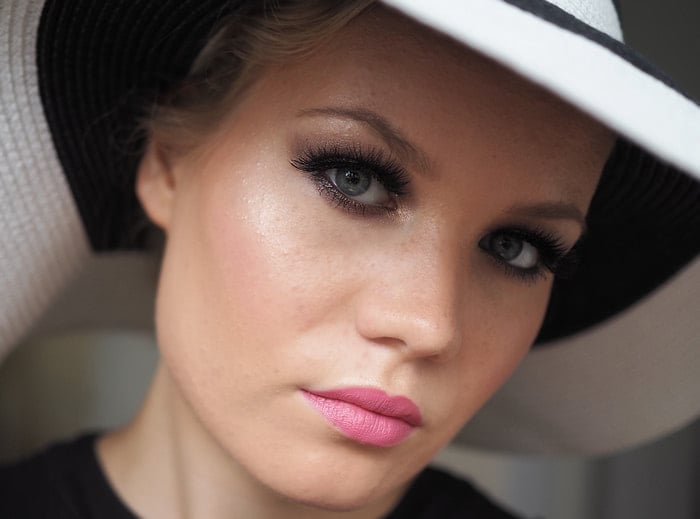
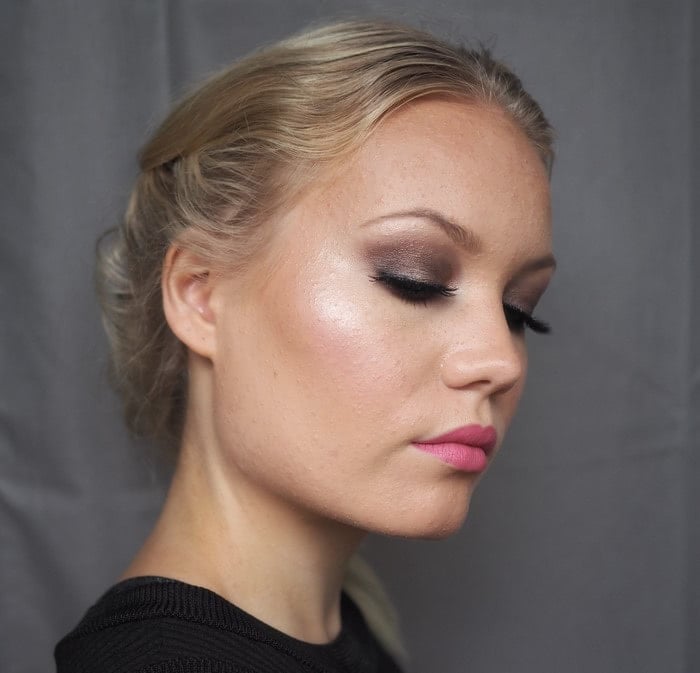
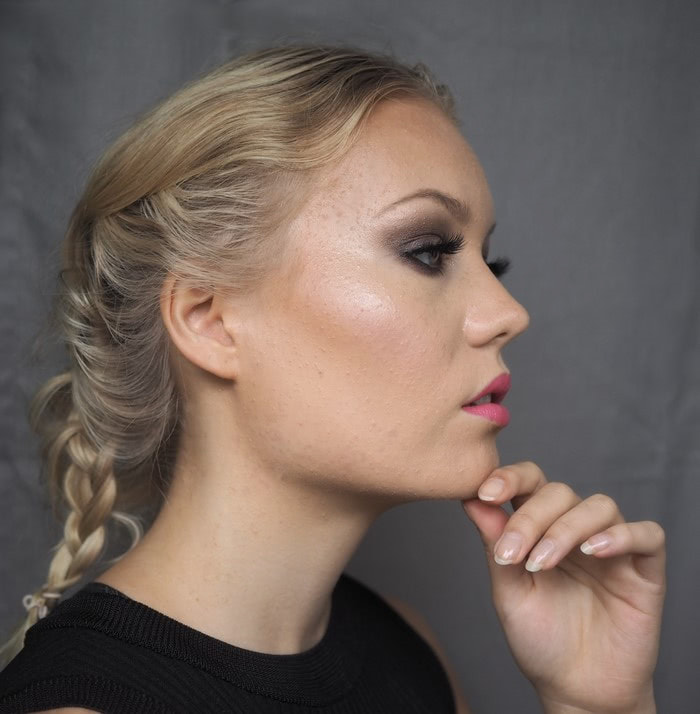
We came up with the idea of choosing a summer makeup look for each other and then creating it. This is my look, designed by Eleni. It was cool to see what she would pick for me and I love this bronzy look, which is very Eleni by the way.  The pink lips and cheeks are a nice contrast to this otherwise very dark smokey eye. I wasn’t sure if I went overboard with the smokey eye, but then again, that’s just typical me.

I had a bit of trouble to make the photos look summery, because this Monday turned out to be rainy and grey. But hey, throw a sun hat on and it’s like I’m at the beach, no?

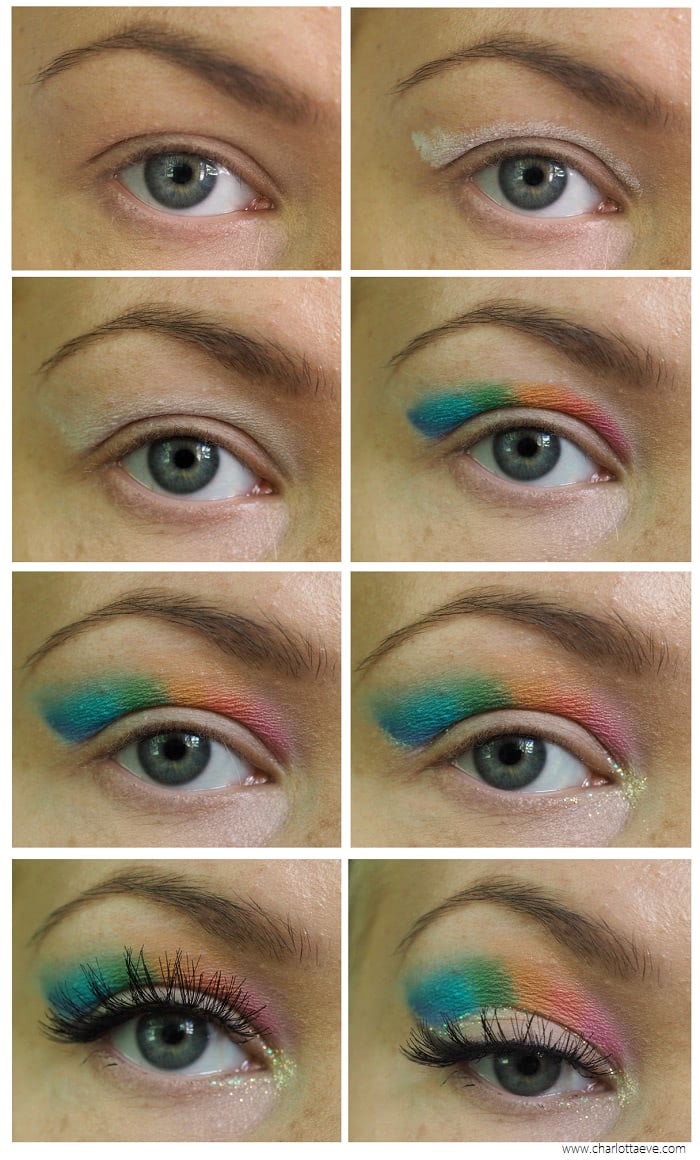
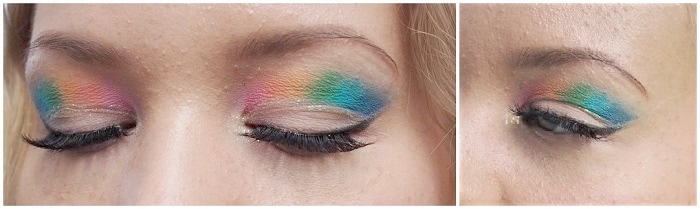
If you want to see what I chose for Eleni’s makeup, go read her post about the summer look designed by yours truly. I can reveal, that I did challenge her a bit with colors!

bronzy smokey eye with pink lips

beautiful makeup

PRODUCTS
RVB Lab The Makeup Primer
Milani Conceal & Perfect Foundation, Natural*
Rimmel Lasting Finish Foundation, Light Ivory (just a tiny amount to make the Milani foundation a bit lighter)
Innisfree No-Sebum Mineral Powder

Benefit Hoola Bronzer*
Milani Baked Blush, Delizioso Pink*
MAC Mineralize Skinfinish, Soft & Gentle*
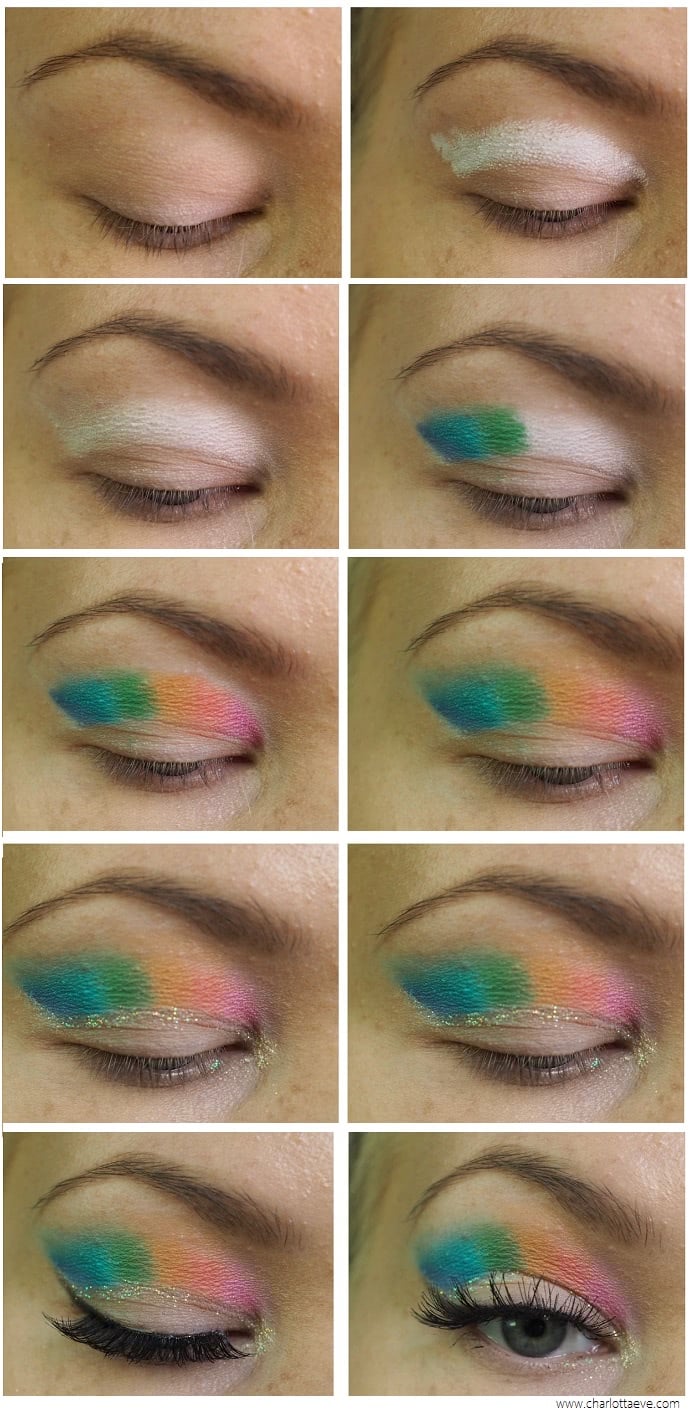
UDPP*
Sleek Makeup I-Divine palettes*, All Night Long & Arabian nights
Alima pure Eye Pencil, Ink
Lancome hypnose mascara*
Eylure Vegas Nay lashes*

Milani Color Statement, Fruit Punch*

Rainbow cut crease 2.0 | Tutorial

rainow makeup hooded eyes tutorial

Do you remember my rainbow cut crease makeup from last year?

 Last year I hid the rainbow in my eyes – having deep set & hooded eyes can be beneficial for hiding secret messages on your lids. But this time I wanted it to show more, so I did another version of it. I even made a little tutorial, so rainbow cut crease 2.0, here it is.

What comes to the pride week and pride, I’ll just say one thing, that is a no-brainer for me: love is for everyone. It’s your personal business, but also it’s something that connects us and so it’s really everyone’s business. Right? There can never be too much love in this world.

And now: Check out this tutorial for creating a colorful rainbow cut-crease. It’s easy to create with a white pencil as a base and some colorful eyeshadows.

rainbow cut crease with glitter tutorial

Rainbow cut-crease

raimbow cut crease tutorial for hooded deep set eyes

Again, I wanted to show you the steps eyes closed and open, because with my eye shape it’s how I work. I always check out the color placement eyes open, so I see how the makeup actually looks, when I’m talking to people.

  1. Prime your eyes the way you like. I used Urban Decay’s primer potion and I set it with light eye shadow.
  2. Create the rainbow shape on your eye, so that it shows when your eye is open, but still so that the brightest color is still a bit hidden.
  3. Blend the white pencil carefully.
  4. Start applying colors to the white base. I used three different shades of blue, green, yellow, orange, pink and a touch of red. Use any colors you like. Pack the colors on to make them as bright as possible.
  5. Blend the colors carefully so that they ‘blend in’ towards your brow.
  6. Cut the crease using a glitter liner. Apply the glitter liner also in your inner color to make it super bright. (There’s a treasure at the end of the rainbow right? Here it’s glitter.) I applied a loose glitter on top of the glitter liner to make it, you know, even more glittery.
  7. Tighline your upper lashline and create a wing. Make sure the wing meets the other end of your rainbow.
  8. Apply mascara and lashes. All done!

raimbow cut crease for deep set hooded eyes

rainbow cut crease with glitter tutorial

rainbow cut crease hooded eyes tutorial

What do you think? Which version do you prefer, last year’s or this?

I used the NYX Beauty School Palette again for my eyes and face (blush). It’s perfect for creating colorful looks – there’s so much to choose from. And I just had to use the same lipstick than the last year, it’s such a stunning pink color. I should wear it more often. Anyway, here is the full product list:

PRODUCTS
Pandhy’s Loose Mineral Makeup, Sandra (review post)
Lumene Nordic Chic Under Eye Concealer
Everyday Minerals Multitasking Concealer
Zuii Organic Eyebrow Definer in Taupe

Urban Decay Primer Potion*
NYX Jumbo Eye Pencil, Milk
NYX Professional Makeup Beauty School Dropout Freshman Palette (tutorials with the palette)
Urban Decay Heavy Metal Liner in Distortion*
Obsessive Compulsive Cosmetics Glitter, Spark
alima PURE Natural Definition Eye Pencil, Ink
Ardell Wispies lashes*

IsaDora Twist-Up Gloss Stick, Tropical Fuchsia


Scroll to top