Easy blue makeup look – tutorial

blue wing makeup

*adlink


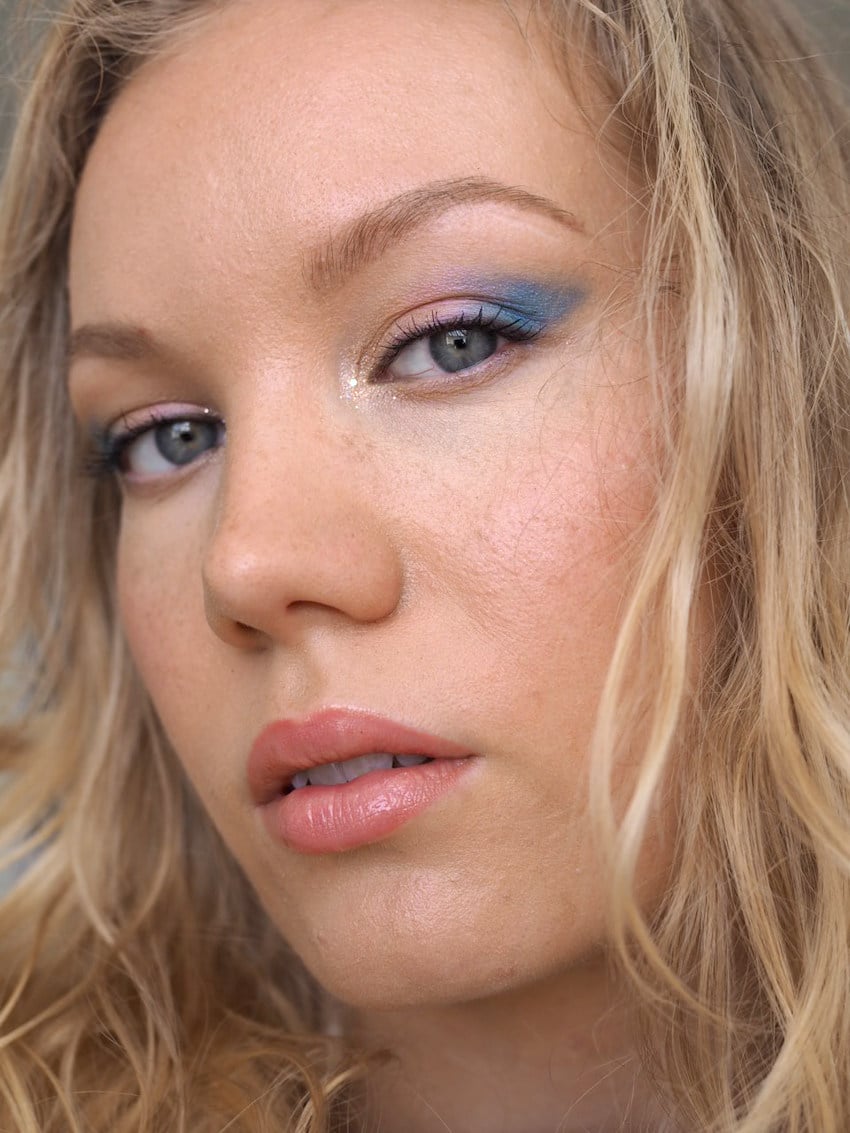
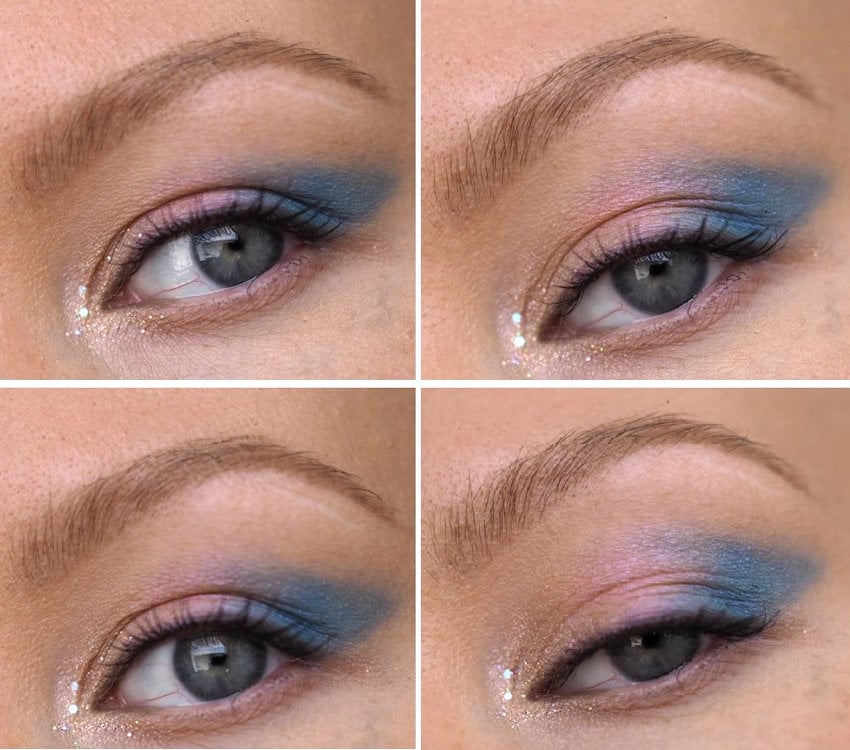
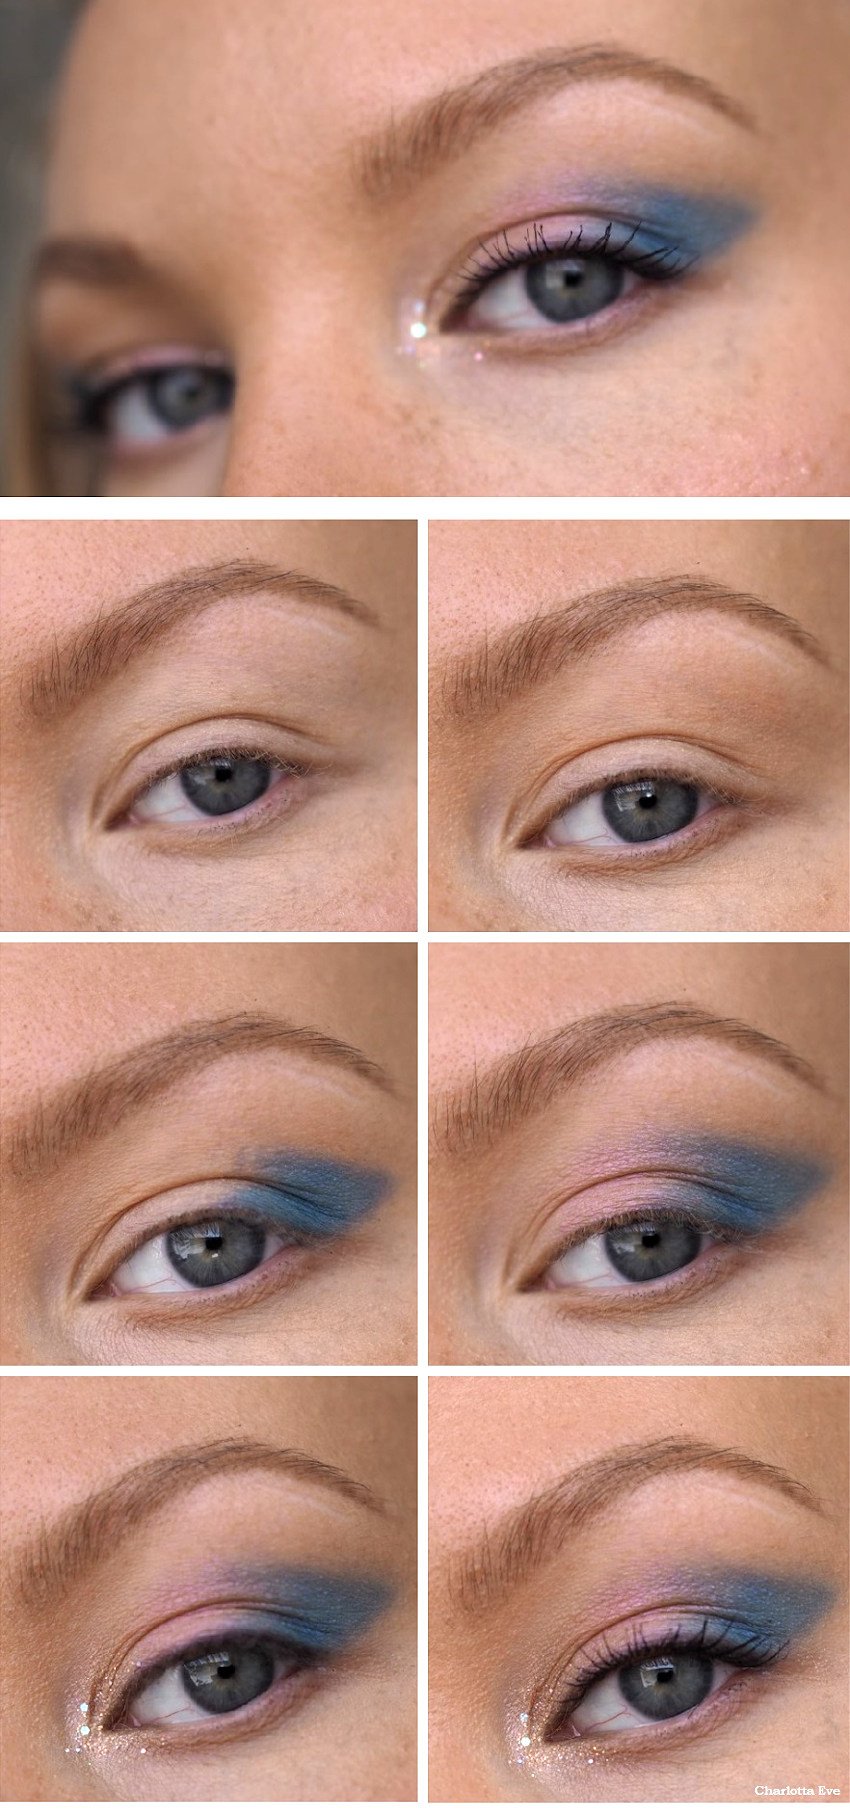
I love blue eyeshadow, even though it’s not the most conventional color. I like to do a full blue makeup, but using just a touch of blue also works. In this look I used blue eyeshadow to create a wing. I paired the look with light pink. Sometimes things escalate to glitter (you know how it is), so I also ended up finishing the look with a glittery inner corner.

If you’re into blue eyeshadow too, I have a video tutorial for another blue look on my IG TV here!

easy blue makeup look

Blue winged eyeshadow makeup tutorial

blue winged eyeshadow makeup tutorial

Instructions:

  1. Prime your eye. Contour/shade your eye a bit using a light brown. This is optional, but for my deep set eyes it really helps to balance the eye. I shaded the area above my actual crease and slightly below my brow bone. If you look at the photos closely, you’ll see the difference.
  2. Add some light brown on your lower lashline as well, so that it doesn’t look too bare with all the color happening on your lid.
  3. Add blue eyeshadow in a winged shape to your outer corner. If you have deep set or hooded eyes, chances are, that an actual winged liner is very tricky. However, a wing shape done with eyeshadow like this is easy to do and works wonders! Blend the edges of that blue color minimally, but keep it quite focused.
  4. Add light pink to the rest of your lid and blend it together with the blue. I didn’t blend too much, because I wanted to keep the colors separate. If you blended a bit more, you could create a purple color between the colors!
  5. Line your eye, add inner corner highlight and some glitter. Add mascara and you’re done.


nyx perfect filter marine layer


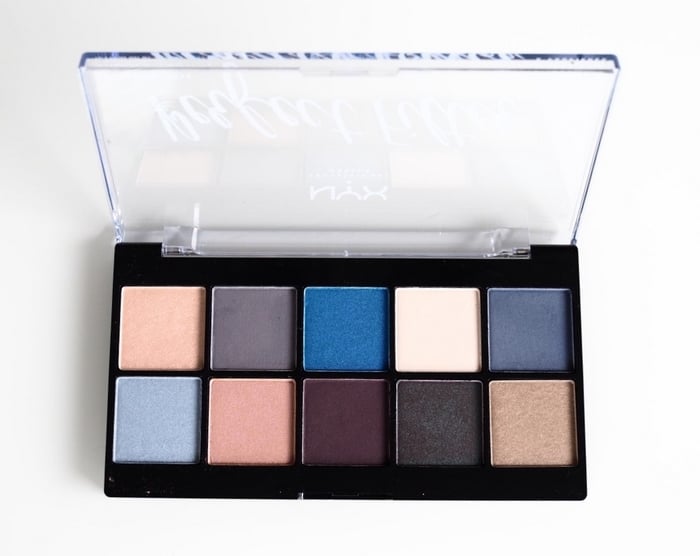
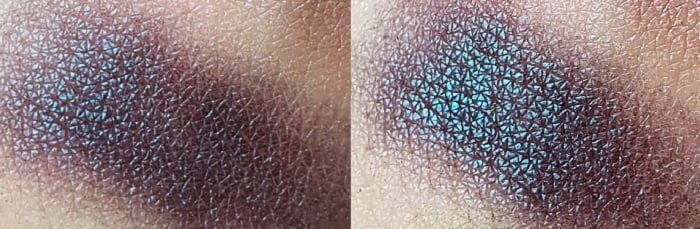
For this look I used one of my favorite blue-containing palette – *NYX Perfect Filter Marine Layer. It has gorgeous colors! Besides these beautiful blues and pink – it has a the most amazing duochrome purple-teal color in it.

For the glitter I used NYX Glitter Primer and glitters from Colourpop and OCC.

nyx marine layers makeup
A blue look I did, when I got the palette in 2017. My makeup style has evolved quite a bit from this.

purple turquoise duochrome

purple duochrome eyeshadow tutorial

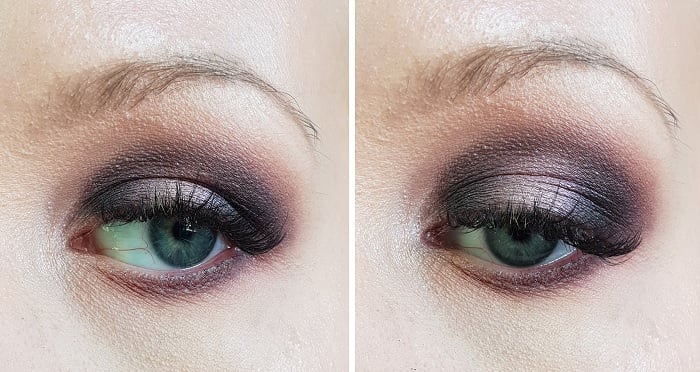
Tutorial for this duochrome look using the palette can be found here!


The fast drying top coat that makes painting your nails worth it – Seche Vite

Seche Vite the best top coat

*adlink


Do you hate painting your nails? The whole process of waiting for an eternity for the layers to dry and then accidentally poking your nail somewhere and having everything been for nothing?

Yet still – you see a gorgeous nail polish color and you would love to have it on your nails. To be one of those women, who had time to do their nails. Or even sometimes use one of the nail polishes that is waiting for the right moment at the back of your drawer.

I. Feel. You.

I didn’t believe it until I tried it, but Seche Vite’s fast-drying top coat makes all the difference. It changes the whole game. I’m telling you. Just watch the video and decide for yourself!

Seche Vite fast-drying top coat

Nowadays, since I’ve switched up to Seche Vite, I actually do paint my nails every now and then. And it doesn’t take me an hour. It’s quick. And quite effortless. Okay, you do need to see some effort, but compared to life before Seche Vite? Ha, not even close. I think the fact that I don’t want to use any other top coat anymore tells you everything you need to know.

The thing with this cult top coat is that it’s a cult you do want to belong in. It actually dries fast. And not only that – it gives an amazing shine to your nails. And when you do it right, it lasts long. If you really want to make your nail polish last long, you should wrap the tips. Here’s an amazing tutorial for that.

When you get used to Seche Vite’s thick consistency and the results, you don’t want to get back.

How to apply Seche Vite?

So the consistency in Seche Vite is thick. The way to do it, is to use a bit more top coat than you would normally and apply it carefully on your nails, without using much pressure. You want to avoid touching the nail polish below it, if that makes sense. Another thing is, that you can apply it almost immediately after your color nail polish. You don’t have to wait for it to dry out, actually you shouldn’t. I wait about a minute, after which I apply the top coat. The top coat is dry in just a few minutes. I know, it sounds weird and difficult. It’s almost like applying a gel on the nail. But as I said – it’s worth a few test runs. You’ll get it eventually.

You can watch how I apply the top coat and how quickly it dries from the video.


This top coat is awesome, because it makes all your nail polishes work for you. It makes painting your nails fun.


Since the consistency in Seche Vite is thick, I recommend buying the Restore thinner as well, which you can use at the end of your Seche Vite bottle. It makes it runny again and that way you don’t have to throw away the rest of the polish.

Shop Seche Vite:

*Seche Vite Top Coat
*Seche Vite Fast Dry Top Coat & Base Coat Duo
*Seche Vite Restore

Scroll to top