1,5 years on the Curly Girl Method (kind of)

naturally wavy hair progress

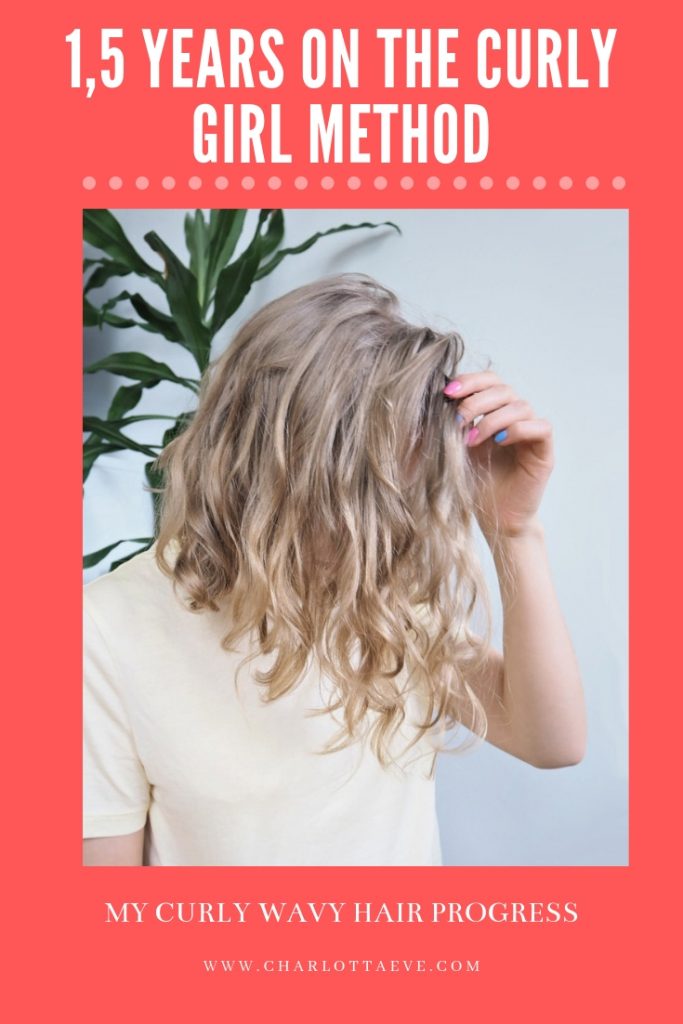
It’s been 1,5 years since I started to embrace my natural hair texture, which is wavy/curly. I’ve been following loosely the Curly Girl Method and I wanted to write down my experience (which is still continuing). I say loosely, and I mean that, because my routine is pretty simple. Treating those curls don’t have to be that complicated!

Healthy, imperfect curls

A lot of people start the method thinking they will achieve beautiful, defined perfect curls. People with wavy hair might think they get tighter, ‘better’ curls. Me included! My hair is mostly wavy, but I also get corkscrews every now and then. It’s a mixture of different kinds of curls and waves. But that’s okay. I love my waves. I’ve learned, that with curly hair it doesn’t necessarily get better, as in, you’ll have perfect curls once you stick with it. In my case, the curl definition varies. My hair and my curls have their own mind. But that’s okay. I let them be that way – some day they are tighter and some day looser. And all in all, my hair looks a million times better now than it did, when I treated it, well, wrong.

Another reason of starting the curly girl method is in hopes to getting healthier softer hair. That I can agree with and that most likely will happen. It’s inevitable. Once you stop heat-styling your hair and use gentle moisturizing products, obviously your hair will benefit from that. And after being on the method for this long, I can honestly say that my hair has never been in this good shape. I’ve actually managed to grow my own natural hair color back!


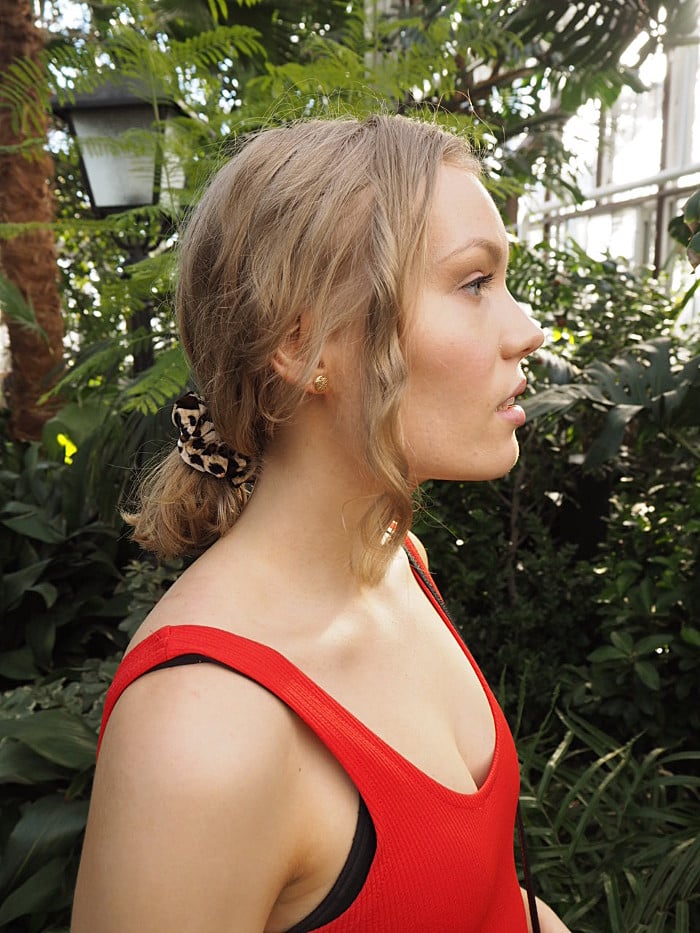
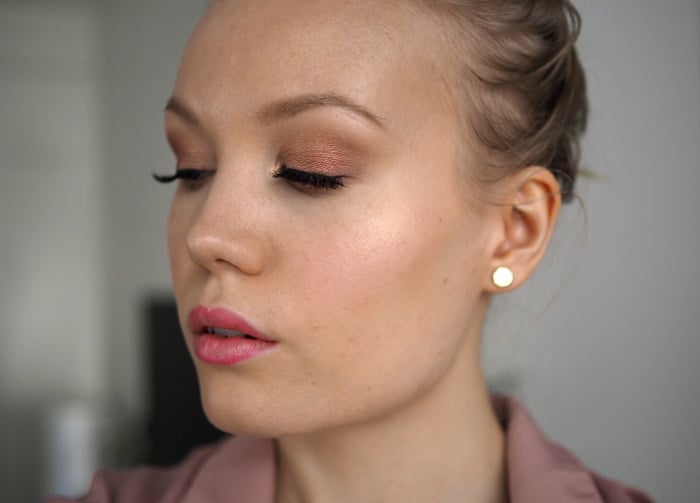
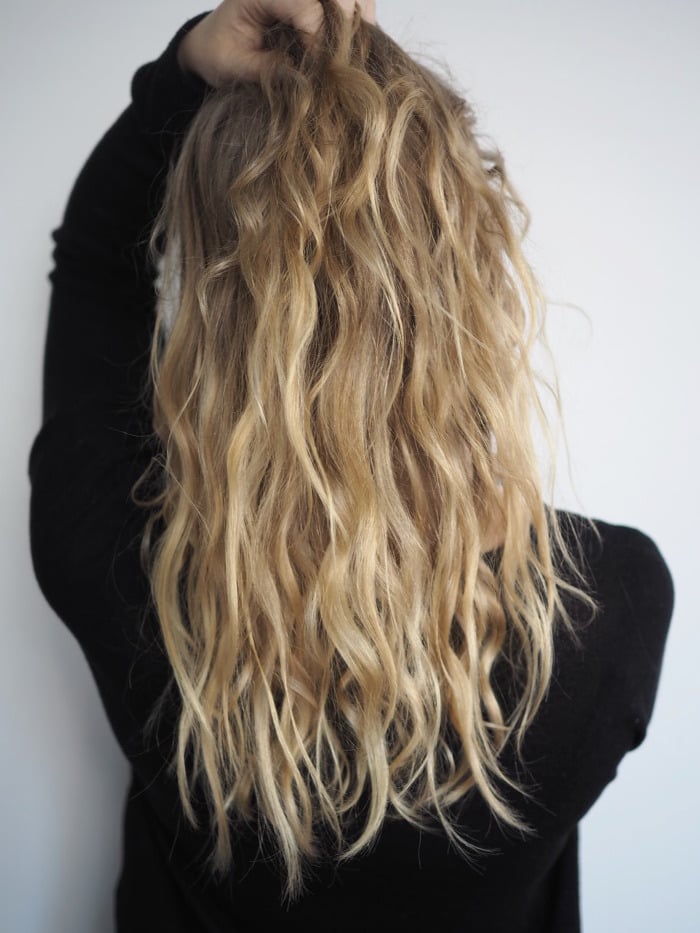
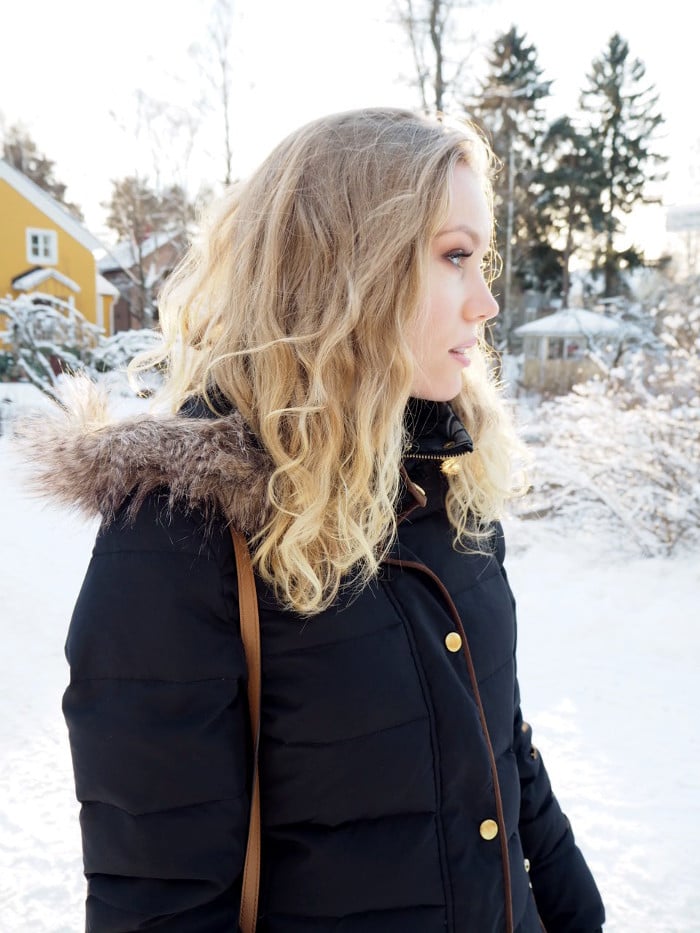
Photo:  Mia/Beauty Highlights

How I went from straight to curly – my curl progress

I had read a lot about naturally curly hair and at some point I realized that I had always treated my hair wrong. I thought that natural curls were a bad thing, something you need to tame and smooth. So I did just that. With smoothing silicone-based products I could get my hair to become pretty silky straight. But still I wondered – why did my hair always become this awful mess when I brushed it?

Photos of my hair before I started to learn about curly hair:

isadora fall makeup

interesting blogs

As you can see, my hair used to be somewhat straight. And brushed. And that’s why it looked so, well, all over the place. It was straight, there were some waves, it was puffy (thanks to brushing it) and it looked dry (because it was). I always felt like my hair just wasn’t ‘sitting’ right.

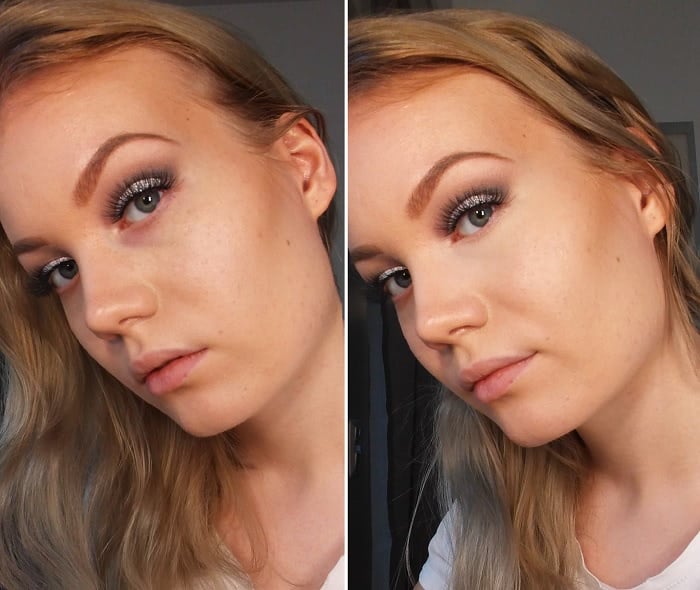
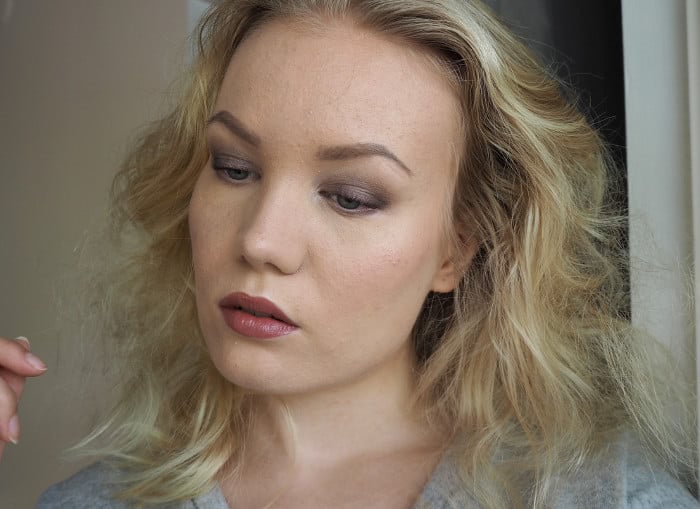
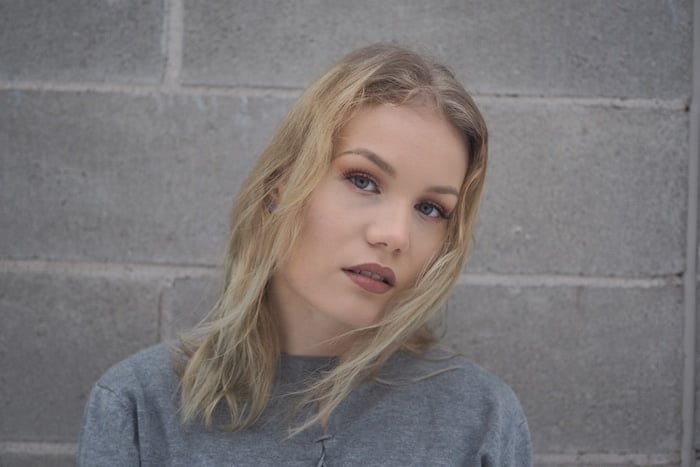
My hair in the beginning of trying to treat my curls the right way (AKA The Curly Girl Method):

beauty lifestyle blog
February, 2018.
chiquelle shirt
March, 2018.
lifestyle blog
March, 2018.
shiny hair
April, 2018. Used Evolve Beauty Shine Shampoo & Conditioner.
May, 2018.
the best lipstick
August, 2018.
bobbi brown makeup artist makeup
September, 2018.
naturally curly hair diffuser
October, 2018. Used a diffuser.
January, 2019.
March, 2019.
luonnonkihara curly girl metodi tulokset
May, 2019.


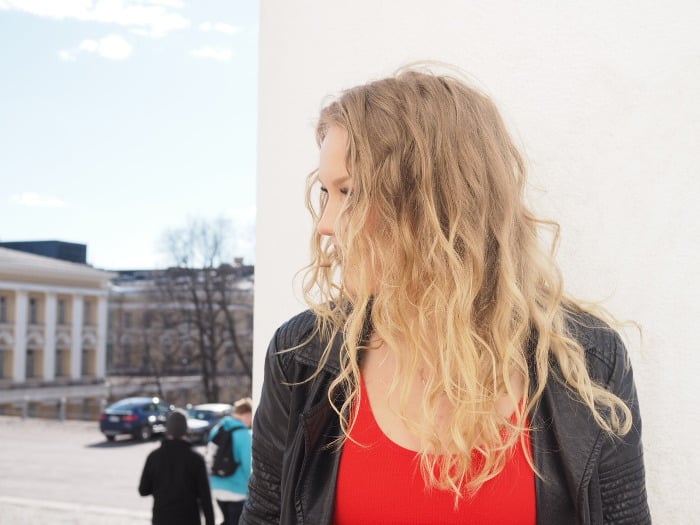
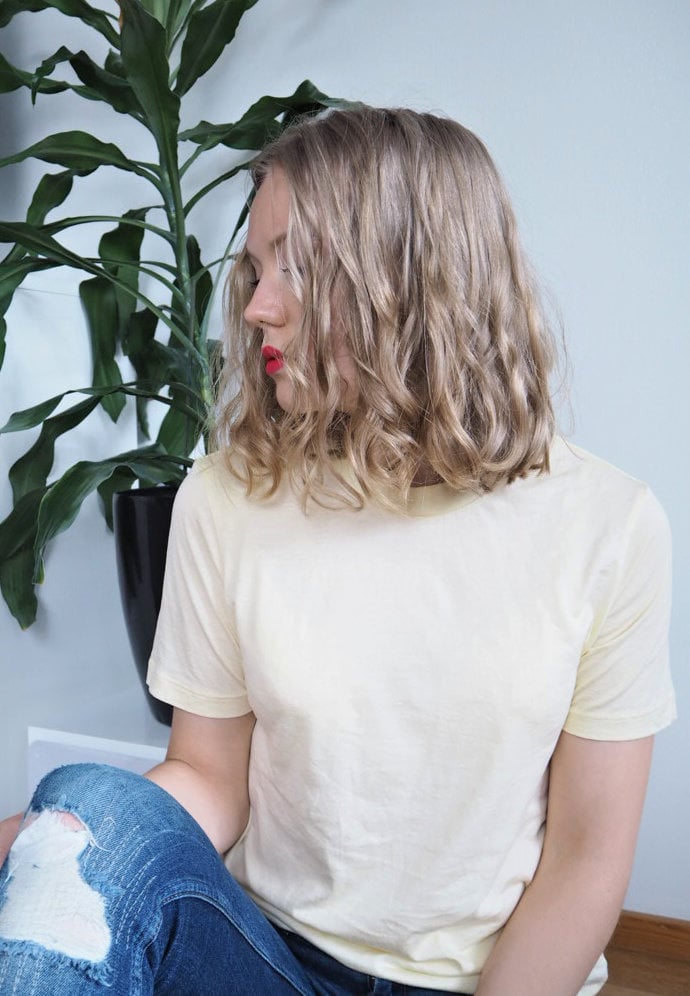
My curly hair progress

After buying my first silicone-free products from amazon and starting my journey, I was ecstatic. I could not believe I didn’t need my heat stylers to get curly hair! Now that I think of it, the first weeks and months were the best. I was like a little child in a candy store, so excited to have found this great thing, that I already had, within my hair.

I still feel like that, but now I’m more used to it. My natural waves feel like a natural part of me. Having my hair straight feels foreign – I look like a completely different person. Come to think of it, I’ve always preferred my hair curly rather than straight.

During this 1,5 years I’ve learned some things through trial and error. When I look at the first photos of my hair, I want to cringe a little (but just a little!). In the beginning I wanted my curls to be as defined as possible and I went a bit overboard with a curl styling cream. My hair looked shiny – and a bit wet. And obviously it felt like that as well. If I put a lot of things in my hair, I feel it. My hair becomes dirty easier. But when I put the minimum amount of products – or even nothing at all – my hair looks airy and fresh and lovely.

Nowadays I prefer the airy, voluminous look. I like having definition, but I don’t want my hair to be that shiny. That way my hair feels clean and it stays clean longer.

naturally curly hair towel dry

Curly Girl Method Simplified – following the rules loosely

I’ve been following the method loosely. I’ve done the basics. I feel like there are so many rules and things going into naturally curly hair, it’s kind of a rabbit hole. There were all these things like the ingredients, hair porosity, curl types and techniques. I decided, that I will just do the basics and go through the journey through trial and error.  Once I had the basics down, I also wanted to share them, because I wanted to make the routine as easy and simple as possible for others as well. That’s why I wrote the beginner friendly post: Naturally curly and wavy hair 101 – Naturally curly hair routine.

Here’s what I’ve done right according to CG-method:

  • Not brushing my hair
    Pretty much never. If I do, I do it in the shower. Life without a brush has been refreshing!
    I did a whole post about it: I haven’t brushed my hair in a year.
  • Not using silicones
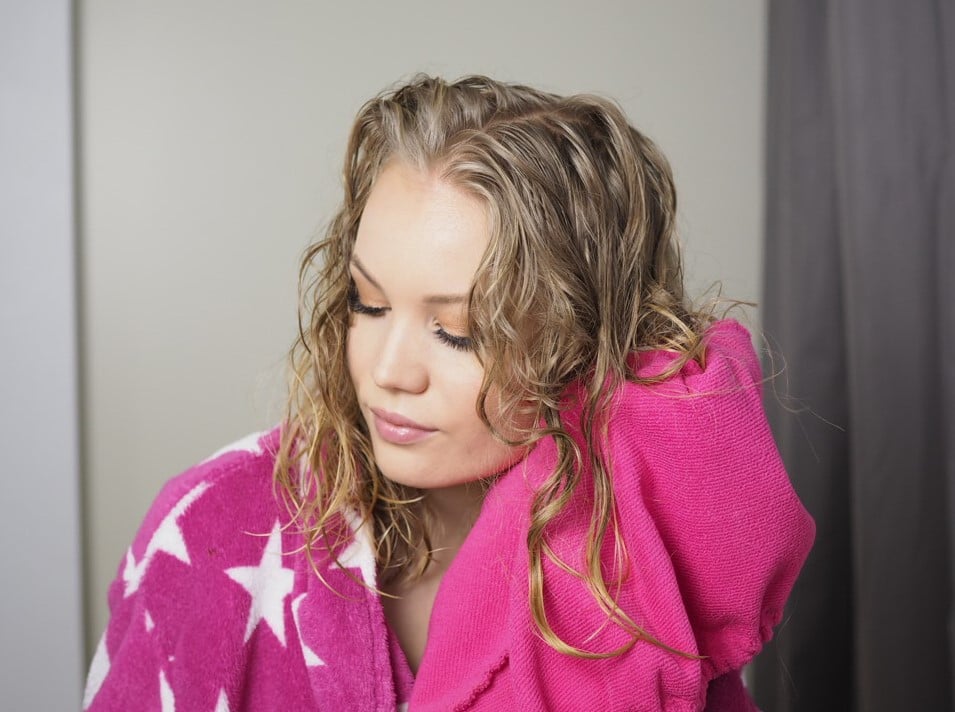
    Well, I already realized that they make my hair straight.
  • Drying my hair with a microfibre towel by squeezing and scrunching the water out
    Not towel-drying and massaging my hair between the towel like I used to.
  • Applying my leave-in products by scrunching
    Never stroking or brushing through the product – that disrupts my curl definition.
  • Using a mild, moisturizing shampoo
  • Letting my hair air dry
  • Drying my hair with diffuser
    Diffuser gives me great results, but it takes time so I still prefer air-drying.
  • Sleeping with a pineapple (my hair tied in a high loose ponytail to protect the curls)


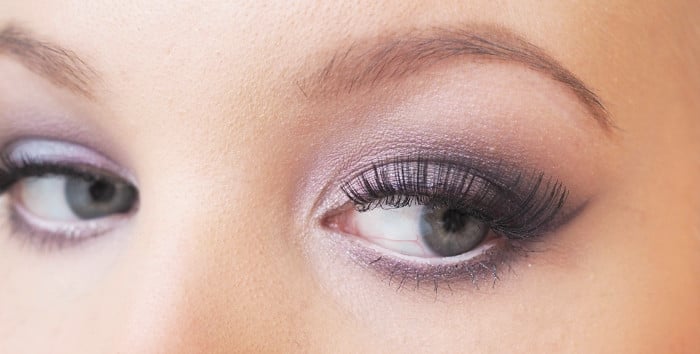
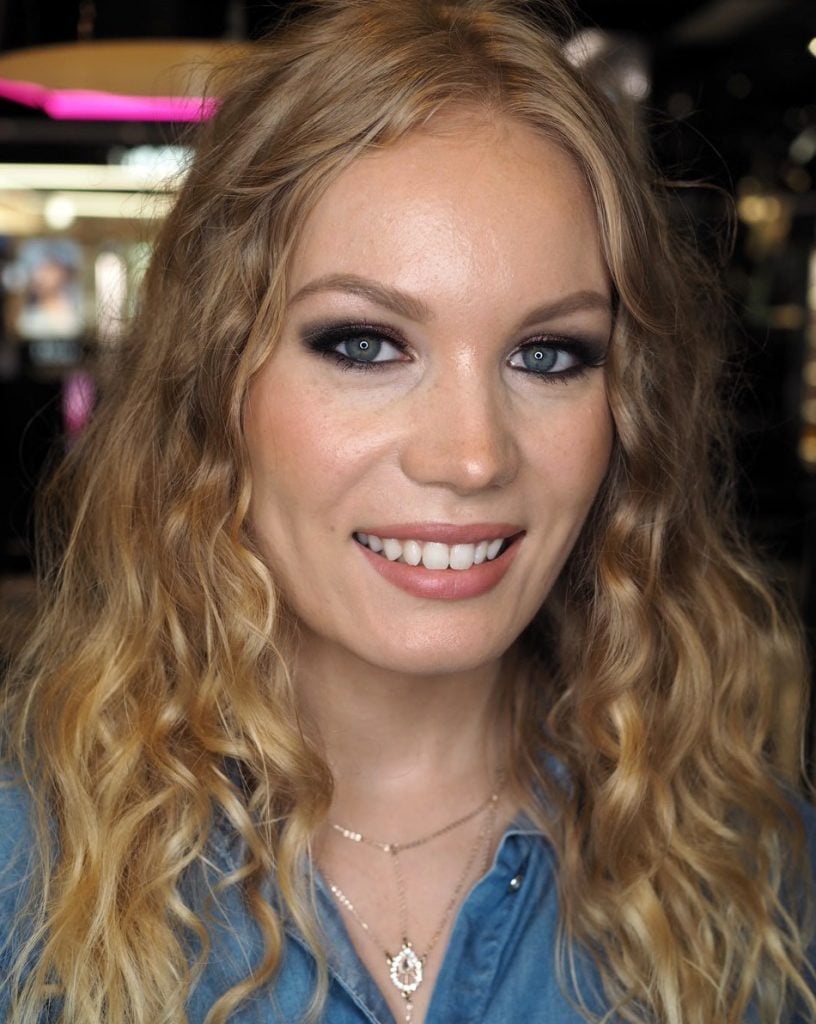
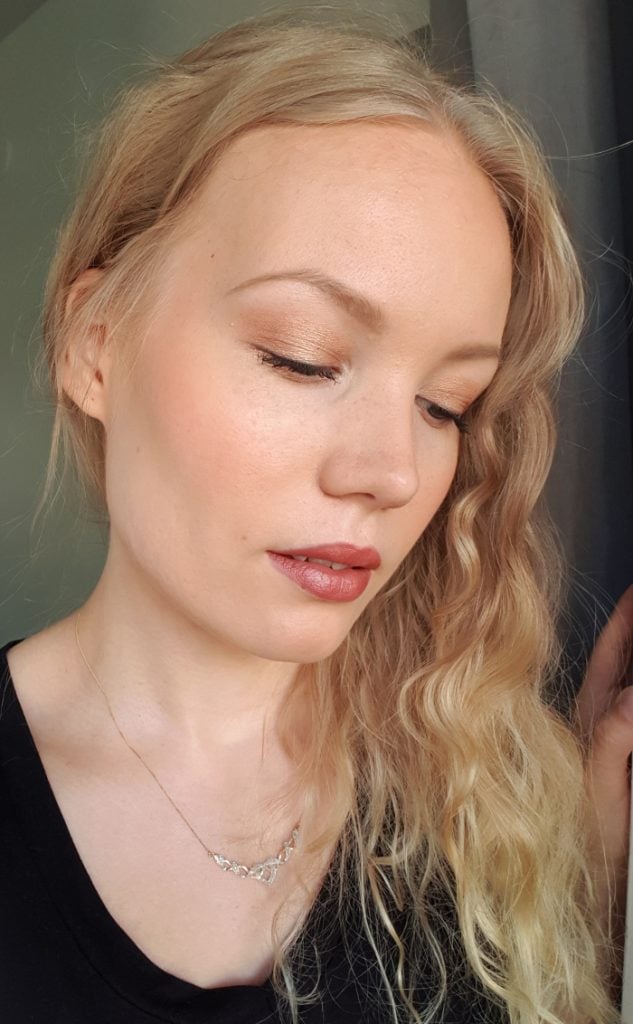
My curls using Schwarzkopf Mad About Waves products. The curl cream I used contains silicones.

Here’s what I’ve done wrong according to the CG-method:

  • Using sulfate-containing shampoos
    This one is tricky. I didn’t realize that I was doing this, because my shampoos were natural and the sulfate was coconut-based. Still, it can be too drying. However, recently I learned that sulfate-containing shampoos might be good to my curl type, actually.
  • Using silicones
    I know I just said that I didn’t use silicones. But I also tried using them. I wanted to see if they really, truly, are bad for curls.  I actually got amazing results with a curl cream that contained silicones. But there is still the aspect of having to wash those silicones out of the hair too. Which then can be too harsh on the hair. I don’t know. I think everyone can make their own opinion on this.
    The post: Mad about waves – perfect products for wavy curls
  • Not knowing everything about the ingredients
    As I said, I started my journey with the basics. Now I’m ready to learn more. Apparently I should only use ingredients that are water-soluble, so that would mean avoiding ingredients like waxes. I remember using a curl cream in the beginning, that contained some wax.
  • Not using anything except shampoo
    I actually do this pretty often. I just wash my hair with either shampoo or water. I get great volume and nice curls this way, without adding conditioner or curl gels. Believe it or not! I think this works for me personally, because my hair is prone to build up and usually there is still some product leftovers even after washing my hair.
  • Not taking it that seriously
    I tend to stress about things, so I’ve tried to not stress about my hair. Sometimes I don’t feel like doing all the steps to achieve the perfect curls. Sometimes I sleep with my hair open (it feels so liberating!). And I also haven’t bought that many hair products. You can spend a lot of money towards this project, but I’ve taken it one product at a time. After I’m done with the products I’ve already bought, I can move on to another product and try something new.
makeup blog
Can’t remember the products here, but I could bet it was, well, nothing. This looks like my hair when I don’t put anything in.


wavy curls type 2B 2C

Learning about hair porosity – The problem with low-porosity hair

Right now I’m interested to learn more about hair porosity. And that’s because of this revelation: apparently my hair is low porosity. That basically means it’s very prone to buildup and that watery, light products are best for me. It makes sense. It also explains why I get great results when I use aloe vera gel as my curl definer. It also explains why I could use the sulfate-containing shampoos for so long and still get good results. Low-porosity hair needs good shampoos (that really wash the hair properly), because products can build up. Another thing is that low-porosity hair doesn’t really absorb moisturizing products or oils (even though it need moisture). And that’s exactly my hair! If I put oils in my hair, it just kind of sits on top of my hair and looks oily. And hair dyes don’t really stay in my hair.

That’s a huge revelation, because a lot of the guides for curly hair suggest using low-poo products or co-washing (washing your hair with a conditioner). I think for low-porosity hair, it’s a no go. And I actually went all the way with this – I tried both the co-wash, but also no-poo. Meaning no shampoo. For a whole month I tried to wash my hair only with water,  but with my curl type prone to build up, it didn’t work out. But I learned some things – and my scalp appreciated the break from shampoo, so it wasn’t all for nothing.

In the beginning my hair needed lots of moisture, but now I feel like I need less of it. Lightweight products are the key. I think in the future I also need to start washing my hair with a deep cleansing shampoo every now and then. And definitely not skipping shampoo.

Even though I’m interested in learning to treat my wavy curls the best way possible, I’ll probably break the rules in the future as well.
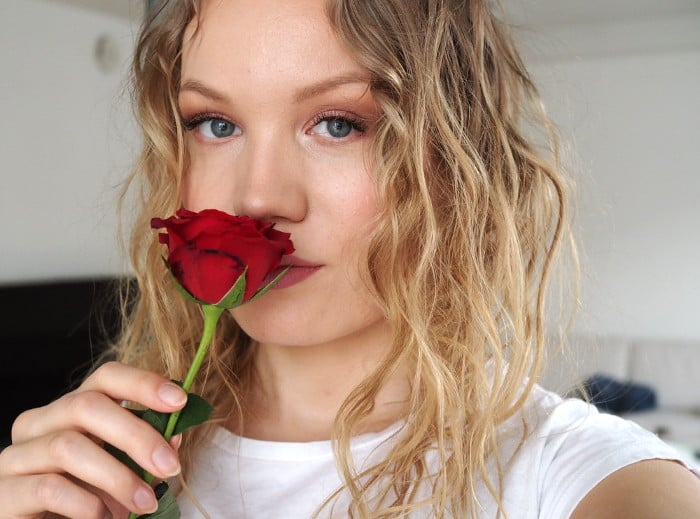
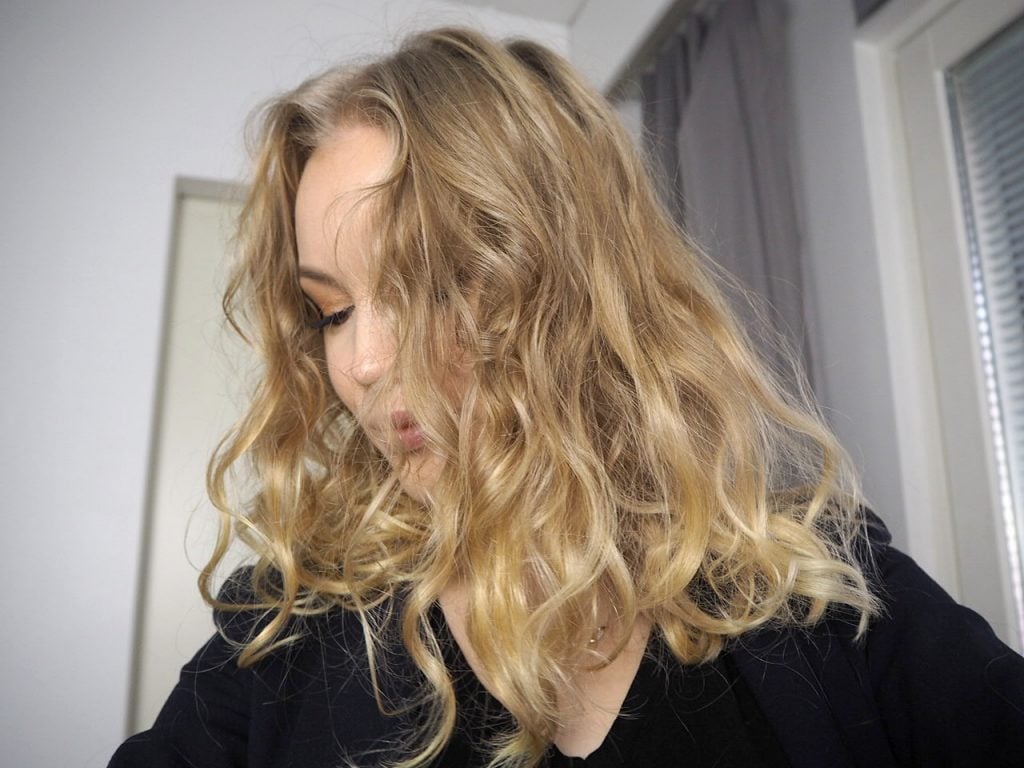
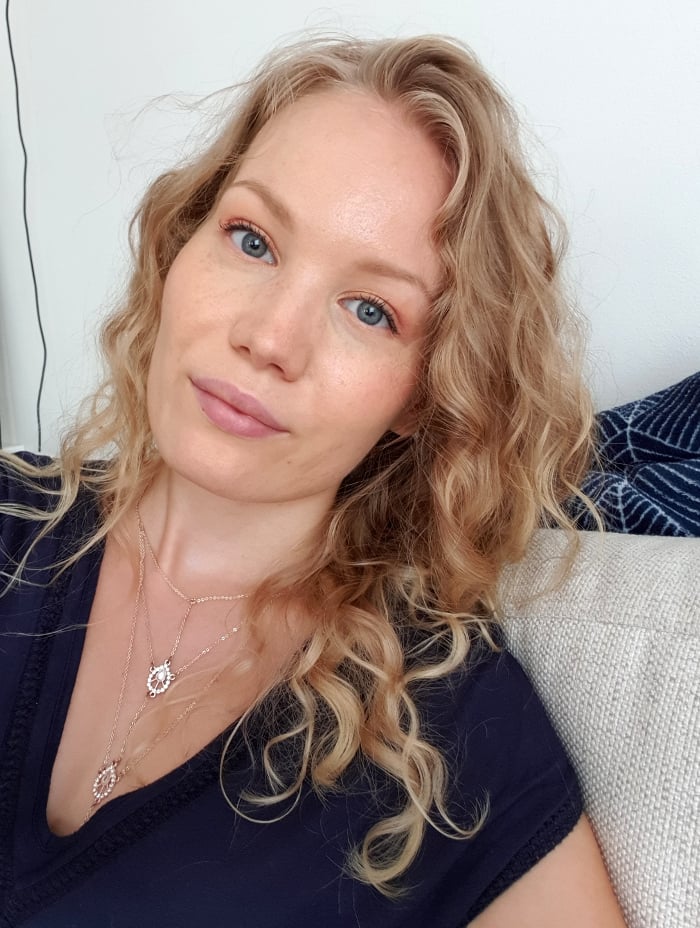
naturally wavy hair charlotta eve blog
Today’s curls: Noughty Wave Hello Shampoo, diluted Briogeo Volume Conditioner & a little bit of Aloe Vera Gel as my curl gel. I used a microfiber towel & let it air dry.

Today’s curls

Today I tried washing my scalp with a CG-friendly non-sulfate-containing shampoo – and washing my hair (the lengths) with a sulfate-containing deep cleansing shampoo. And you know what? My hair could take it. It didn’t feel dry. I also tried diluting my conditioner with water and that worked amazingly. I think next time I’ll dilute it even more. I used my Briogeo Volume Conditioner. Diluting my conditioners is actually genius – that way they will last even longer in my use. My hair nowadays is in such good shape, it doesn’t really need a lot of conditioning. And right now I’m back in love with aloe vera gel as my curl styler, because it doesn’t weigh my curls down and it’s so lightweight.

Shop my curly hair favorites from amazon (*adlinks):
*Aloe vera gel
*Noughty Wave Hello Shampoo
*Briogeo Volume Conditioner
*Briogeo Curl Charisma products
*Diffuser
*Microfiber towel

On my buying list:
*Silk pillow case
*Silk scrunchies


So – here’s where I’m at right now. Still figuring it out. Ready to learn more. And most importantly, embracing the imperfect hair that I have. I think natural hair is beautiful. It doesn’t ‘need’ to be anything. I think the most important thing is to have fun with it and enjoy yourself and your curls. And definitely not stress about using all the right products all the right way.

Your natural curls are beautiful – just the way they are.

How is your curly hair journey going?

The Curly Girl Method - Hair Progress

How to do your own wedding makeup & best bridal makeup products

Bridal makeup is challenging, because it can basically mean whatever. The makeup should reflect the bride and her looks and personality. For some that might mean a very natural look with earthy tones and to others it can be a black smokey eye with red lips.

*adlink

Bridal makeup 101

Possibly the most important thing about bridal makeup is that it has to last. A bride’s makeup has to go through it all – laughter and tears, a day of nervous sweating and evening full of dancing.

There are also some general things brides usually ask for. They want en even beautiful skin with some glow. Eye makeup that contains some shimmer. And pretty often, a lip color that is somewhat natural looking.

In this post I will share with you my tips to doing your own wedding makeup. I’m sharing the best products I’ve used on many brides. I also gathered some helpful makeup tutorials here – so that you have no other option, but to succeed in your makeup!

This post is quite comprehensive, so if you feel overwhelmed, bookmark this page and read it in parts. Or if you prefer videos, just check out the video.

In the photos you see one of my friends, Anet, and the bridal makeup I did on her. I recreated her wedding look on myself in the video. Many of the products I mention in this post are also what I used on her.

Me doing Anet’s makeup.

Bridal makeup step by step

I’ve divided the bridal makeup in four parts – the base, the glow, eyes and  lips. If you’re here just for product recommendations, here is your cheat list with all the best makeup products for your wedding. Investing in these products is indeed an investment, since you’ll end up with great products to use even after the wedding. (And they would remind you of your big day every time you use them!)


Best bridal makeup products

  1. Primer – *Stila’s One Step Illuminating Primer
  2. Foundation – *Estee Lauder’s Double Wear 
  3. Concealer – *NARS Radiant Creamy Concealer
  4. Powder – *Laura Mercier Transluscent Powder
  5. Contour – *Anastasia Beverly Hills Contour Kit
  6. Bronzer – *Guerlain’s Terracotta Bronzer
  7. Blush – *Too Faced’s Sweethearts blush
  8. Highlight – *Becca’s Prismatic Amethyst Highlighter
  9. Brows – *Jane Iredale Brow Pencil
  10. Eyeshadow primer – *Urban Decay Primer Potion
  11. Eyeshadow -* Urban Decay Naked Palette
  12. Mascara – *Maybelline Snapscara
  13. Lashes – *Eylure Individual Lashes
  14. Lip liner – *MAC’s lip pencil
  15. Lipstick – *IsaDora Twist-Up Gloss Stick

how to do your own wedding makeup

Bridal makeup product recommendations

Bridal makeup – The base


A beautiful, even and glowy base is the key to a beautiful bridal makeup.

Primer

It all starts with a primer. The best primer that works for all skintypes is *Stila’s One Step Illuminating Primer. It truly does it all: it minimizes pores, smooths out the skin, hydrates and brings a beautiful glow to the skin.

Even more important than the primer, is to prep your skin. The only skincare product I will recommend here is *Evolve Beauty Radiant Glow mask. Use that instead of going into a facial, a day or two before your big day! More on that on the post linked below.

Skincare checklist:
2 x mask that does it all

Foundation

The most important product for the base is foundation. More expensive foundations are often better in consistency and longevity and they also have skincare benefits. I recommend investing in this one, even though there are also affordable options.  You’ll end up with a great foundation to use even after the wedding.

I think the ultimate foundation for a wedding day is *Estee Lauder’s Double Wear  foundation.

The first one is very full-coverage and offers amazing lasting power. That would be best for combination to oily skin types. There is also a lighter version*of Double Wear with a lighter coverage – more suitable for normal to dry skin.

I recommend applying your foundation with a damp *beautyblender because that sheers out the foundation a little and makes blending easier. No foundation lines and smooth coverage. Get a beautyblender – you’ll be using that to blend your concealer as well.

Helpful posts:
How to apply foundation – natural flawless finish
Undertones & makeup – are you cool, warm or neutral?

Double Wear – the best long lasting foundation


bridal makeup how to
For Anet, I used Double Wear in the shade Ecru and as you can see, her base is flawless. I applied it with a damp beautyblender.

Foundation – mineral makeup

As an exception to my rule when it comes to expensive foundations, I do sometimes use mineral makeup on brides. The brand that I like is pretty affordable. Mineral makeup is a great idea for a wedding to those that have normal or dry skin, since it doesn’t last that well on oily skin. It looks natural and reflects light beautifully so it gives a nice glow. But again, if your skin tends to be more on the oily side and you need that lasting power with good coverage, a mineral foundation is not the best choice.

My favorite loose mineral foundation is Lily Lolo’s*.

Concealer

No one wants to look tired or let the stress pimples show on their wedding day. Use a concealer to hide your dark circles and any pimples or areas that get red easily (like the sides of your nose). The best concealer is the iconic *NARS Radiant Creamy Concealer. It gives an amazing coverage, yet it’s still easy to blend since the consistency is so creamy.

before after nars radiant creamy concealer vanilla
Before and after of using NARS Vanilla concealer.

I like to use first the shade Custard to hide the blueness under my eyes and also to hide any pimples. After that I use shade Vanilla to bring a bit of light under my eyes. But, if I layer Vanilla, that also works amazingly, like shown in the photo.

Helpful posts:
How to hide your dark circles – concealer tips
Effortless makeup with Lily Lolo


Powder

You should use powder to set everything in place, but you shouldn’t use a very light layer of it.

A good quality powder is fine and makes the skin smooth – not cakey. The best powder I’ve used is *Laura Mercier Transluscent Powder. It makes my skin feel silky smooth and it does the job fantastically.

Contour and/or bronzer

Contour and bronzer are not as important as blush and highlight, but they do give definition and warmth to the face. Many celebrate their wedding in the summer, so bronzer gives that nice sun kissed look.

If your face is cool toned, pick a cooler contour shade. If your face has warmth to it, a slightly warmer contour shade looks better. If you don’t know what I’m talking about, read my post about undertones.

*Anastasia Beverly Hills Contour Kit suits many skin tones and is a good choice. You can also use that for bronzing. What I like to use is *Benefit Hoola, which is quite warm, but it works for me.

where to apply contour bronzer blush and highlight

dark brown – contour
orange – bronzer
pink – blush
white – highlight

Bronzer can be a warm color and it can contain shimmer, whereas a contour shade should be matte. You should apply bronzer to the highest points of your face, where the sun naturally hits you. Brush bronzer to your cheekbones, tip of your nose, your temples and just a touch on your chin.

If I could choose anything for my wedding day, I would choose something like *Guerlain’s Terracotta Bronzer. I love a big luxury bronzer.

Even in here, you can see the beautiful subtle glow on Anet’s cheekbones.

The bridal glow – the importance of blush and highlight

The bridal glow comes from blush and highlight and it’s probably my favorite part of the makeup. The right blush shade depends on your skin tone, but I think pink blush colors are quite universal and work really well on brides. If your skin is more on the warmer side and you like a sun kissed look, you might want to go for something peachy.

Blush

I usually use a blush that has some sheen or shimmer to it, just to keep the cheeks fresh and glowy.

Zuii’s Melon blush* is the perfect blush for anyone with that nice pink/peachy shimmer. It’s also the better alternative to NARS Orgasm blush. I also like *Too Faced’s Sweethearts blush (comes in both pink and peach colors).

An affordable option is *Milani’s Baked Blush. The shade Luminoso is quite universal and works on many skin tones.

highlighting points on face
Where to highlight.

Highlight

I have one product that I use for every bride and that is highlight. I think for bridal makeup a cool slightly pink color is most flattering, at least for fair skin. There is just some magic to it. When you have the right good quality product, it just blends on the skin perfectly and just glistens.

If there ever was a bridal makeup highlighter, *Becca’s Prismatic Amethyst Highlighter would be it. It’s such a perfect shade, just like the one I like to use on brides.

However, if you are more tanned and olive, you might want to choose a warmer highlighter. Another favorite highlighter of mine is *MAC Mineralize Skinfinish, Soft & Gentle, which has more of those bronzed warm shades. I use the shade Soft & Gentle, which is gilded peach bronze and works on my skin.

­

.

Helpful posts:
How to highlight your face
Undertones & makeup – are you cool, warm or neutral?

Bridal eye makeup & brows


Eye makeup is probably the hardest part for most. And that is the part that I really encourage you to work on. Watch youtube videos, look for tutorials, learn to work with your eye shape and find a style that works for you. That said, it doesn’t have to be that complicated. A simple look works for most eye shapes: one shimmery color across the lid and some shadowing in the crease or a bit higher depending on your eye shape. If you have deep set or hooded eyes, my tutorials might be helpful for you.

Primer 

A super important product to remember is an eyeshadow primer. It makes all the difference. It keeps your eyeshadow on the whole day and night, it makes the eyeshadows more vibrant and it also evens out the skintone a little.

My holy grail eyeshadow primer is *Urban Decay Primer Potion. The original one is great, but I would also recommend the Eden one, if you want it to even out the color of your lid.

Eyeshadow

When it comes to eyeshadows, I’m not as picky. I like *the Naked palettes and their quality, but I also often use *NYX Eyeshadow Palettes.

For Anet I used NYX Perfect Filter palettes in the shade Golden Hour (brown, golden colors) and Marine Layer (purple and pink shades). Anet’s eye makeup was a bit different, since she wanted to have some purple on her eyes. I loved how it turned out. This is probably my favorite bridal makeup I’ve done.

hooded and deep set eyes eyeshadow

Liner

When it comes to eyeliners and pencils, we probably all have our own favorite products. I love a smoked out, soft line. That can be achieved with just eyeshadow and a liner brush, so you don’t necessarily need another product for this.

The best black pencil I’ve found is Alima Pure’s Ink Pencil*. My eyes are quite sensitive and I have found that it works for me. The best eyeliner I’ve tried is mellow cosmetics eyeliner*.

Mascara

You might want to choose either a waterproof mascara or something that can be rinsed with warm water. A good idea is *Sensai’s 38 mascara. Another affordable find is *Maybelline’s Snapscara, which can be removed with warm water. I also like *Essence’s mascaras*.

Lashes

False lashes are a great idea for bridal makeup. They lift up the eyes and finish off the eye makeup nicely. False lashes can be a struggle, so what I would suggest are falsies, that have a very thin lash strip or just get single lashes. Single lashes are the easiest to apply and they also look very natural.

My favorite false lashes are from *Eylure and their single lashes are also what I like to use on brides.

Anet actually had lash extensions, which is another great idea for a wedding.

Helpful posts:
How to – makeup for deep set and hooded eyes
Makeup basics – easy eyeshadow (for almond-shaped eyes)
Smokey bronze eyes tutorial
More tutorials

Brows

I think that for most people, enhancing the natural shape of their brows is the best way to do the brows. Just applying a bit of definition and color to the brows.

If you are lost in the eyebrow world, get your brows done on a professional. Tint them and get them waxed. After that, you have a nice shape and color and it’s easier to apply makeup to them.

My favorite brow product is the mad4eyebrow Natural brow filler, which is unfortunately a bit hard to get. Besides that, I love a thin brow pencil that I can use to imitate brow hairs. My favorite brow pen is *Jane Iredale’s Brow pencil, but there are similar from *Anastasia and *NYX. I also like brow definers that have this angled shape to them like Zuii Organic’s Eyebrow Definer*. That product is actually super easy to use and that was the product that made me fall in love with brows in the first place.

If your hairs tend to not stay in line, use brow gel. My favorite brow gel is *Essence’s brow gel.

I used mad4eyebrow Natural Brow Filler on Anet and she actually ended up buying that product for herself as well.

Bridal lip makeup – best lipsticks and glosses

A rosy nude lip color is a classic choice for bridal makeup. Not just because it works for so many looks, but also for its convenience. A nude lip color looks more natural when it wears off and it’s easy to reapply. And when it comes to reapplying – lipstick is something you should have with you (along with blotting papers), so that you can fix your makeup during the day if needed.

Lip liner

Even if you weren’t used to lip liners, I would strongly suggest to use a lip liner on your wedding day. It makes the lips look more polished and it makes lipstick application easier. Lip liner also keeps the lip makeup locked in it’s place. You want to choose a lip liner that is close to the lipstick shade you’re wearing.

There are many different affordable options for lip liners, but MAC’s lip pencils* are some of my favorites.

valentine's day makeup tutorial

Lipstick

Nude, slightly pink or rosy lipstick colors are universal and work for everybody. That is also the most convenient color, since it doesn’t look off, when it wears off. It’s easy to reapply and and suits all eye makeup colors.

One of my go-to lipsticks for brides are *IsaDora’s Twist-Up Gloss Sticks. Those are moisturizing, they feel comfortable on the lips and they give a nice shine. They are also super easy to apply, since they come in a pen form. There are some very nice nude colors (as well as colorful) available!

But when it comes to lipsticks, only sky is the limit. I think the key here isn’t to find the most long lasting lipstick (those are not usually that comfortable or forgiving on the lips), but to find something that feels nice on the lips and is nice to carry around. I’m all for luxury lipsticks and if you want to splurge a little,* Yves Saint Laurent’s Volupte Shine lipsticks are a great choice. I also love *Jane Iredale’s Triple Luxe lipsticks, because they feel like nothing on the lips yet they have great pigment.

For Anet, I used Zuii’s Nude lipliner and IsaDora’s Twist-Up Gloss Stick in the shade Milk ‘N Chocolate & Sugar Crush.

Helpful posts:
Bare & beautiful – IsaDora Twist-Up Gloss Lipstick swatches & review
The best lipstick I’ve ever tried?

+ A few more notes

As I said, keep your lipstick with you. You might also want to pack a concealer – just in case. If you end up crying and your nose starts to get red for example, you can tap on some of that concealer.

Oh – and one more thing. Keep blotting papers with you! They are the best way to refresh the makeup, since it’s better to soak off that excess oil, than to add more makeup (=powder) to the face. My holy grail blotting papers are these *Powdered Papers.

And if you’re reading this, because it’s your big day soon – congratulations and I wish you the best wedding day!

Photos of Anet’s wedding – Oka Morikawa

Scroll to top