Orange spring makeup – tutorial


*adlink


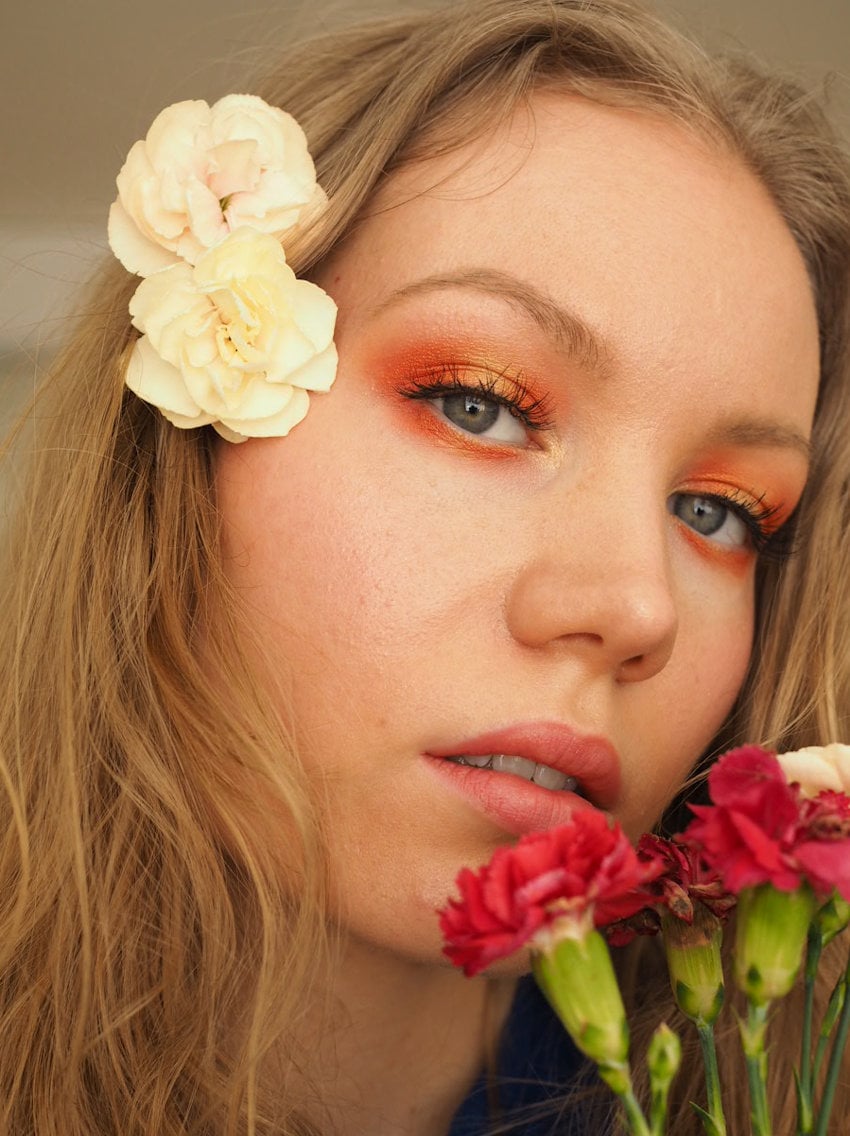
Spring doesn’t know about all the craziness going around the whole world. Spring doesn’t know things are cancelled. It doesn’t start its mornings by worrying and checking out the news. No, no, no. It wakes up excited to see how many new flower buds have risen today. Or better yet, maybe it never goes asleep and just tirelessly works to bring us the next best spring and summer.

Because when has spring ever let us down? Or summer? Maybe we’re not looking at the best time of our lives, but we can still make the most of it.

Just like spring does.

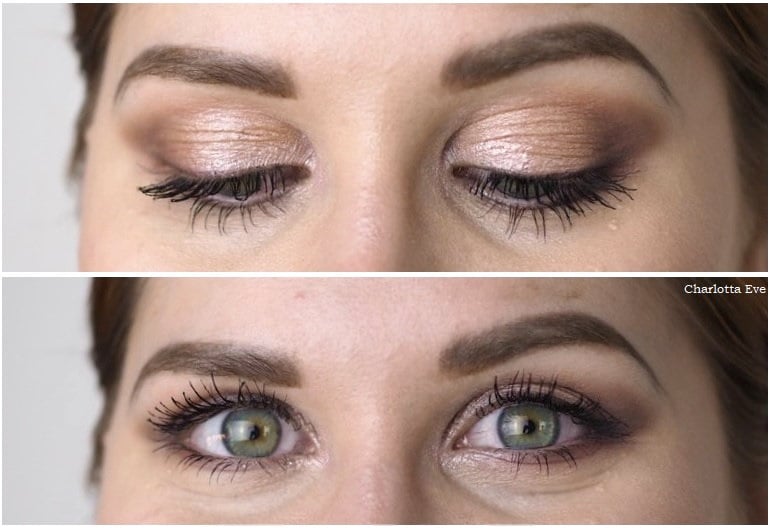
Orange spring makeup tutorial

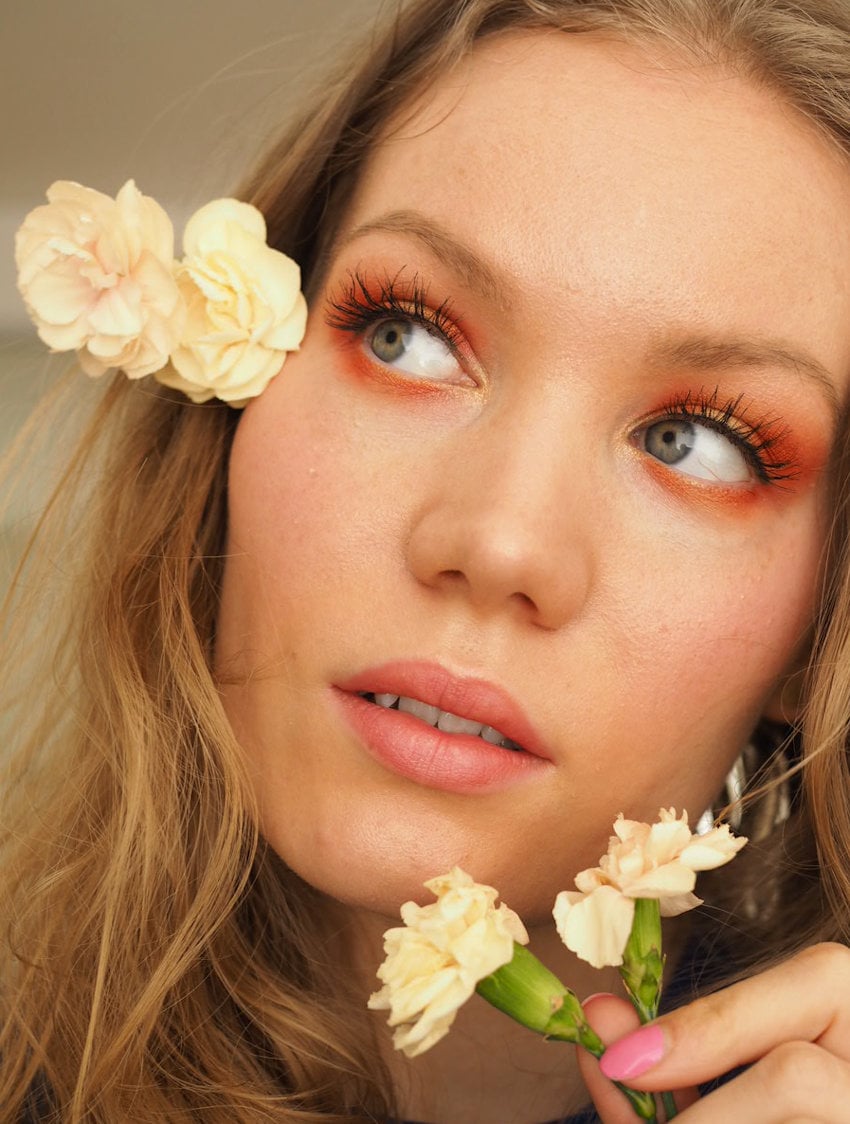
Today I’m sharing with you this simple look inspired by spring. Orange is possibly my favorite color for eyeshadow, because it just suits me so well. If you have warm undertone and blue or green in your eyes, I really recommend trying orange.

orange spring makeup tutorial

You can do this look with just two colors – orange and yellow. Instead of yellow you can also use some other light shimmery shade in the center of the lid and in the inner corner. However, if you’re having trouble blending the orange nicely, you can use a transition color as well, to help blend the orange to your skin. In that case I would choose a warm peach or a lighter orange shade.

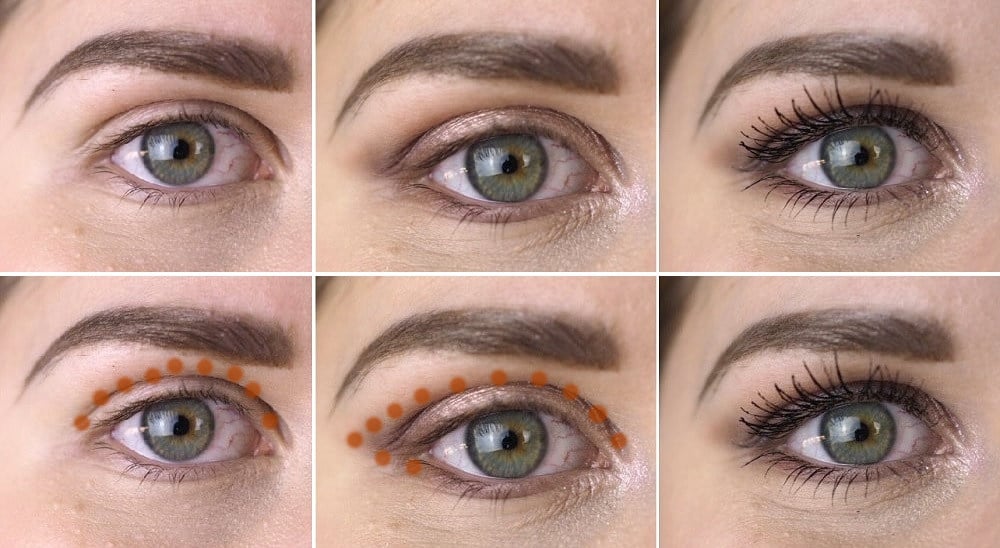
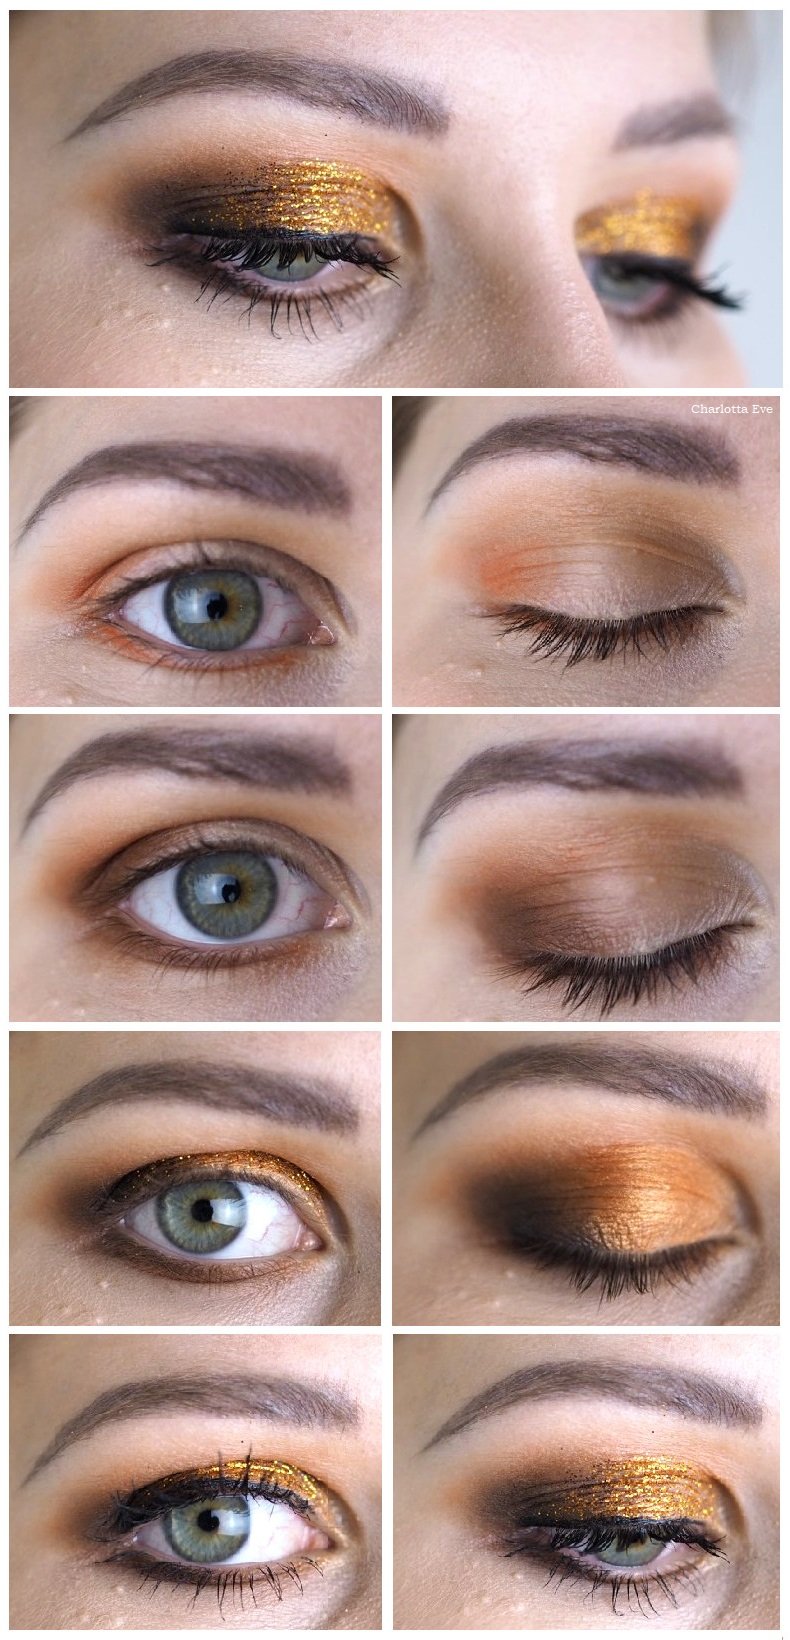
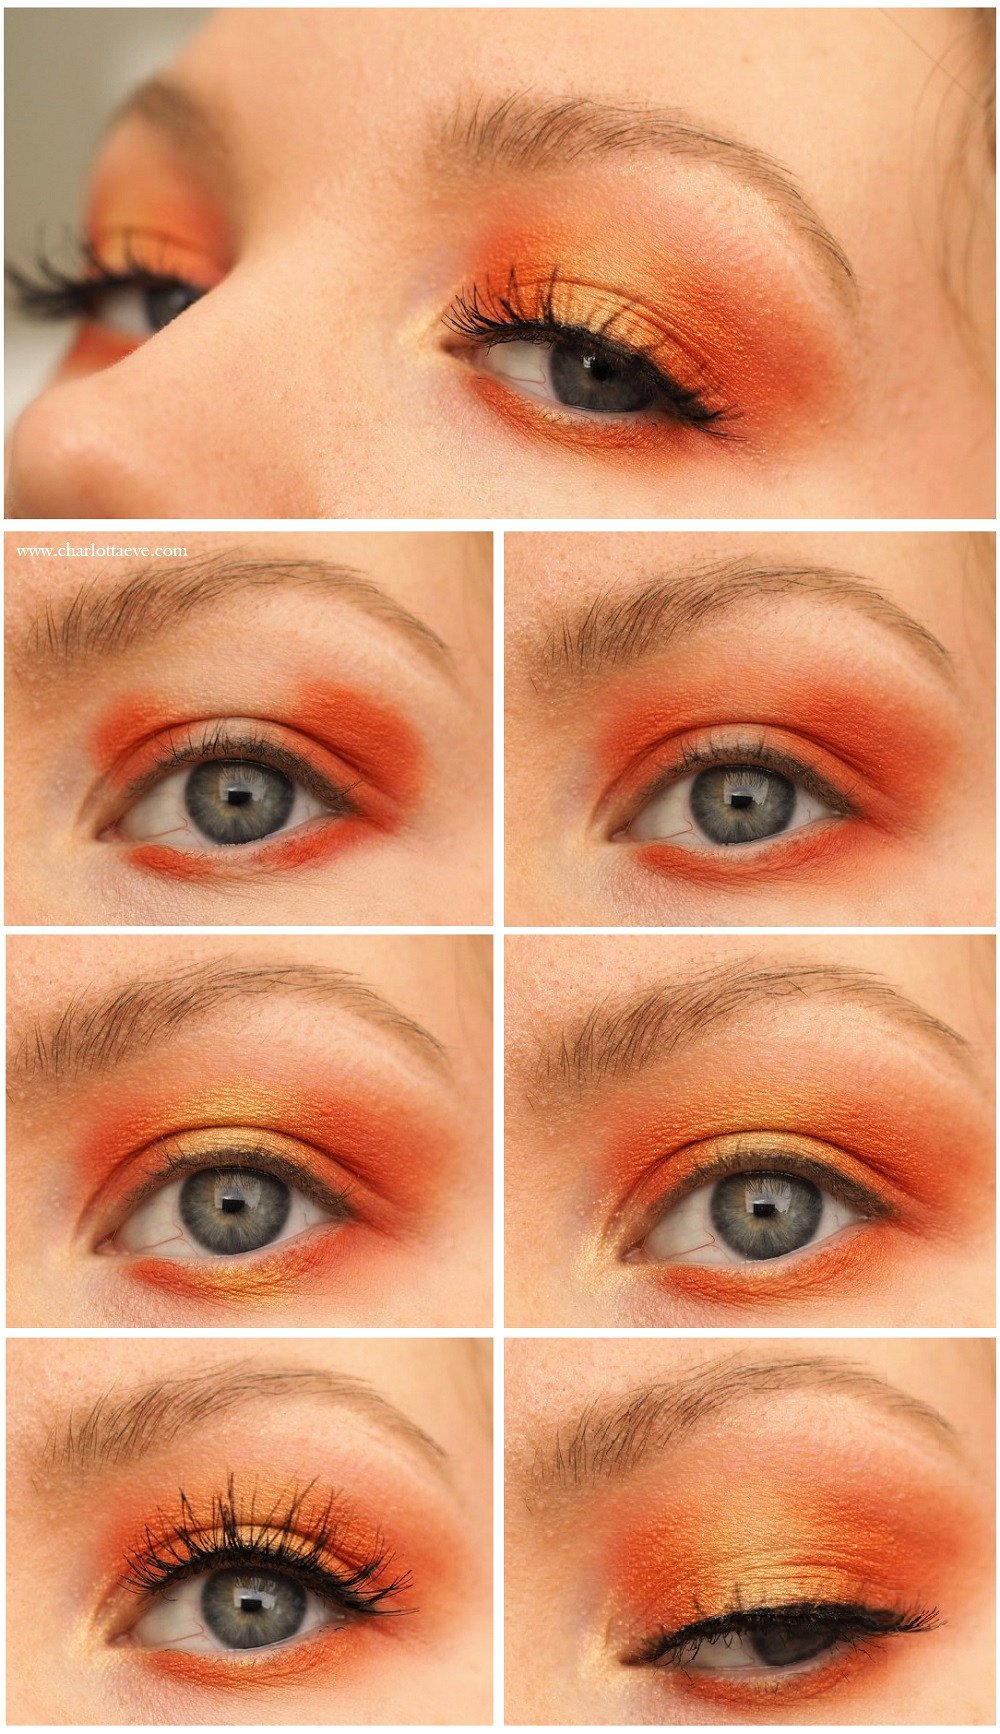
  1. Apply orange eyeshadow in the shape that you want your eyeshadow to be. Nothing new here really – I keep my eye open to see how high I want to lift the shadow. Pretty high on my eye, as you know. I went for a halo eye kind of look. That means I applied the orange all over the lid except the center, which I saved for the yellow shade.
  2. Blend the orange well. I wanted the blend to be really hazy.
  3. Apply yellow in the center of the lid and a touch on the center of your lower lashline as well (optional).
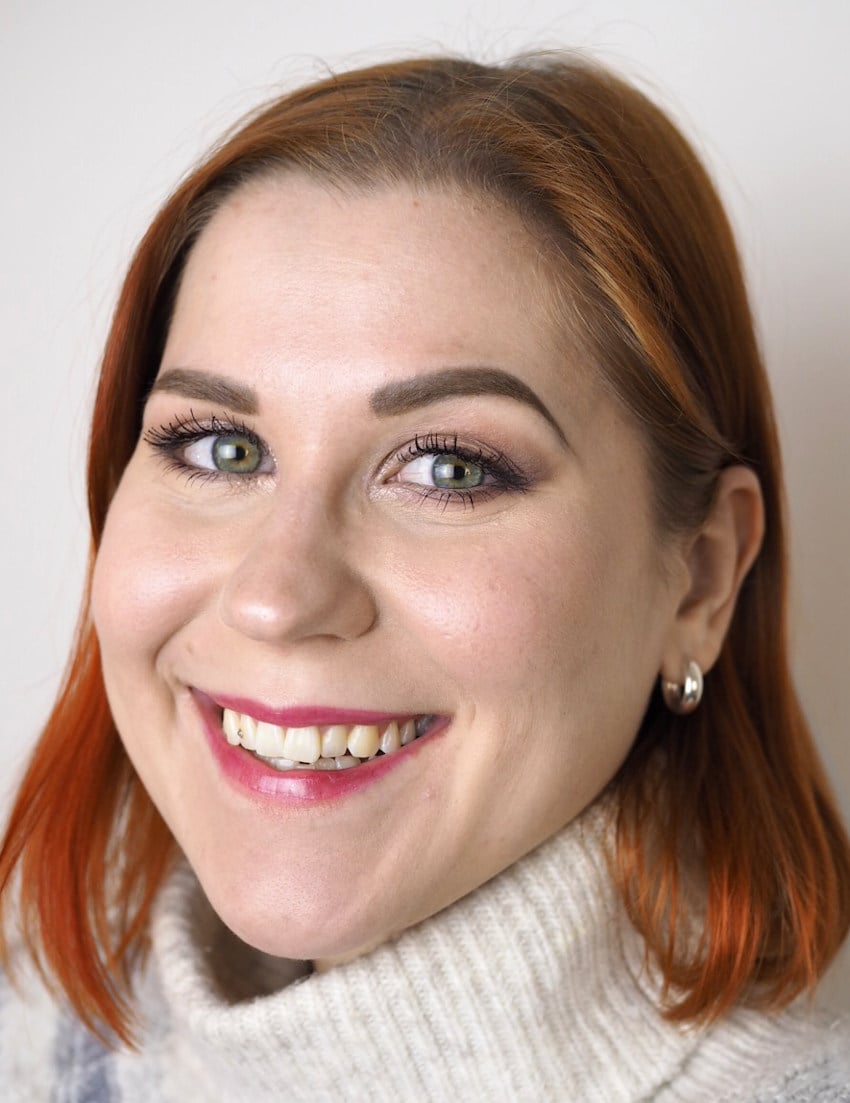
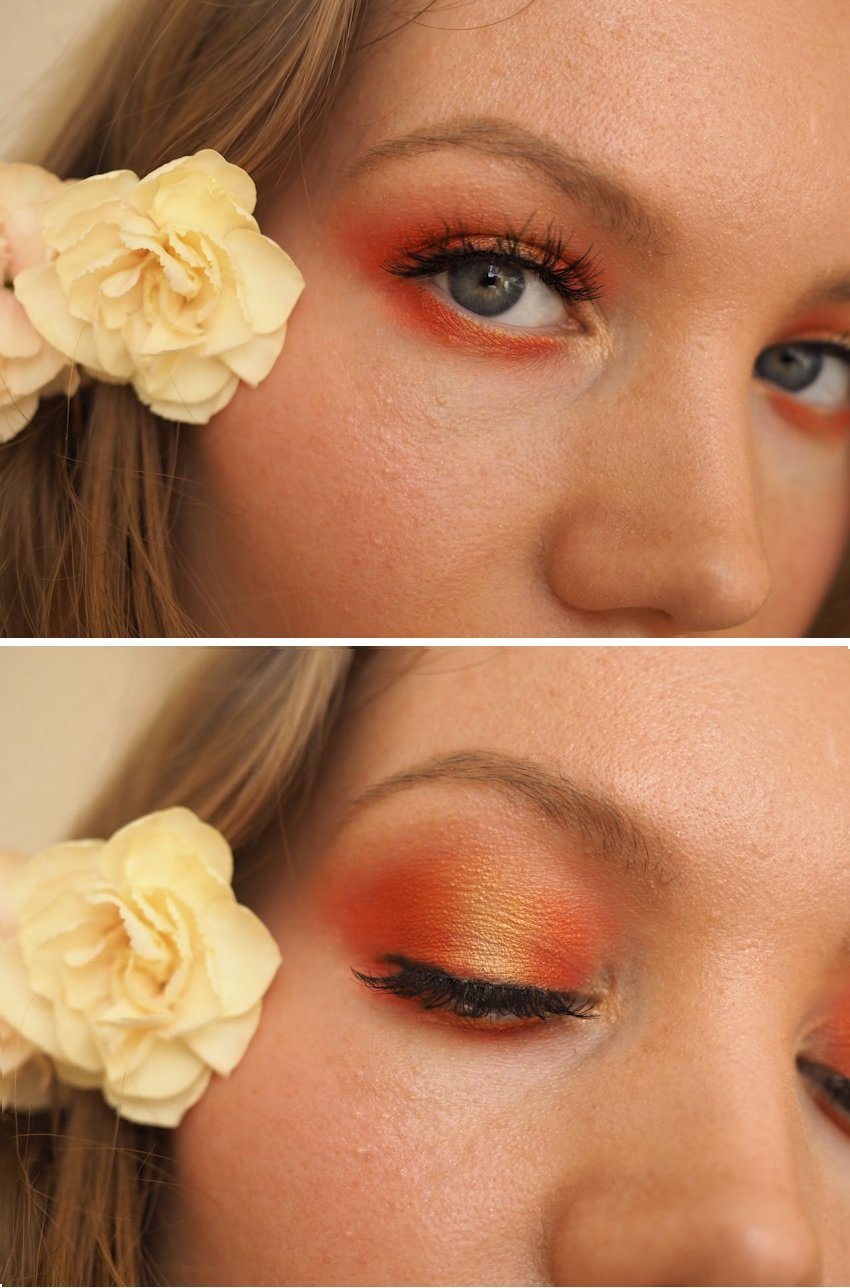
  4. Apply inner corner highlight, liner, mascara and lashes. All done!

My lashes are Eylure Enchanted Heartbreaker lashes. I had worn them a couple of times already so this was their last trip. You’ll find similar ones from *Eylure . I really like their lashes, because in most of their lashes the lashband is very thin, making it comfortable. They also have natural looking lashes, that are not too crazy (though there are obviously big lashes available too).

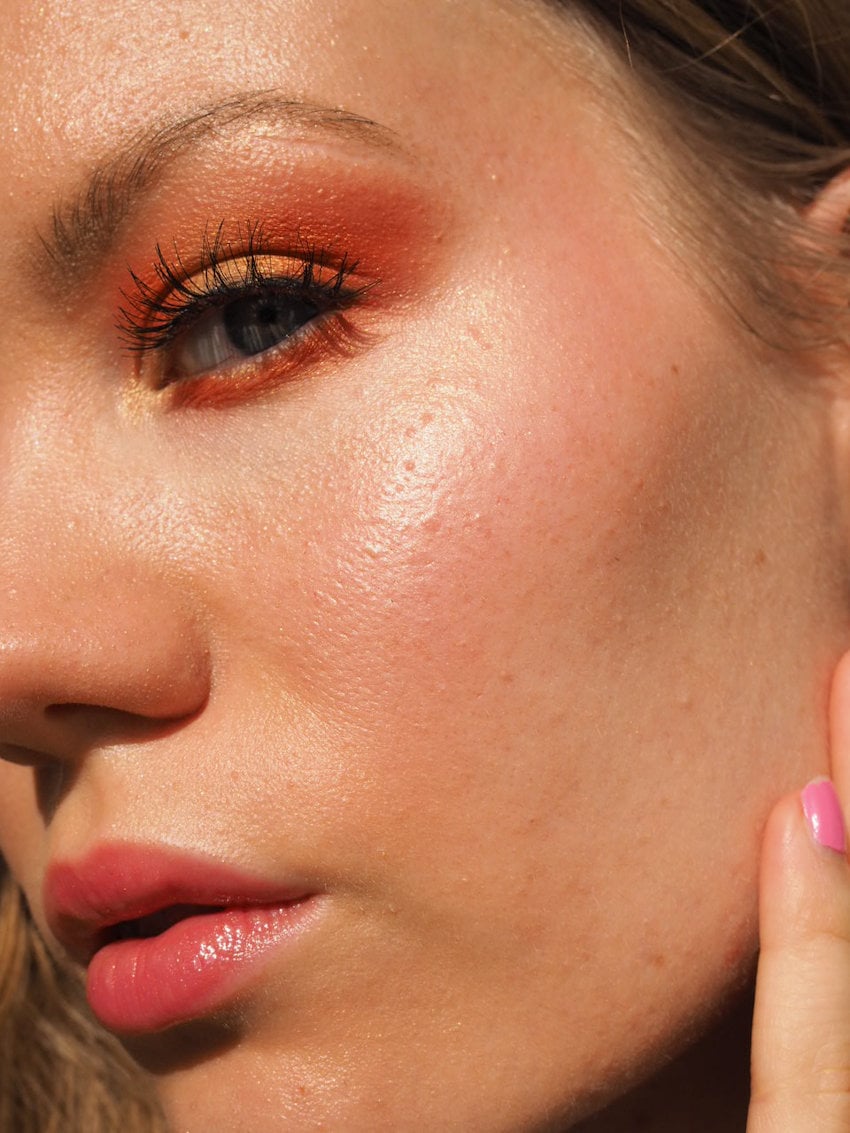
I’ve used Vita Liberata’s beauty blur a lot lately and I really like it. It’s a tinted primer that evens out the skin tone and gives a subtle glow. I’ve even used it just by itself a lot lately (and skipped foundation!). It just makes my skin look really nice and I love to have a light base that feels like I’m not really wearing anything.

Products

*Vita Liberata Beauty Blur, Latte Light
Madara Skin Equal foundation (review)
Kjaer Weis Above and Beyond Blush
*Bareminerals Highlighter, Joy
Madara Brow Pomade, Smoky Blonde
Urban Decay Primer Potion, Eden
Morphe 3502 Palette
*Eylure Heartbreaker lashes

What do you think of this look?

How to: makeup for round deep set eyes

*adlink


Different tricks work for different eye shapes. When determining your eye shape, you should look at the main features of your eyes and do your makeup accordingly. What do you want to emphasize? What do you want to hide?

Today I’m talking about round eyesand to be more specificround deep set eyes. Round eyes are gorgeous. They appear big and open. It’s totally fine to emphasize the roundness of the eye, but balancing the shape with a cat eye styled makeup works too.  It elongates the eye and balances the shape, making it appear more almond shaped.

Round eyes can also be protruding, in which case my post makeup for protruding eyes can be more helpful. But here my model’s eyes were more deep set. Her atopic skin actually sometimes makes her lids swell a bit, which makes her lids a bit hooded. Still, they appear big, as round eyes typically do. If your eye shape looks similar to my model’s, this post is for you!


You’ll find tutorials for deep set & hooded, downturned and protruding eyes on my blog.

How to: makeup for round deep set eyes

Here is a before and after where you can see the shape that I’m going for. Linda’s eye is pretty round in the inner part of the eye, so I’m balancing that out by bringing some definition to the outer part of the eye.

round deep set eyes makeup elongating eye

Here I’m trying to explain the shape even further. Normally the shape of the eye is pretty round, but when I shade it on the area shown with orange dots, I’m making the eye appear more almond shaped.

Obviously this is not the only way to apply eyeshadow to this particular eye shape. You could also emphasize the roundness of the eye and not make the V in the outer corner. But in my opinion, this style suits the eye.

deep set round eyes makeup how to

Everyday makeup tutorial for round deep set eyes

makeup for deep set round eyes tutorial

  1. Contour the eye minimally in the crease using a light brown shade.
  2. Create a V-shape in the outer corner using a brown matte shade. Blend it well. You can also blend it more later once you have the lid color.
  3. Apply a shimmery lid color all over your lid. Blend the outer corner color to your shimmer lightly.
  4. Shade your lower lashline a bit using a light brown.
  5. Line your eyes and add mascara. Done.


I also have this more festive gold glitter makeup for you. Here I used warm colors.

Festive gold glitter makeup for round deep set eyes

gold glitter makeup for round eyes

This look I did earlier on Linda for a Makeup Monday post, but the photos didn’t turn quite right. In hindsight, since my model’s eyes are a bit deep set, I shouldn’t have brought the shadow on the lid as far as I did here. Oh well. It was still a nice look and most important thing – my model was happy.

  1. Prime the eye. Start shading the crease and outer corner with a warm orange shade and blend well. Don’t pull the shadow too high, but just enough, so that some of it shows when the eye is open. Leave the lid bare (for glitter!)
  2. Slowly deepen that color by choosing a darker color than the one you used before. The darkest color is dark brown and that should be concentrated only on the outer corner and outer part of the lid, to get that elongated eye effect.
  3. Finally add glitter glue and press glitter on the lid. If you don’t have glitter, a shimmery eyeshadow will also look gorgeous applied on top of a glitter glue.
  4. Line the eye with a black pencil and add mascara. Done.


Product recommendations:

My go-to eyeshadow palettes:
*NYX Perfect Filter Golden Hour Palette
*Illamasqua Nude Collection Unveiled Artistry Palette
*Pressed glitter palette BeautyGlazed

*Eyeko Lash Alert Mascara (on Linda’s lashes here)

Makeup brushes:
*Zoeva €€
*Coastal Scents 22 brush set

If you have atopic skin, you might want to check out the Makeup Monday post that Linda featured on.

Scroll to top