*adlink
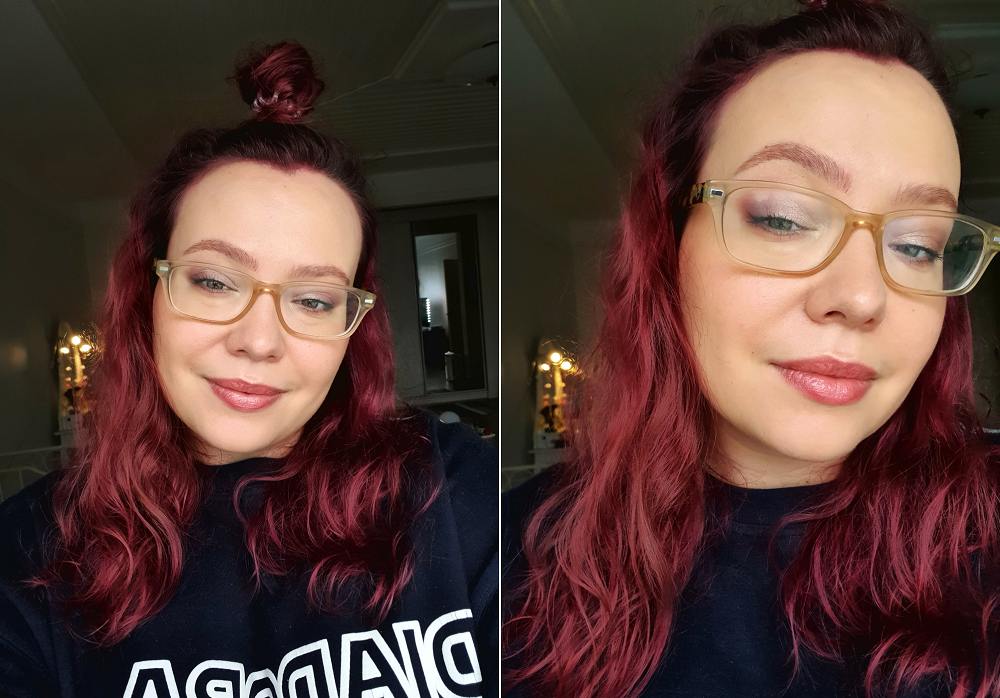
This elongating makeup works especially well for almond shaped eyes. It just further emphasizes the almond shape of the eye and makes it appear bigger. This technique can also work for hooded or deep set eyes. When it comes to hooded or deep set eyes, bringing the eyeshadow high is a good trick. But you can also elongate your eye by pulling the eyeshadow to the side a bit, like I did here.
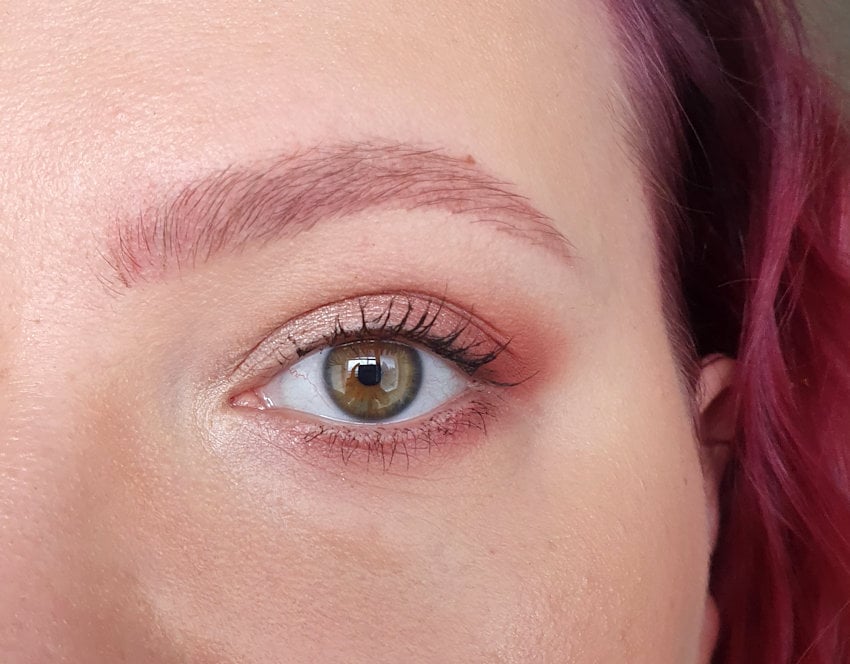
Elongating makeup for almond eyes
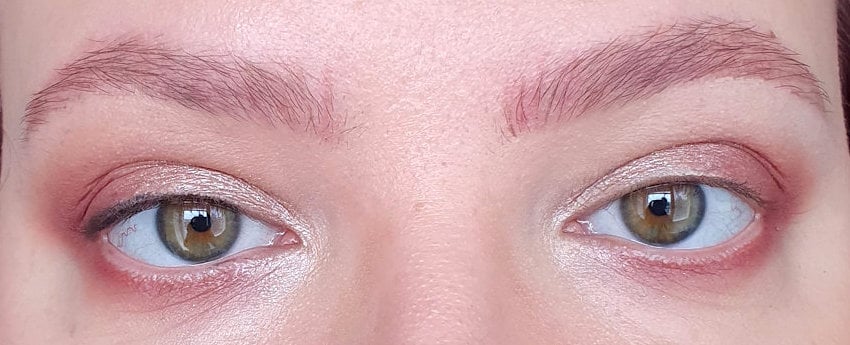
Almond eyes are typically more narrow, rather than round, and there is not a lot of visible lid space. The shape resembles an almond.
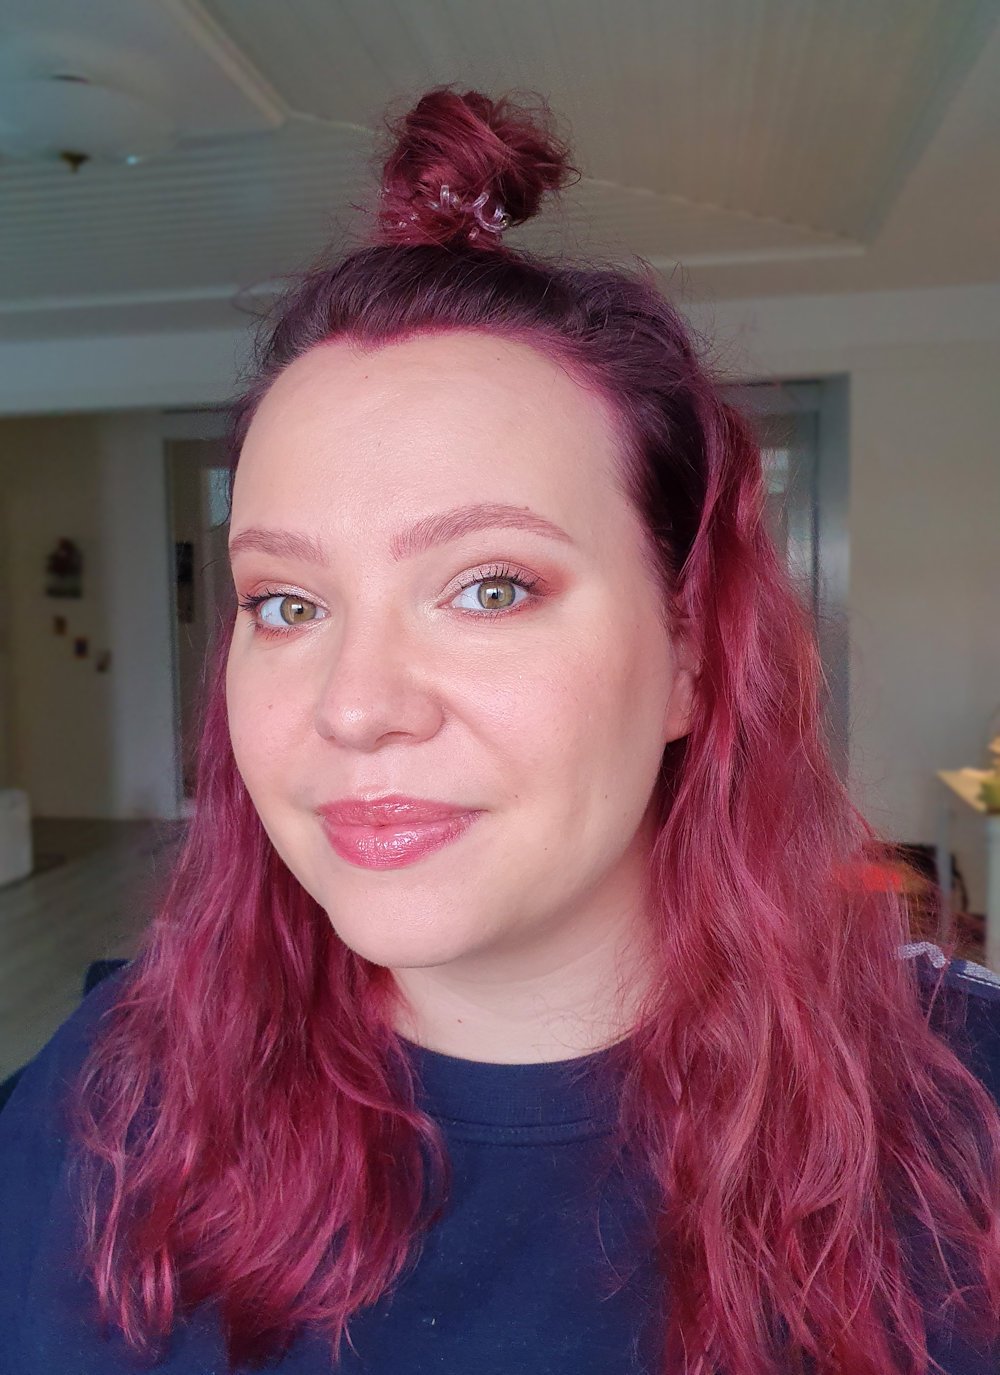
My sister’s Annika’s eyes are almond shaped. They are also a bit hooded, but they don’t totally hide her lid. When she relaxes her eyes you can see the hood dropping on the lid a bit.
A flattering makeup is basically done in just three steps.
- Shade the crease with a medium matte shade. If you have hooded eyes, make sure to lift up the shading on top of the hood as well.
- Define the outer part of the eye with a dark matte shade, along with the natural shape of the eye.
- Add light on the lid and inner corner.
Annika is used to wearing eyeshadow and she always wears her eyeshadow pretty much the way I did it here. Rather than taking the eyeshadow super high (like I do on my own eye shape), she takes advantage of the outer part of the eye and pulls the eyeshadow there. This elongates the eye and suits her almond eyes perfectly!
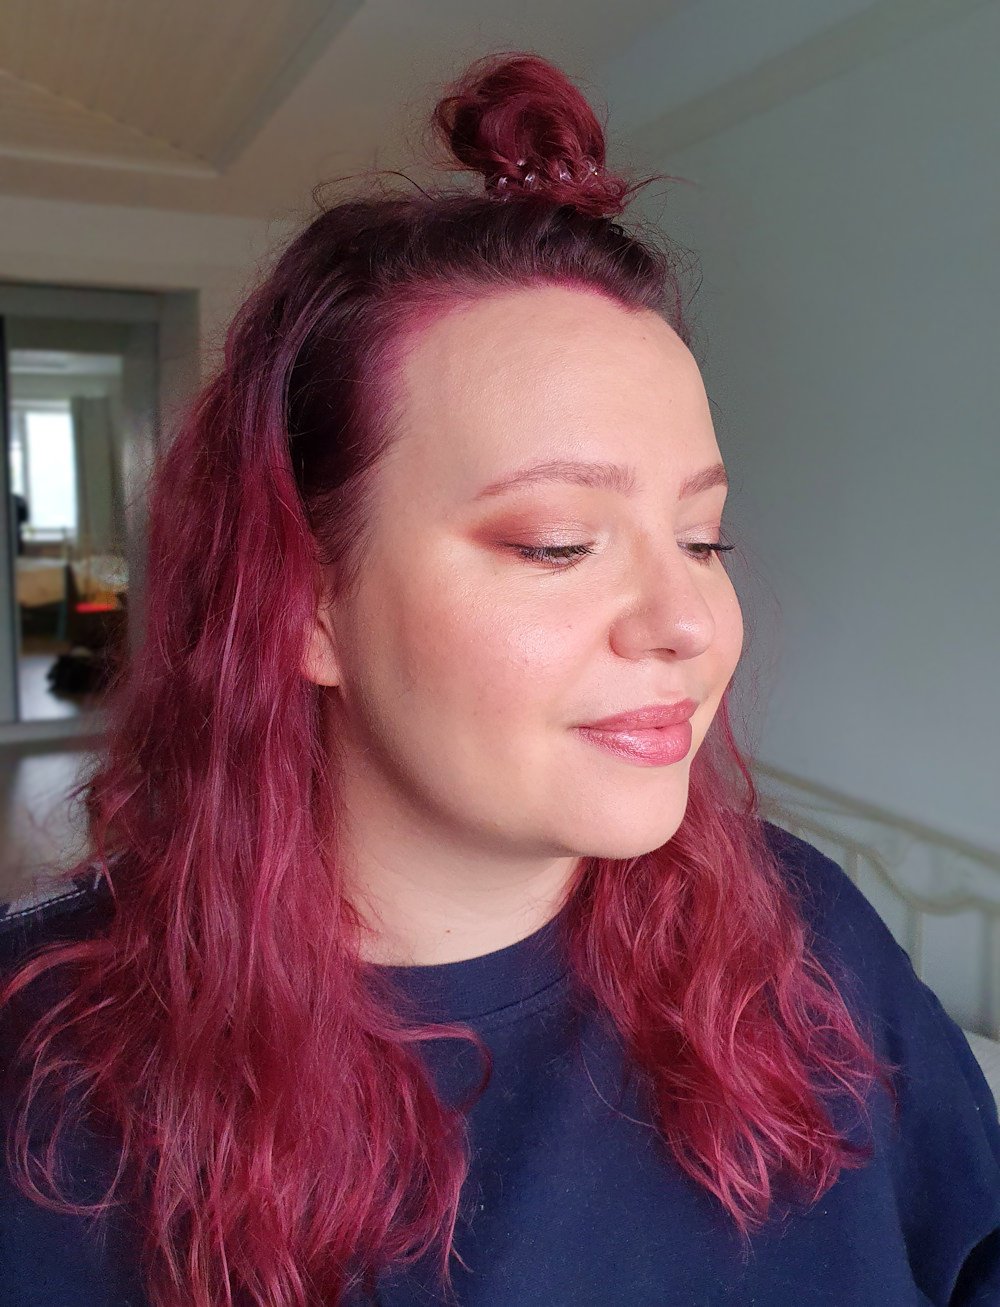
You might also notice, that the eyeshadow color I chose really brings out the olive color of her eyes. That makes the makeup even more flattering for her.
Makeup tutorial for almond eyes
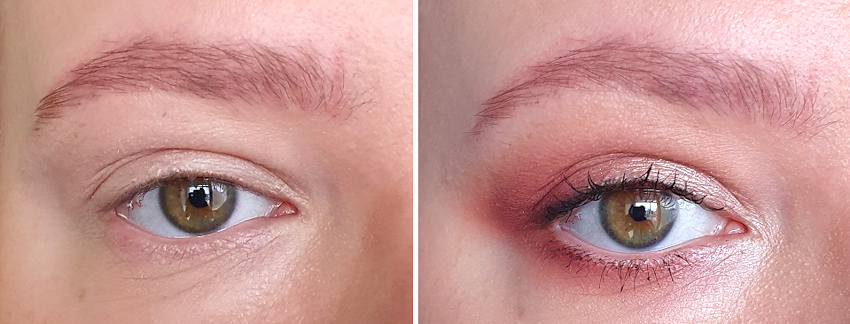
Besides the usual step by step eyeshadow tutorial, I have more photos below to show you the change compared to the bare eye.

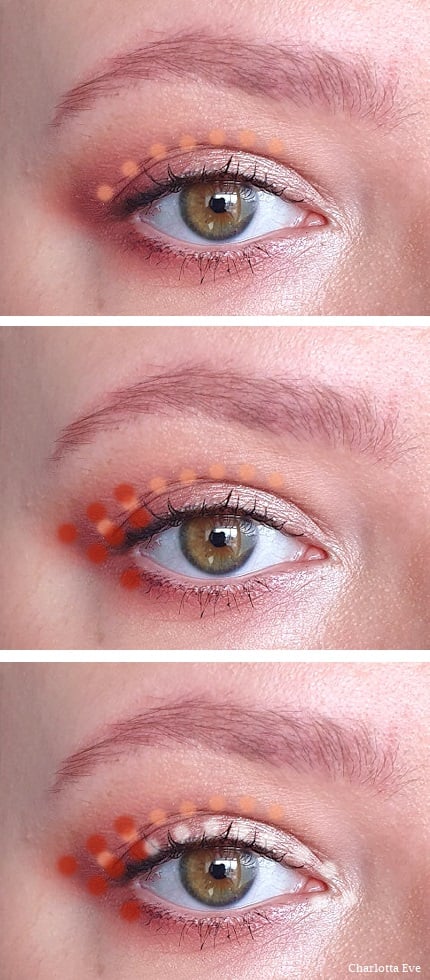
- First I lightly shaded the hooded area with a light brown. If your eyes are not hooded, you can lightly shade your crease instead.
- Next I started to elongate the eye by defining the outer corner.
- Then I blended that out really well, leaving the eyeshadow still focused in the outer part of the eye.
- Then I added shimmery color to the lid (see how that highlights that area?) and on the inner corner.
- Finally I tightlined the eye and added mascara.
And here’s the steps in just one eye.

I also tightlined the eyes. It’s a good trick, because it saves the lid space, but defines the lashes and makes them look thicker.
In the outer part I brought the liner on the lid, just a bit.
See the difference tightlining makes?
As for the makeup products used on Annika, here are the key things listed. I tried Zuii Organic’s Flora Flawless foundation on her and I was amazed at how well it suited her dry skin. Usually it’s so difficult to find suitable foundations for my sister and she mixes argan oil almost with all her foundations. But this foundation went on very smoothly on the skin and looked beautiful and radiant! The only downside to it (for my sister’s preference) is that it has a rose scent from the ingredients. It does evaporate during the day though. Otherwise she would have bought the foundation.
If you have dry skin, my sister has also shared her skincare routine in this post!
Products:
Zuii Organic Flora Luminescent foundation, Driftwood
*rms beauty Un Cover-Up Concealer, 22
*Milani Baked Blush, Luminoso
*Urban Decay Primer Potion
*Urban Decay Naked Heat
Kiko Milano Water Eyeshadow, 200
Clarins Natural Lip Perfector, 8
Makeup brushes I use:
*Coastal Scent Brush Set ($)
*Zoeva rose gold brush set ($$)
What do you think of this makeup? I think it suits her really well!