Classic makeup for glasses wearers

*adlink

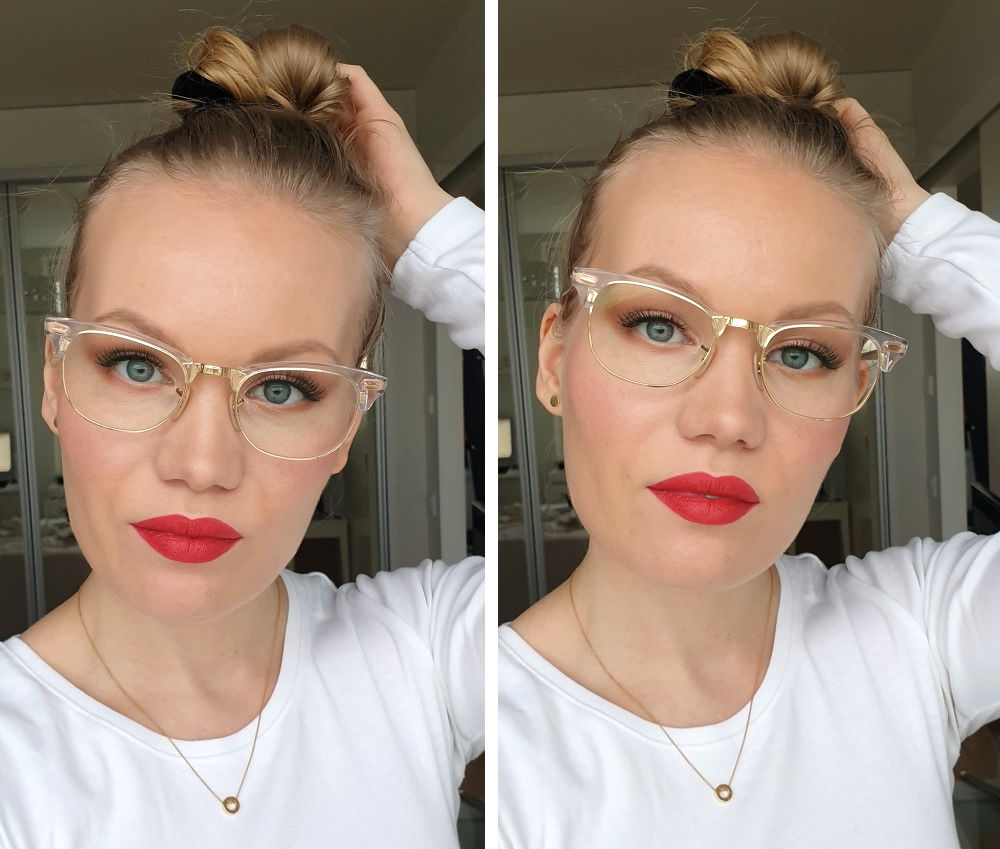
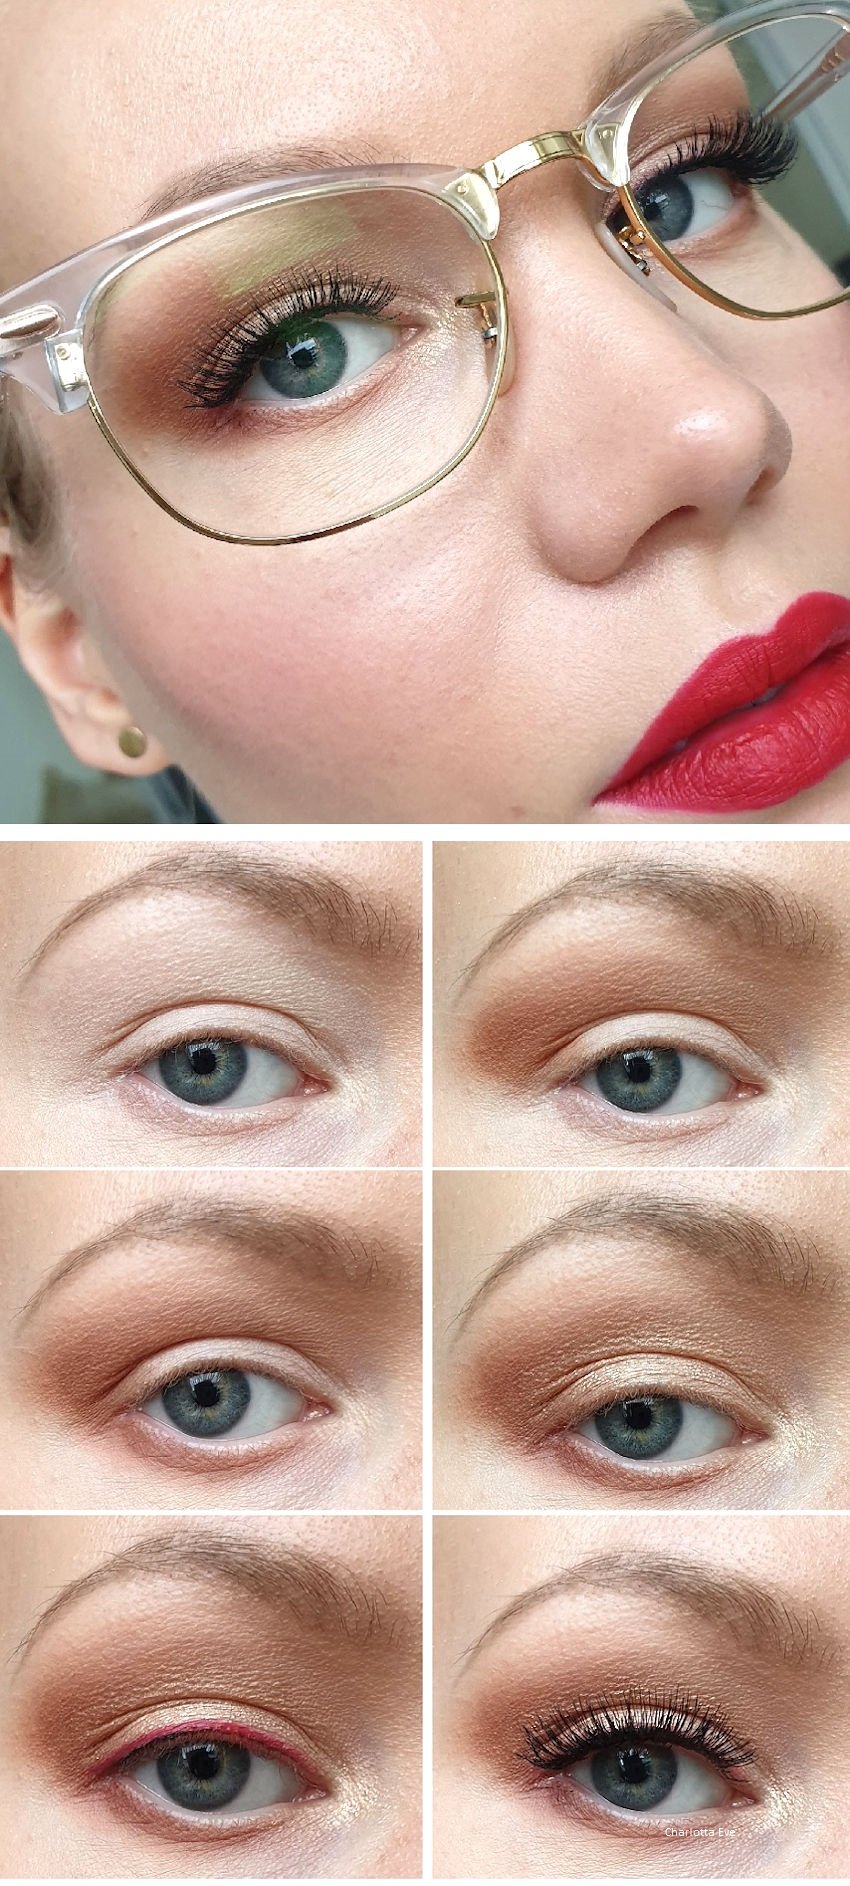
Any makeup can be worn with glasses. I say that as someone who puts on her glasses every day, after doing whatever look. However, you can’t go wrong with a classic look. The point of this makeup is not to pull the attention to the makeup itself, but rather to your eyes, if that makes sense.

This look is great for glasses-wearers and for anyone wanting to enhance their eyes. It’s a simple technique of shadow and light in order to make your eyes bigger and stand out behind the glasses.

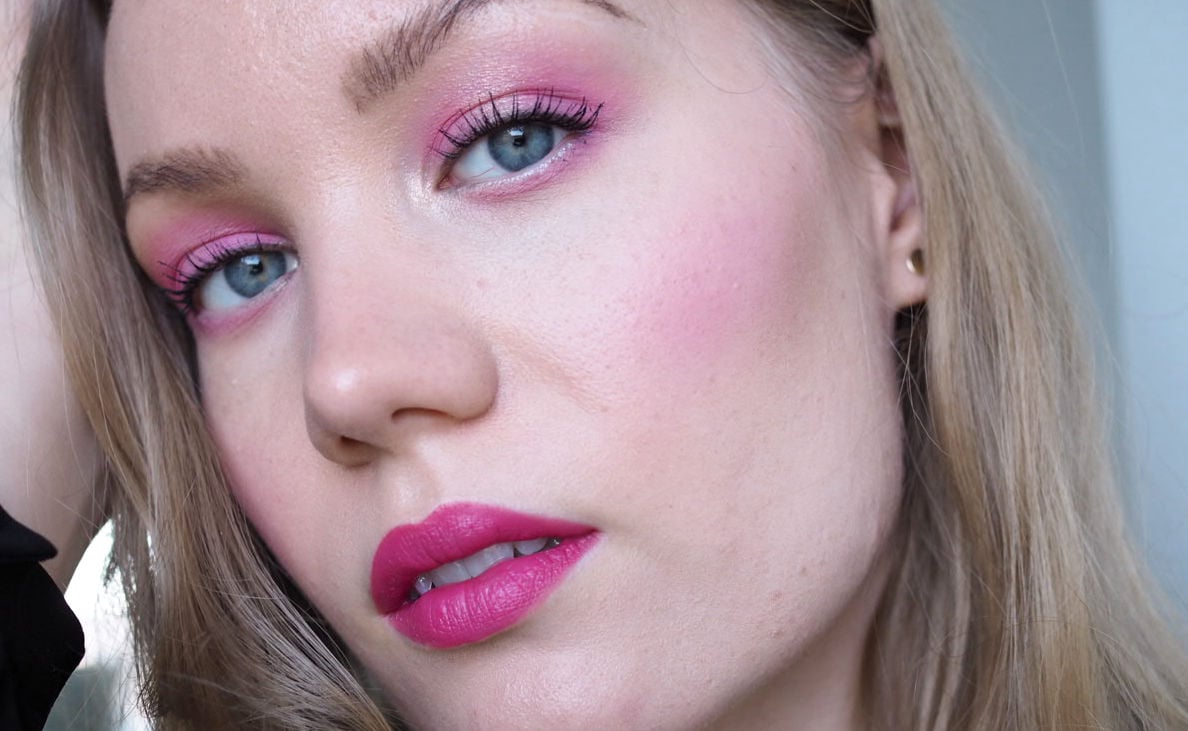
This look is also my everyday natural go-to look. I know it’s simple, but simple works. At first I added a red liner to make it more interesting, but then I realised I wanted to wear lashes so you can’t really see it. And I didn’t want to take up any more space on my lid (because that would make my eyes look smaller). Oh well! Feel free to spice it up with a colorful liner if you have more lid space. Adding a pop of color is a great trick for glasses wearers, as I mentioned in my makeup tips for glasses wearers post.

Classic makeup for glasses wearers

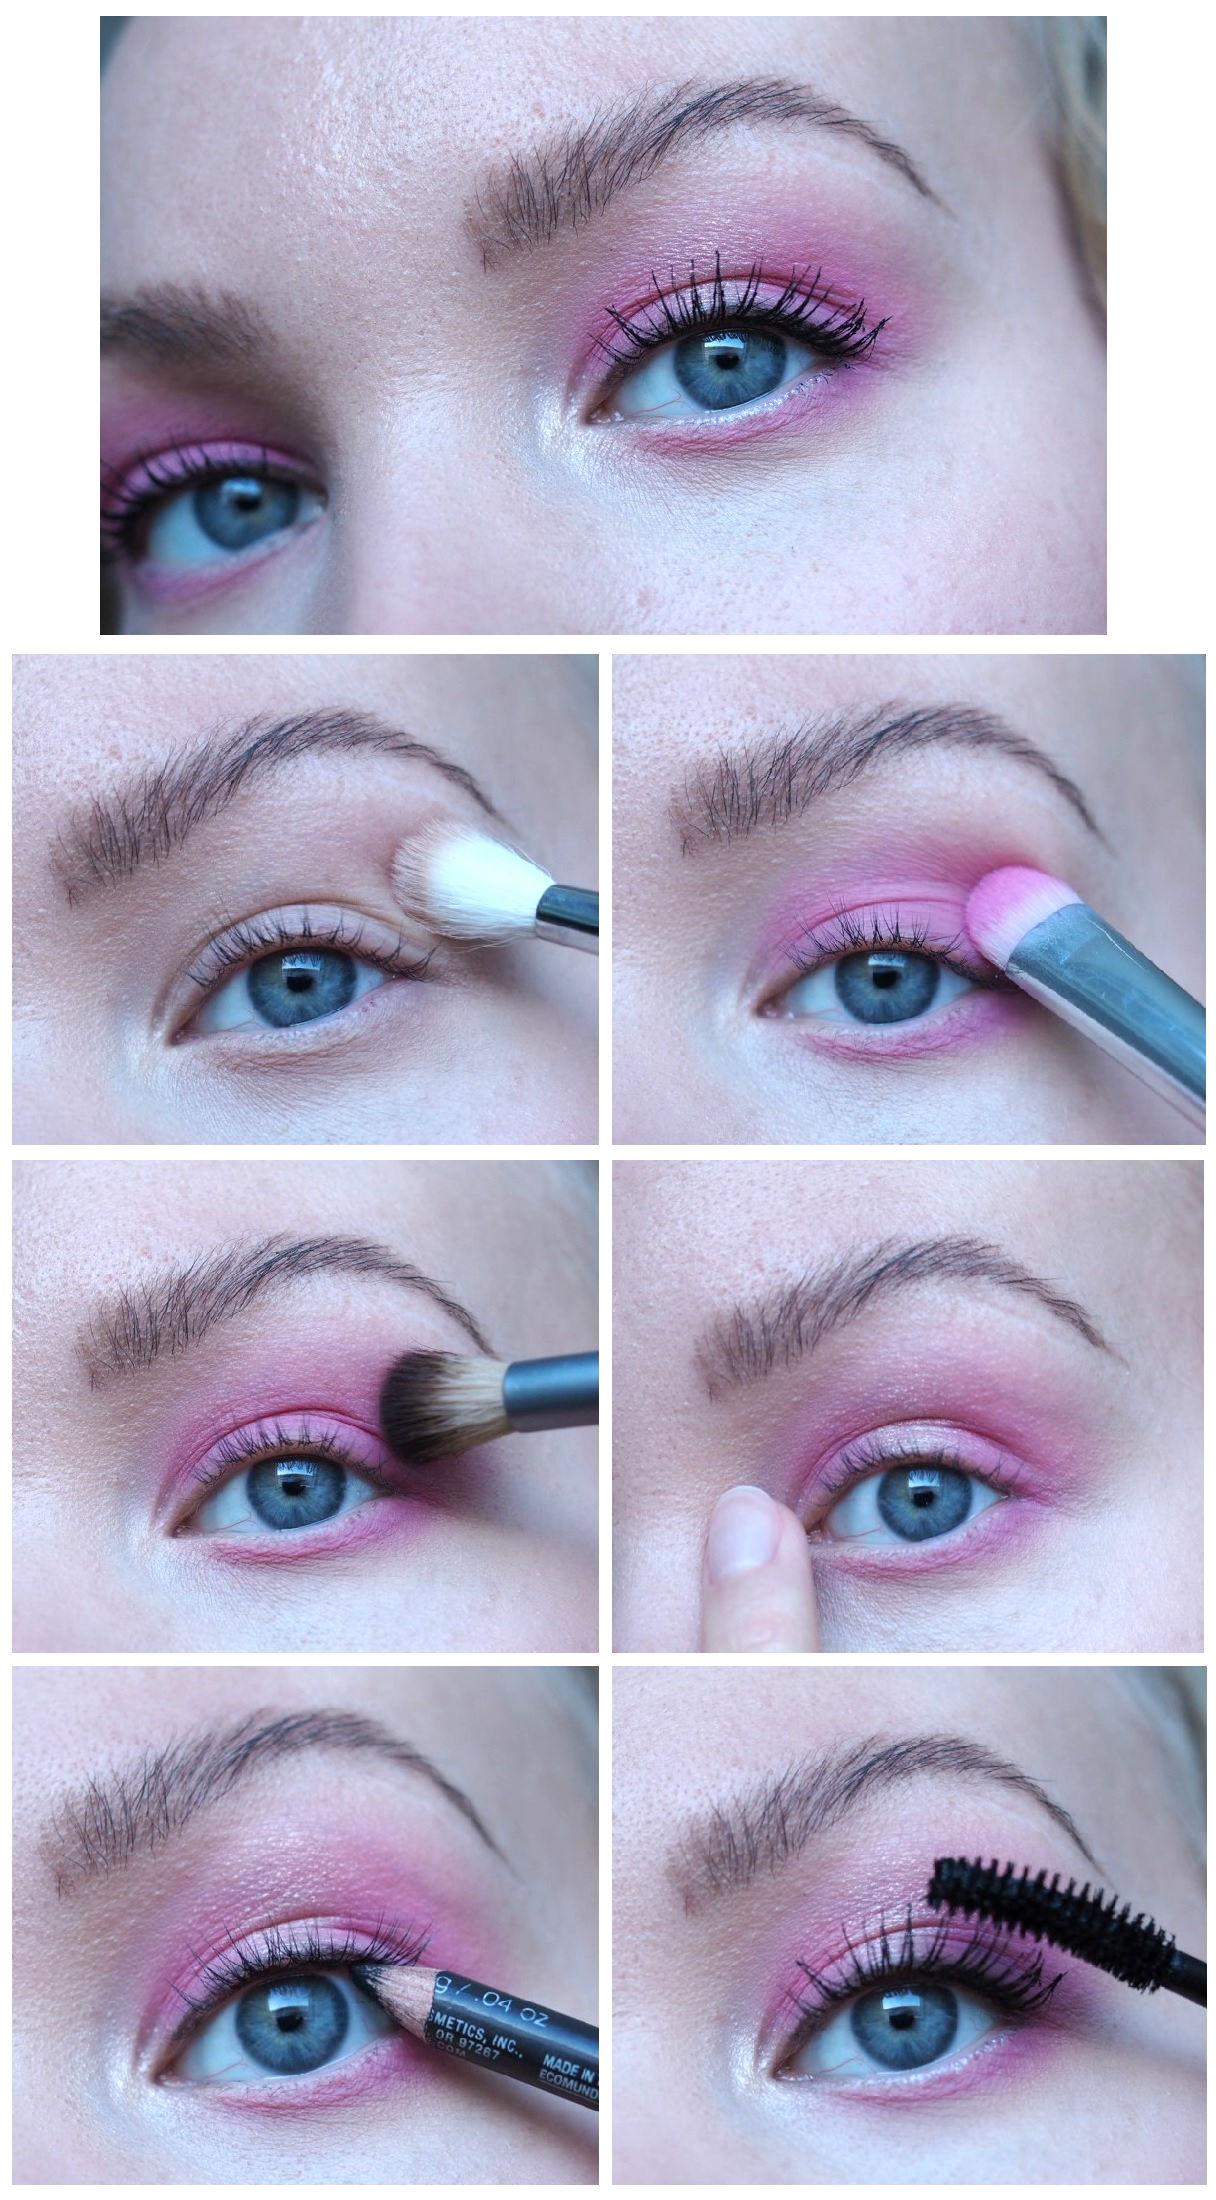
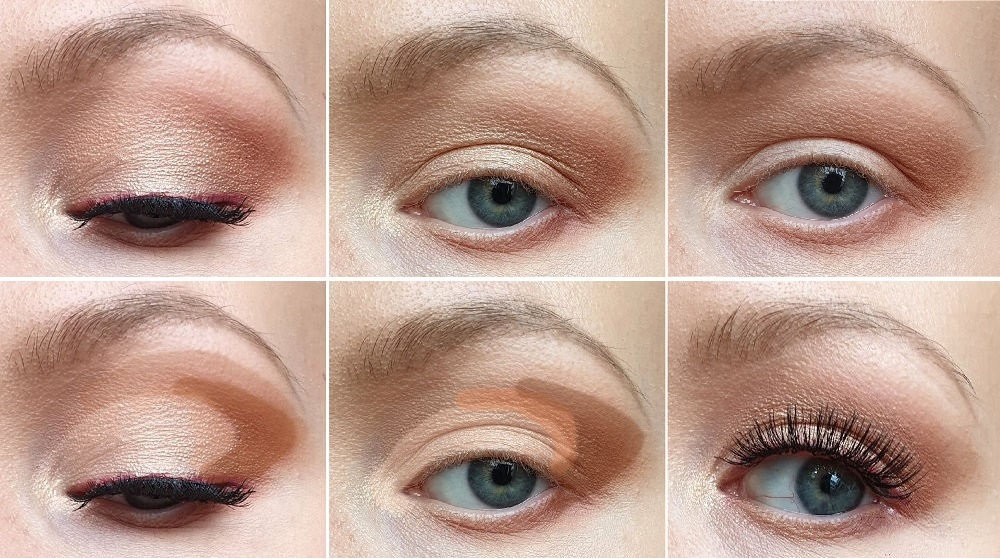
As I said, this look is all about light and shadow.

I created a shadow with a matte shade and defined my eye with it. I also hid the hood and wrinkles I have because of my eyeshape. I brought the color up and to the side on the outer corner to elongate my eye.

After that I applied light on the lid and inner corner. A light shimmer will catch light and make this area come forward.

Final step is liner, mascara and lashes. If you have naturally long and voluminous lashes, congrats! Lashes really help to bring out the eye, especially behind glasses. If you struggle with falsies, I suggest using *individual or *flare lashes. They also look more natural.
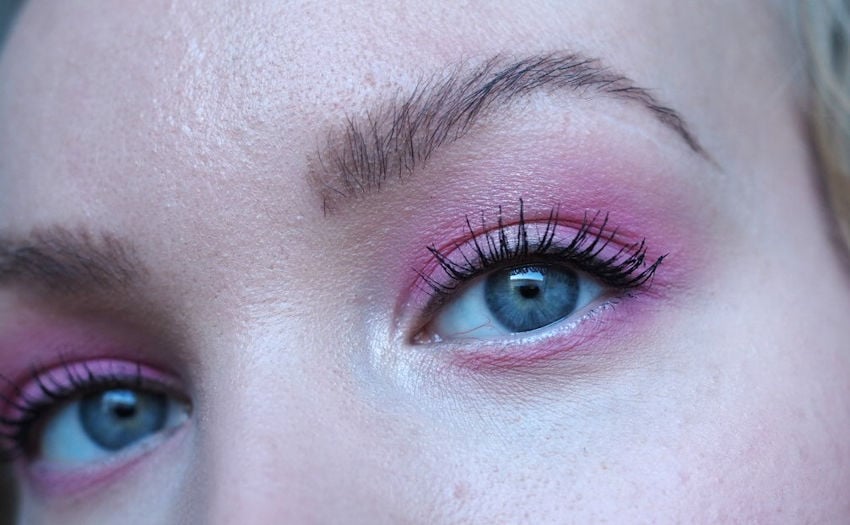
And that’s it!

This time I also made a short video to show you the steps:

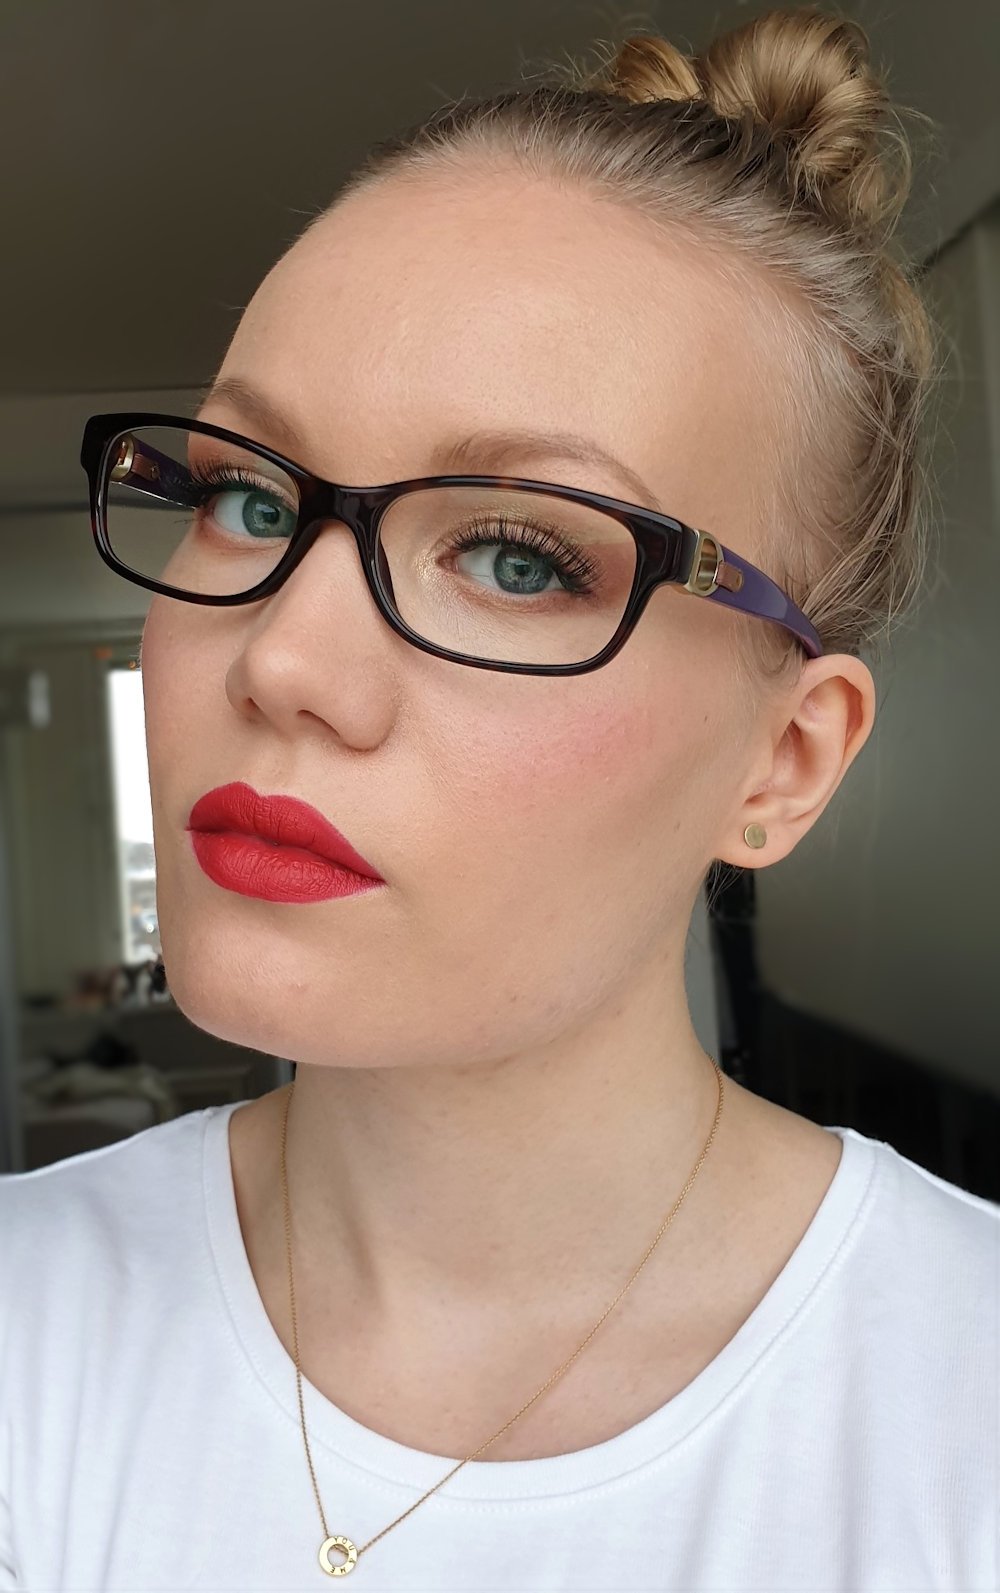
A very simple technique, which works for most eye shapes. 

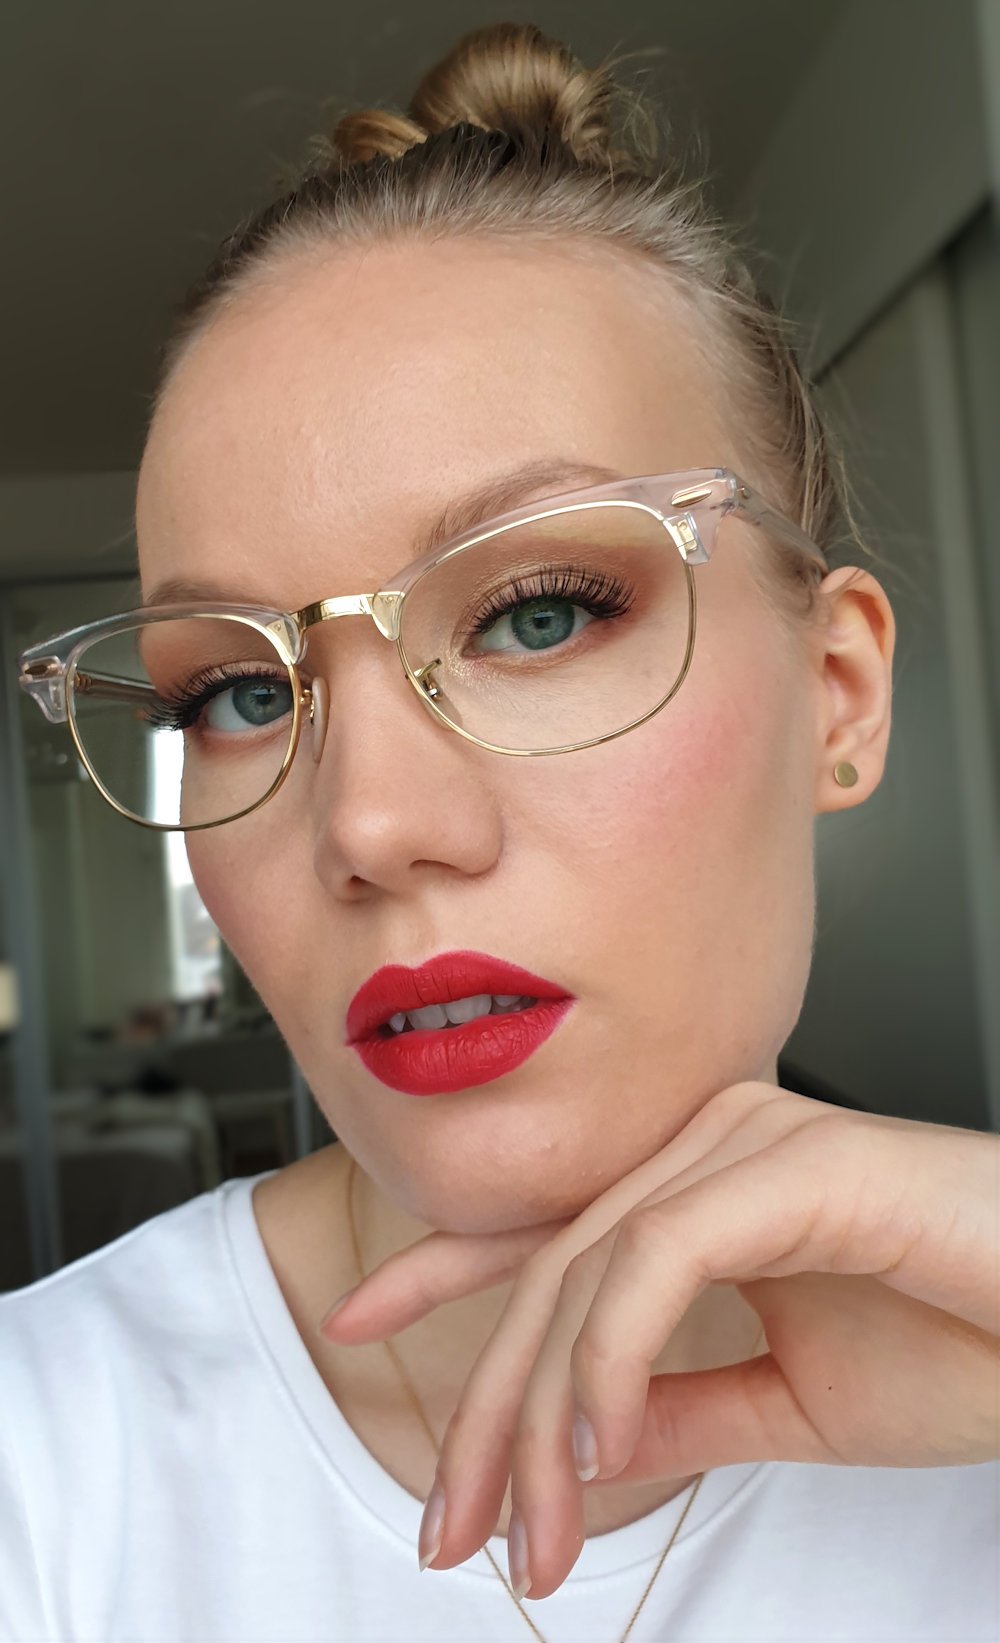
I also tested this look with my other, heavier glasses.

PRODUCTS

*Illamasqua Artistry Unveiled Palette (Shop in*UK & *EU)
*Luxie smokey eye brush set
*Eylure false lashes
*Ardell Individual lashes

*YSL Touche Eclat Le Teint Foundation BD30
Clarins Joli Blush, Cheeky Purple
*YSL Tatouage Couture Matte Lip Stain, 12


P.S. If you need help doing a red lip, check out my quide to the perfect red lip!


Pink makeup for Valentine’s Day – tutorial


*adlink

Last weekend I checked the date and realized we’re already on the second chapter of 2020. Just like that, we survived January. I mean, it was a good month, but oddly grey and rainy.

This year more than ever I want to do makeup tutorials for all the seasons and even though Valentine’s Day is not huge in my country, I wanted to take the time and celebrate it at least with makeup.

Using pink was expected, but necessary. Did you know pink eyeshadow actually looks beautiful on all eye colors? It’s especially flattering for blue and brown eyes. It also works great for green, but for green I would choose a deeper redder shade.

valentine's day makeup pink

Pink Valentine’s Day makeup tutorial

This look is pretty easily achievable, because I used bronzer to shade, a blush all over the lid and a highlighter as a light shimmer. So chances are, you already have the products and you don’t have to go and buy pink eyeshadow. Also, when you a choose a lighter blush color, it’s not going to be as intense. That’s going to make it more wearable, if a super bright color is not your thing.  In that case, check out my last year’s Valentine’s Day look as well, which was a bronzed rose gold kind of look.

pink valentines day makeup tutorial


  1. Start shading the eye with a light brown color. Apply this shade to where you want the pink color to end, which is usually your crease or if you have deep set or hooded eyes, it’s the area where I have my brush in the photo, slightly below the brow bone. This helps to blend the pink to your skin tone better. I kept the color quite light. I used a big fluffy brush, Zoeva 221.
  2. Start packing the pink color all over the lid and to your lower lashline as well. I used elf 201 flat brush, which is actually pretty great (and super affordable). Blend using circular motions and a fluffy brush. I could have also used Zoeva 221, but I used a rounder fluffy brush from Ecotools, because it’s more concentrated.
  3. Apply some highlighter to the center of your lid and your inner corner. This brings some more definition to your eye and helps to brighten up the look. I used a new highlighter from NYX, which has a weird gel-like formula. It works great applied with a finger like this. It actually feels like a metallic eyeshadow.
  4. Tightline and line your eye using a black pencil. Add mascara and you’re done. Especially if you have a lash lift done to your eyelashes (it’s the best).

If you want to see this tutorial in a video format, head over to my Instagram Stories (I will save it for highlights too). @charlottaeve


pink eyeshadow on blue eyes makeup

PRODUCTS

*Benefit Hoola Bronzer
*Milani Baked Blush, Pink Delizioso
NYX High Glass Illuminating Powder, Moon Glow
Alima Pure Ink Pencil
*Tony Moly Panda’s Dream Mascara

*Zoeva brushes (Zoeva 221)
elf 221 brush
*Ecotools brush set

*MAC Amplified Lipstick Girl About Town

P.S. If you’re wondering why my brows look different and so good (no? just me?), it’s because I recently got a brow lamination/brow lift done. It’s a beauty treatment that I’m already obsessed with.


Scroll to top