CRACKED BLUE SKULL – Easy Halloween makeup tutorial

easy skull with cracks tutorial

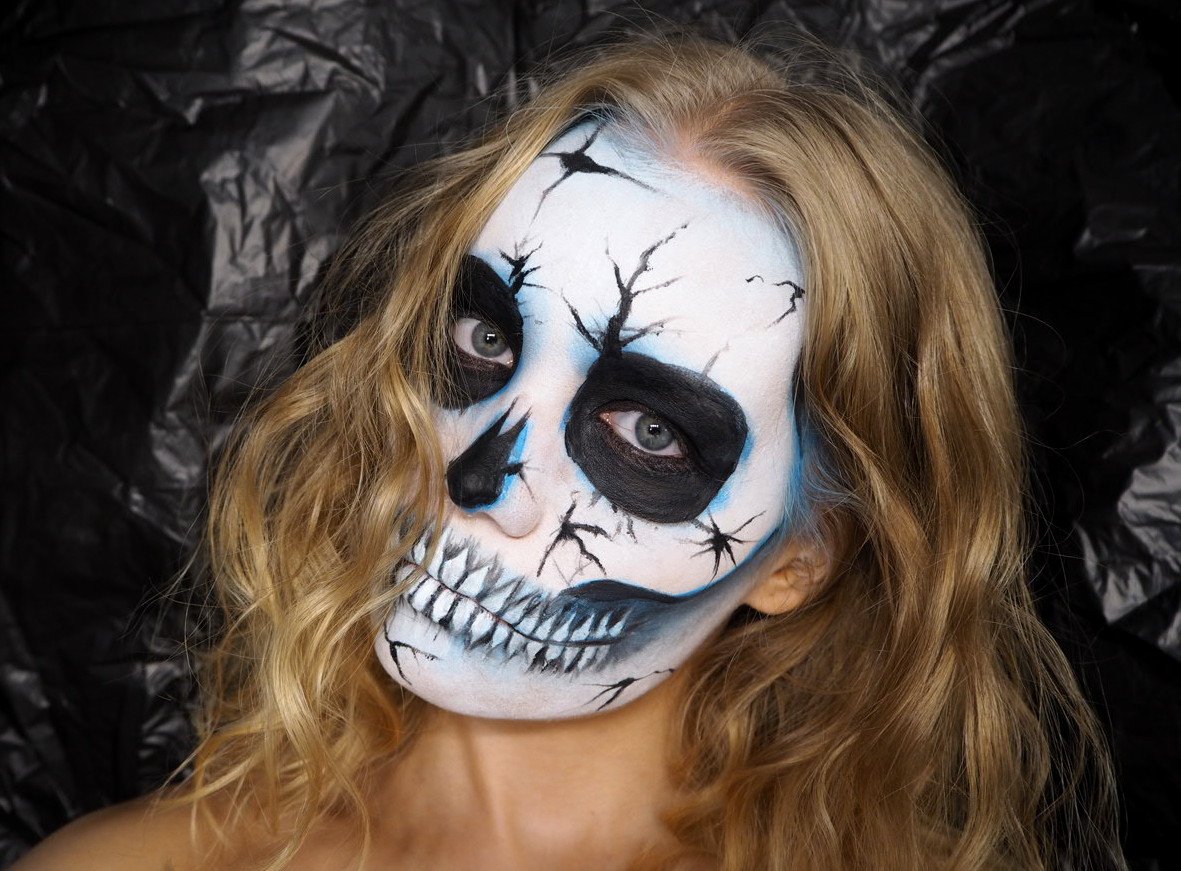
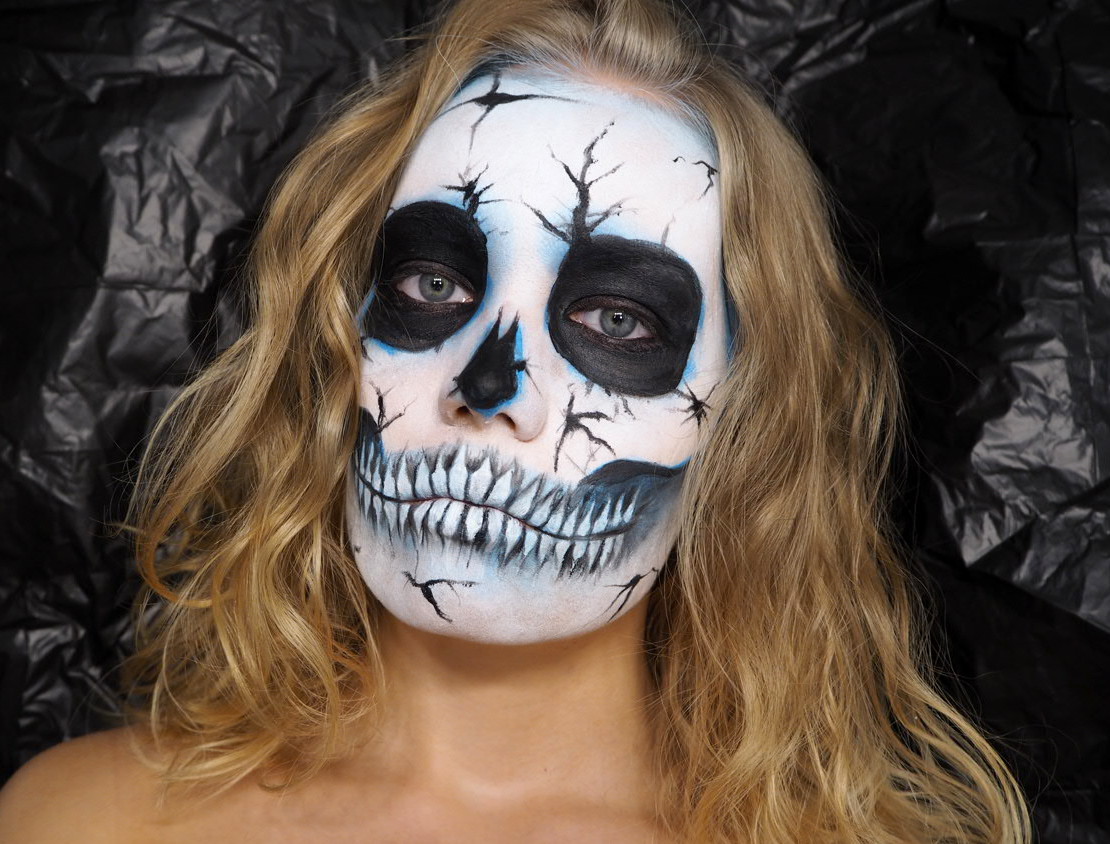
Creating a skull makeup is easier than you’d think. Here’s proof: this is the second skull, I’ve ever made. Like, ever. Even if it didn’t turn out perfect, it still looks like a skull. Like, no one is gonna ask you at a Halloween party: “what are you supposed to be?” Duh, it’s a skull.

Easy Halloween makeup

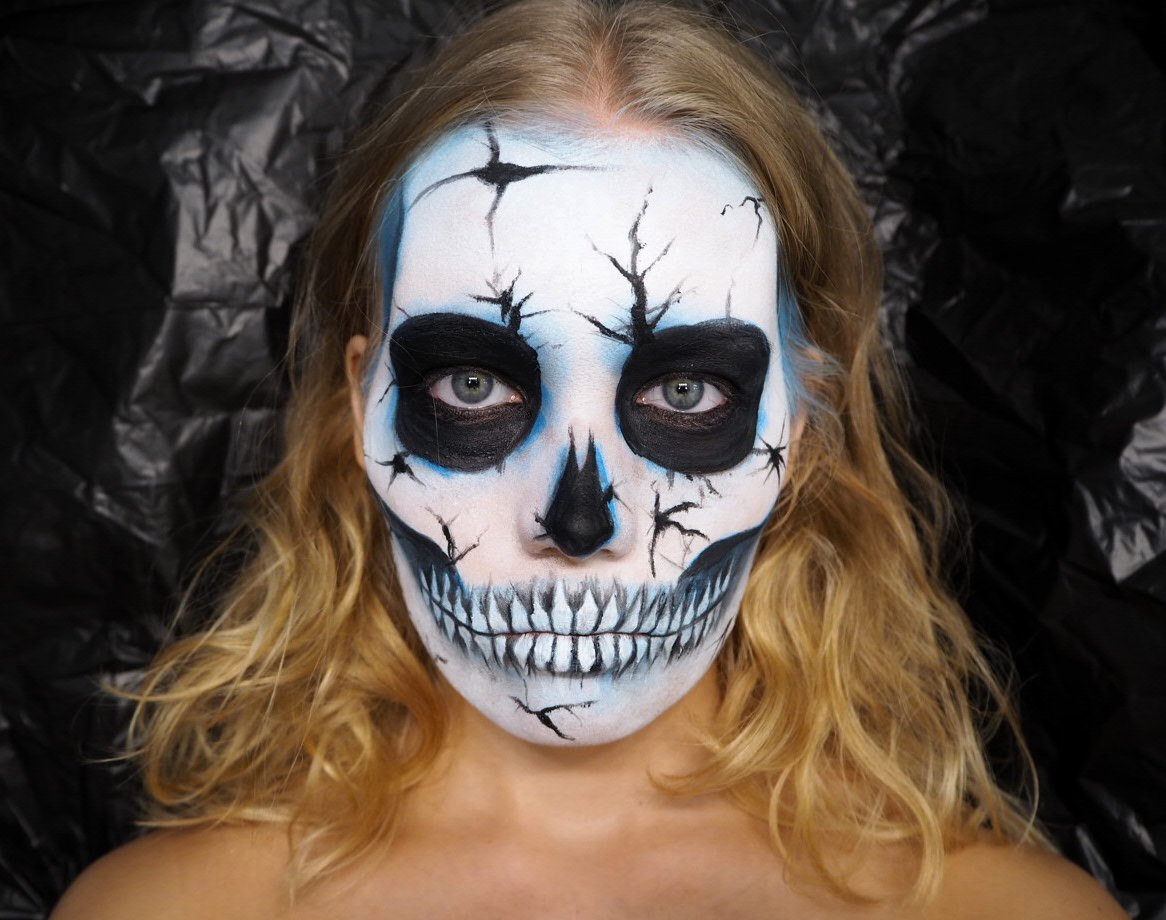
You can use these instructions to create an easy Halloween skull makeup. Here I added some cracks on the skull, just to make it interesting. You could also add pearls, diamonds and some glitter. You can decorate it however you want, once you have the base of it done: eyes, nose, cheek contour and teeth. If you’re more into glam, I have another tutorial for a purple glam skull.

Another thing I want to note, is that when you’re creating a skull makeup – it actually looks pretty rad when it’s not perfect. When you can see the brush strokes and lines. I gotta admit, the hardest part is to paint the teeth, but actually those look quite cool messy as well.

It’s Halloween – play a little, experiment and have fun.

skull makeup halloween tutorial

Easy skull makeup tutorial

easy skull tutorial

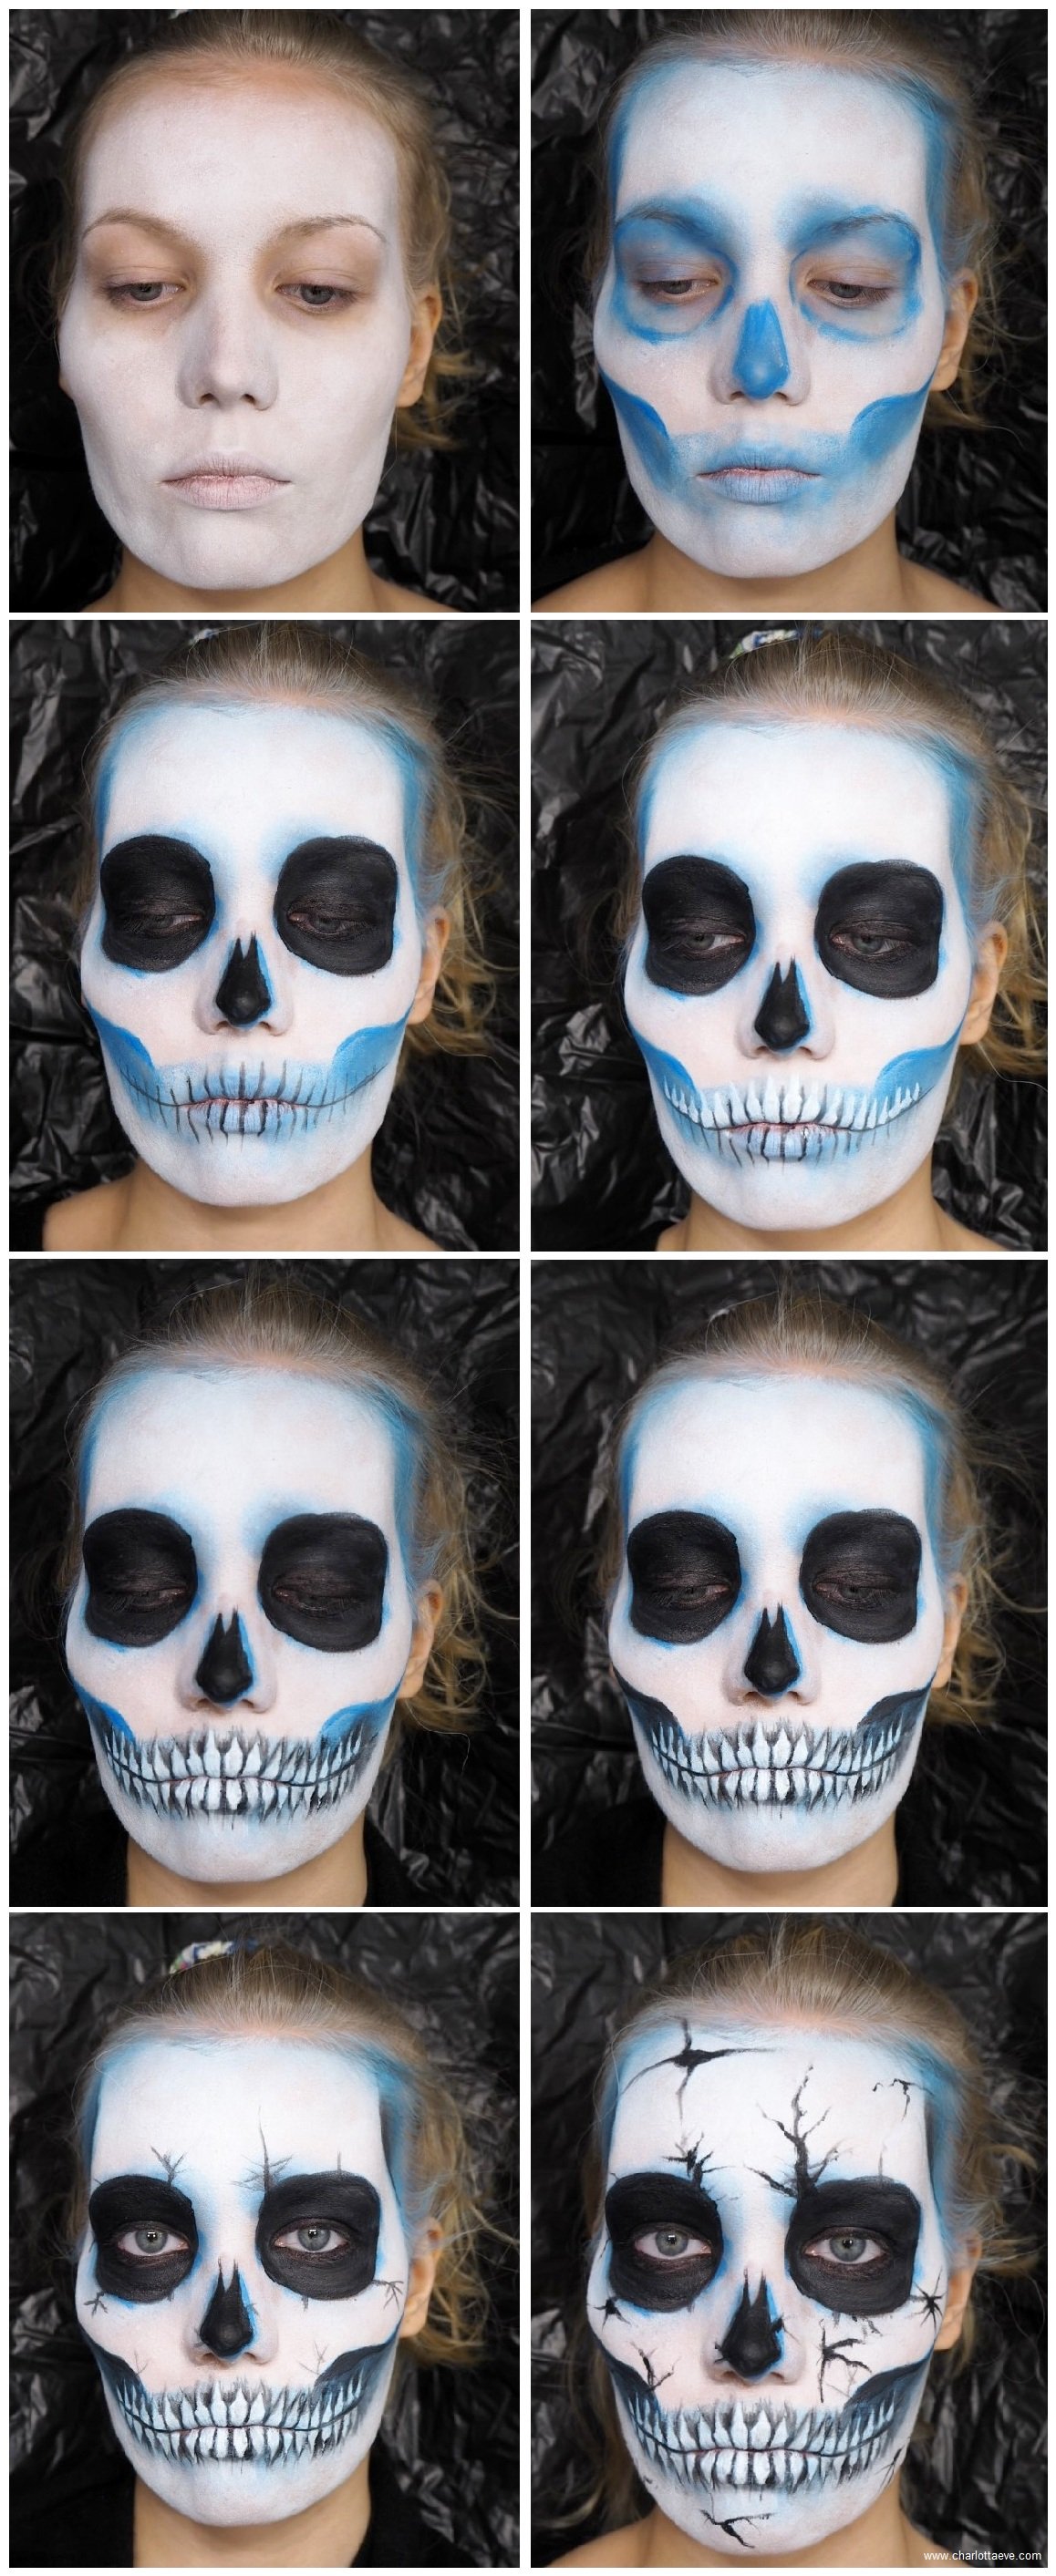
One easy way to make your skull more interesting is to use another color under the black color. Like I used blue here. I love blue. You could also use some other color instead of white as your base.

Easy skull teeth makeup tutorial

easy skull teeth tutorial

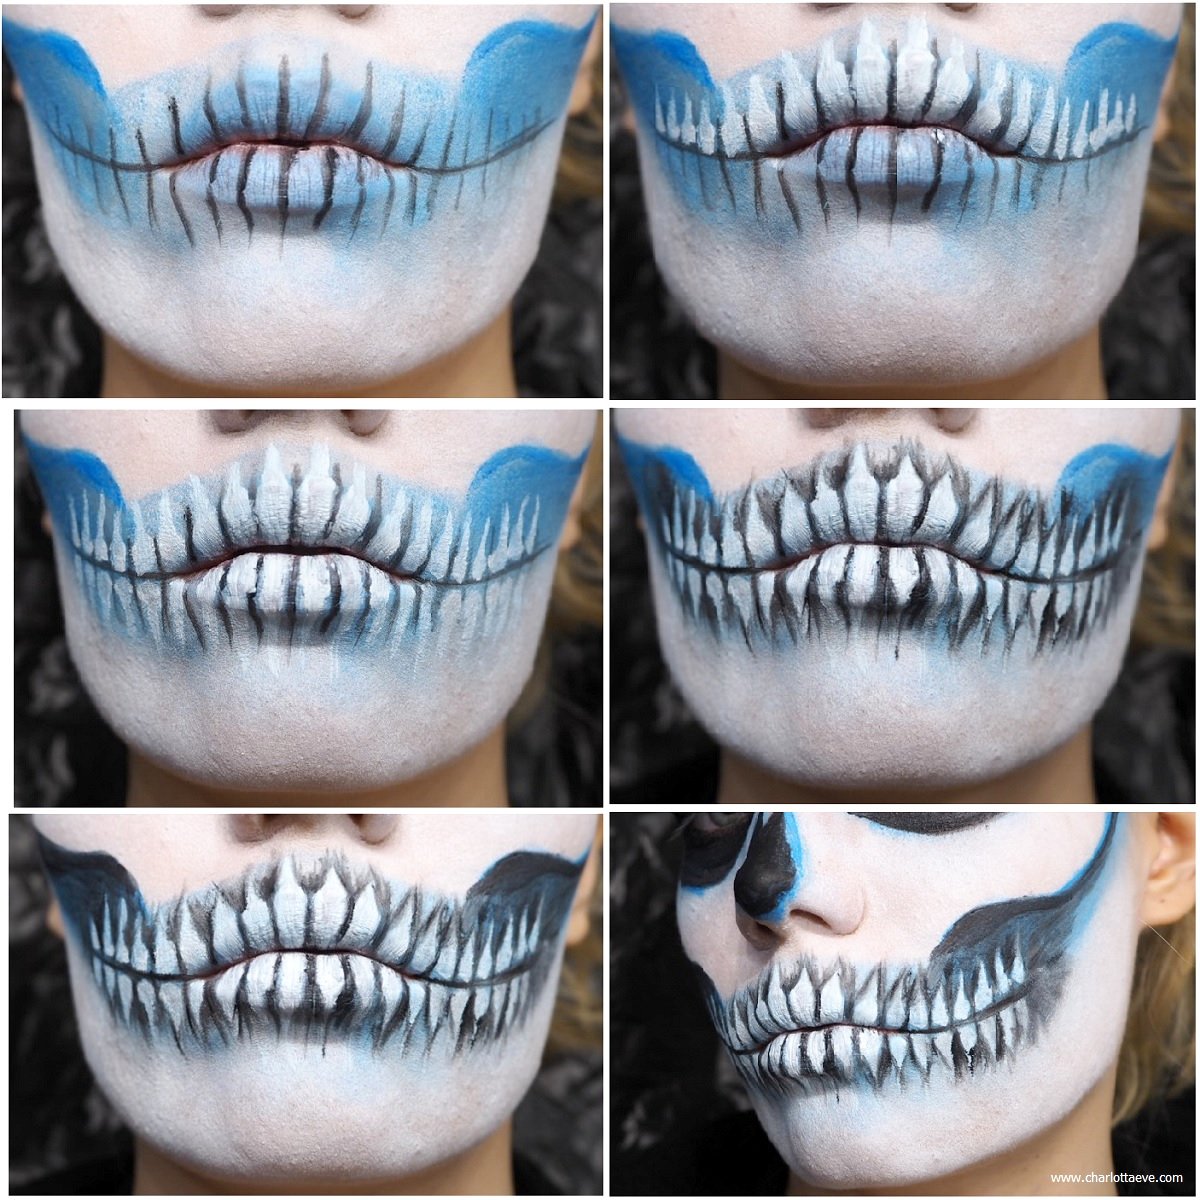
How to make the teeth even easier: just stop at the first picture. I’ve seen lots of looks, where the teeth are drawn with just simple black lines.

And since I’m not a tooth professional (yeah, I’ll admit), check out Chrisspy’s video tutorial on easy skull makeup. On the video she shows exactly how to paint those teeth.

cracked blue skull makeup tutorial

And that’s it! It’s been fun to get out of my comfort zone and play with Halloween makeup. I’m so used to doing beauty makeup, it’s refreshing to do something unconventional for a change.

What you need to re-create this skull:

*CC Beauty Face & Body Paints with brushes
*Black Eyeliner


Don’t forget to check out my other skull tutorial – purple glam skull with diamonds!

What do you think of this look?

Fall makeup tutorial using Vice 4 palette

fall makeup tutorial

Fall makeup tutorial using Vice 4 palette coming your way!

I’ve been using my Vice 4 palette a lot lately and I realized it’s quite the palette for fall and winter. In this burnt orange smokey eye look I used Bitter, Delete, Flame and Deadbeat from the palette. The star of the show is definitely Flame, that beautiful shimmery orange color, which I used all over the lid.

For once, I decided that more is more. So this look ended up quite dark and dramatic. But I kinda love it. If you want to tone this look down, skip the black eyeshadow and do a thinner liner.

I also have another tutorial using the palette here!

Fall makeup tutorial using Vice 4 palette

fall makeup tutorial using vice 4 palette

  1. Start by drawing a straight line from your lower lashline all the way to your crease area with ‘Bitter’. Create the shape for your eyeshadow with this color. Once you’re done, blend longer than you’d like. This look is supposed to be smokey, so don’t worry about blending the orange color too far or too low on your lower lashline.
  2. Darken the outer corner of your eye with ‘Delete’. Blend well.
  3. Add ‘Flame’ all over your lid. Pat it on to get the best pigment.
  4. Line your eyes with a black pencil. Line your lower lashline as well, and connect the liner in the outer corner. Blend the pencil with a small brush and make it nice and soft. I only brought the pencil about 1/3 of my lower lashline, and then blended the color, so it looks nice and soft.
  5. Add ‘Deadbeat’ right where you lined your eyes and blend it to make it even softer and so that the colors blend seamlessly together.
  6. Add some inner corner highlight (I used MAC’s Soft&Gentle). Then apply mascara and possibly some lashes. Done!

I could have added bigger lashes (those would suit this look), but I just wan’t mentally prepared for that fight. Lightweight lashes are easier to apply! I like Eylure’s lashes.

Color placement.

fall makeup burn orange

PRODUCTS

TonyMoly Silky Smooth Balm
Estee Lauder Double Wear Light, 3 & Rimmel Lasting Finish Nude Foundation, Ivory
Innisfree no-sebum mineral powder
Catrice Liquid Camouflage High Coverage Concealer, 15
Maybelline Fit Me Concealer, 15
Maybelline Master Fix Baking Powder
Hoola Benefit
Jane Iredale Flawless Blush*
MAC Mineralize Skinfinish, Soft & Gentle

mad4eyebrow Natural Eyebrow filler, Blond
Holika Holika Wonder Drawing Skinny Eyebrow, 02
Urban Decay Primer Potion
Urban Decay Vice 4 palette
Alima Pure Natural Definition Eye Pencil, Ink
IsaDora Insane Volume Lash Styler Mascara
Eylure 080 lashes

Jane Iredale Lip Fixation, Content*

fall makeup tutorial burnt orange


Scroll to top