*adlink
Quick answer: deep set eyes sit deeper under a more prominent brow bone, and lightly hooded eyes have a soft fold that can hide part of the lid. If that sounds like your eye shape, keep your eye open while placing shadow, lift the shape slightly above the natural crease, and avoid putting the darkest color only on the visible lid.
This post shows how to tell whether your eyes are deep set or lightly hooded, the biggest makeup mistakes I see on this eye shape, and what to do instead. For a full step-by-step look, see my deep set eyes makeup tutorial. If your main issue is eyeshadow disappearing, my hooded and deep-set eyeshadow placement trick builds on the same idea.
- Do: keep the eye open while mapping the shadow.
- Do: lift the outer corner and softly smoke the lower lashline.
- Don’t: keep the darkest shadow only on the visible lid.
Quick dos and don’ts for deep set eyes
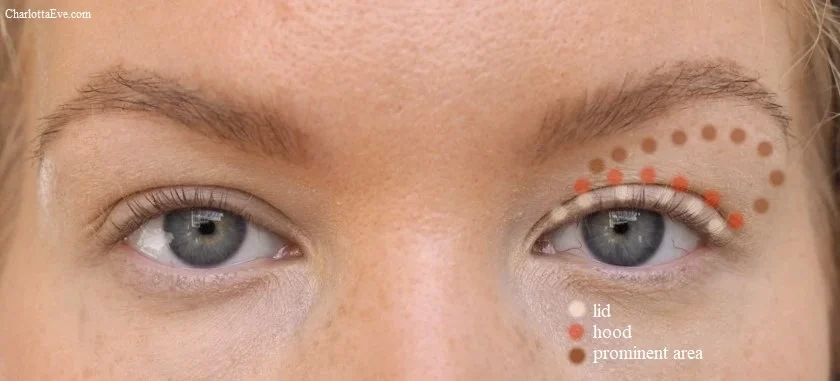
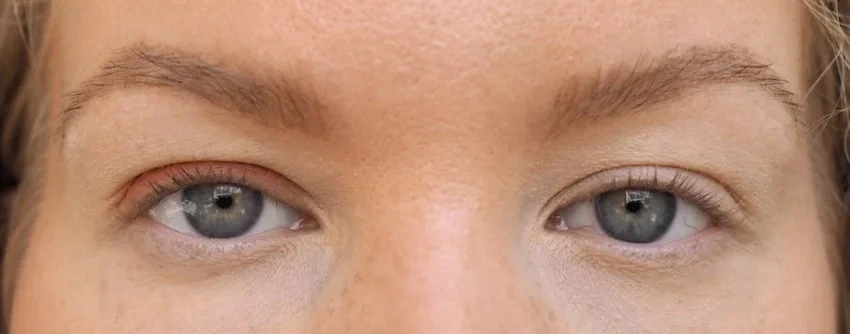
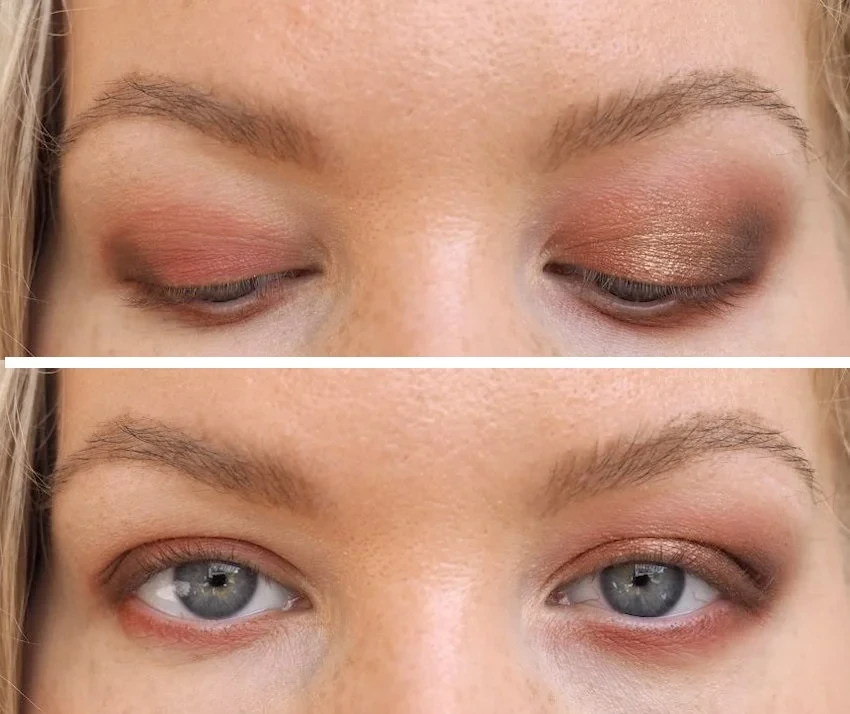
Here are my eyes. I have a bit of visible lid space. If you have hooded eyes, you might not have much visible lid at all. Above it I have a slight hood, which is also where my crease sits. But the most noticeable feature is the prominent area above that hood, where the brow bone pushes forward. That is the area I like to shade to balance my eyes.
Instead of shading my actual crease, I imagine a new crease slightly higher in that prominent area and place my matte shadow there. That keeps the hood from taking over the whole look and gives the eye more lift.
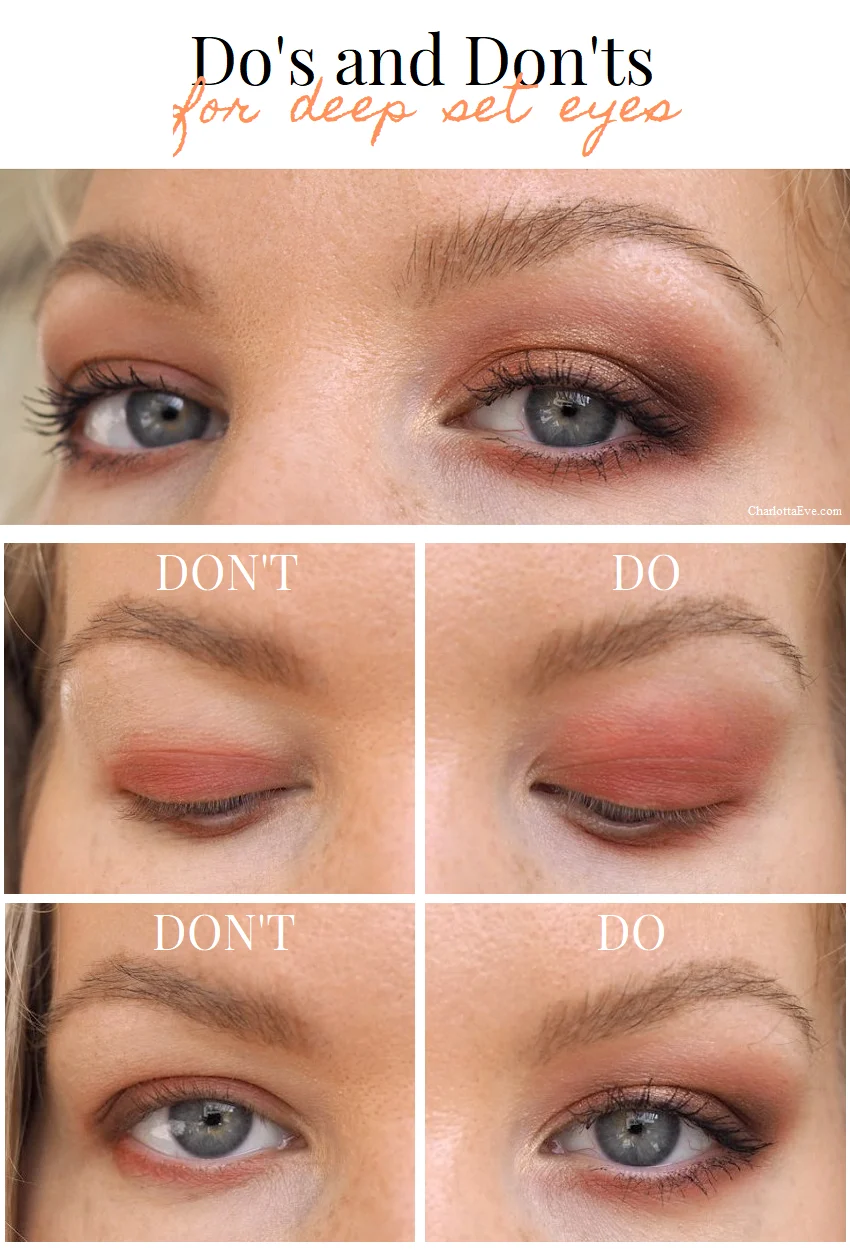
Don’t: place dark eyeshadow only on the visible lid
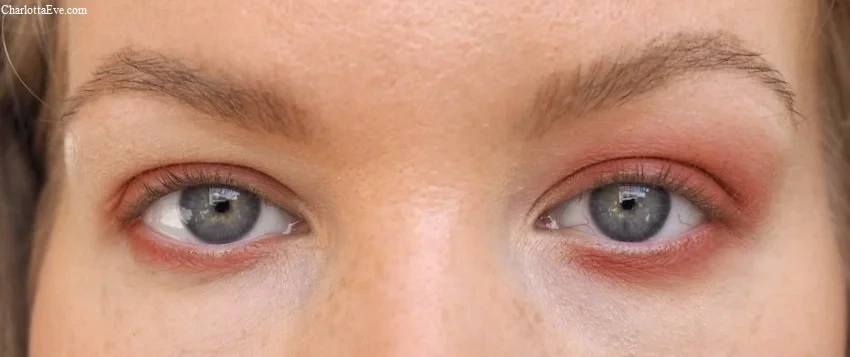
See what this does to my eye? It sinks it in even further. The hood and the prominent area also look even more pronounced, because the contrast between my skin and that dark shadow is so strong.
Do: keep your eye open while applying shadow
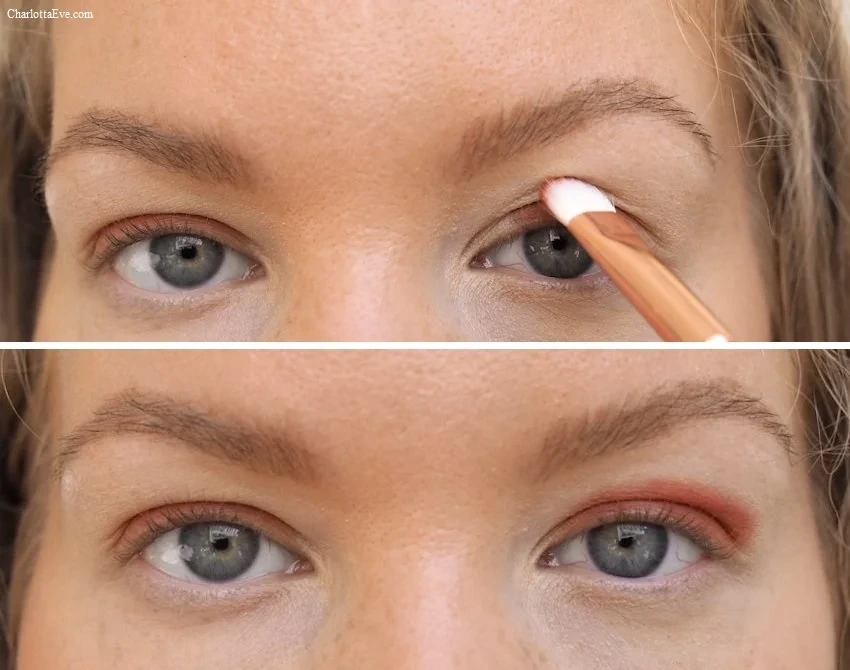
The most important rule for both deep set and hooded eyes is this: keep your eye open while applying your shadow. The whole idea is to hide the hood a little, so you need to place the shadow on top of the hood and slightly above it. Keep your eye open so you can actually see how high you need to bring the color for it to show and work.
If you like stronger looks, the same placement rule still applies in my bold eye makeup for deep set eyes tutorial too.
Do: smoke the lower outer corner instead of stopping at a harsh line
Here might be the reason why people are afraid of a smokey eye. When it is done wrong, it makes the eye appear smaller. By lifting the shadow and smoking out the lower outer corner, the eyes look bigger and rounder.
Do: lift the outer V toward the tail of the brow
This trick works especially well if your eyes are also slightly downturned. Keep the eye open, look straight ahead, and place the deeper shade where it creates a lifted V on top of the hood instead of dragging the outer corner down.
Do: use shimmer where it helps the eye open up
This is partly personal preference, but I like to emphasize the visible lid with a touch of light shimmer. It rounds the eye a little and keeps the lid from disappearing completely.
For a colorful lid-focused example, see my easy blue makeup look tutorial.
That is really the main idea: check the shape with your eyes open and relaxed. Is the makeup lifting and opening the eye, or is it pushing the eye deeper? Once you learn to judge that, deep set eyes become much easier to work with.
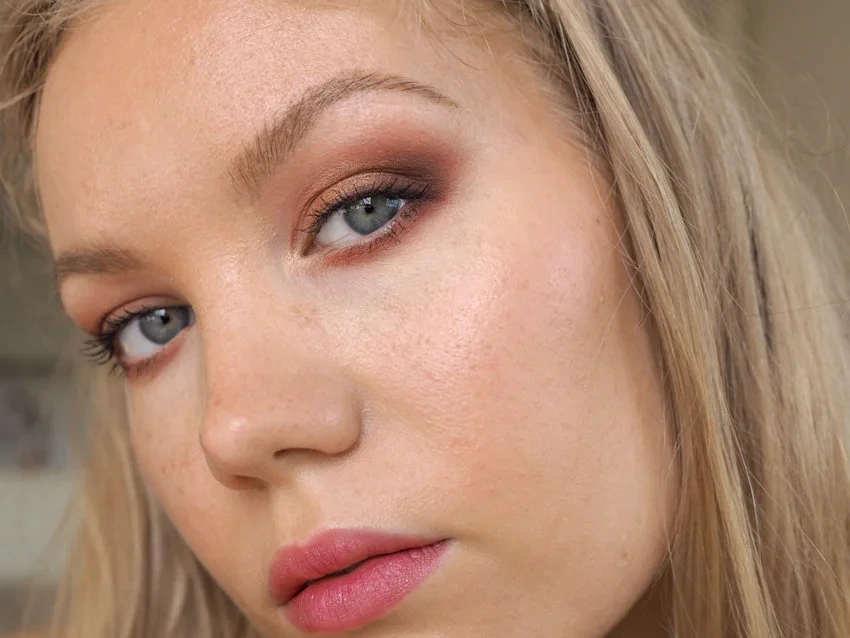
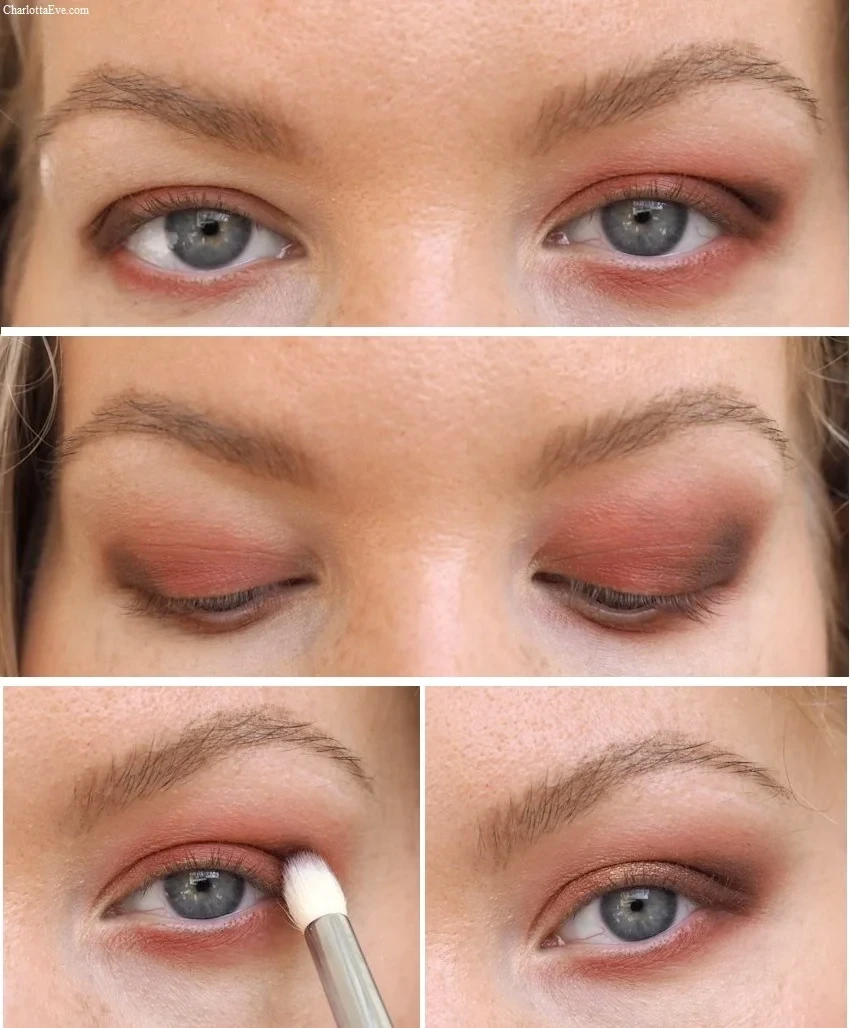
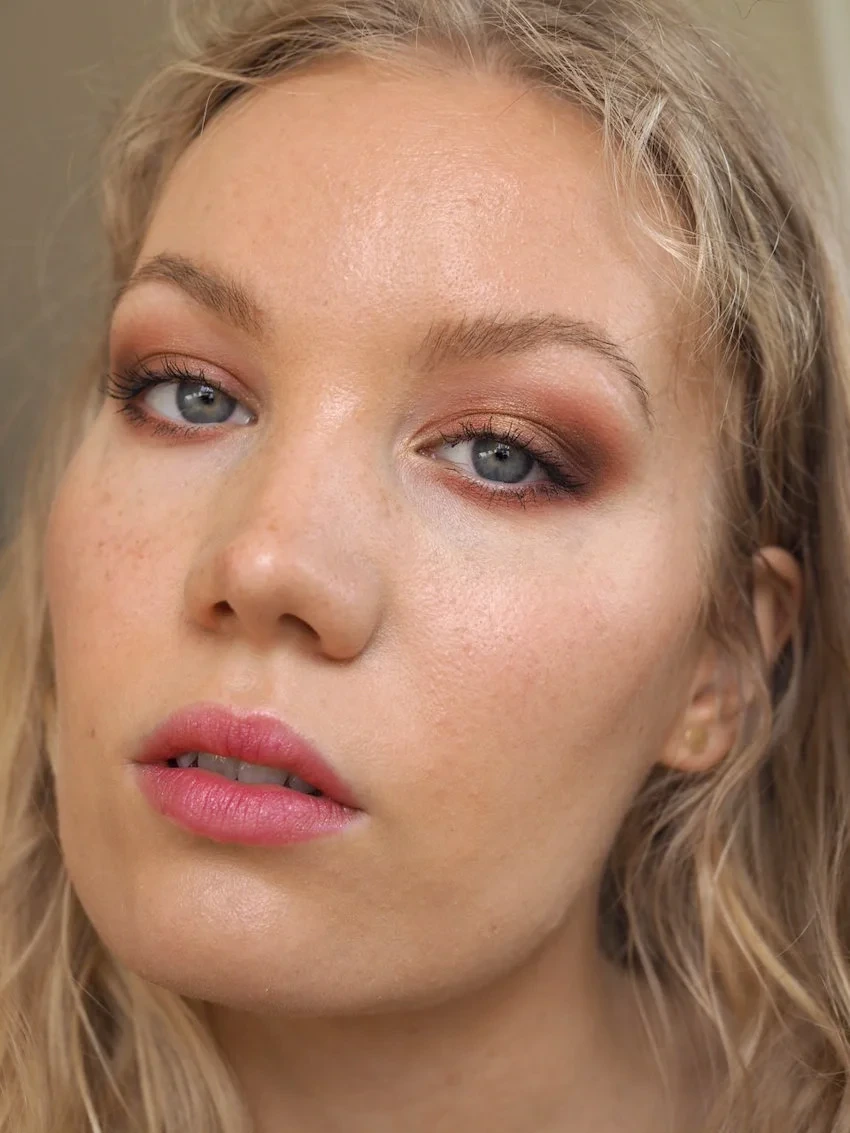
Example tutorial: warm reddish brown makeup for deep set eyes
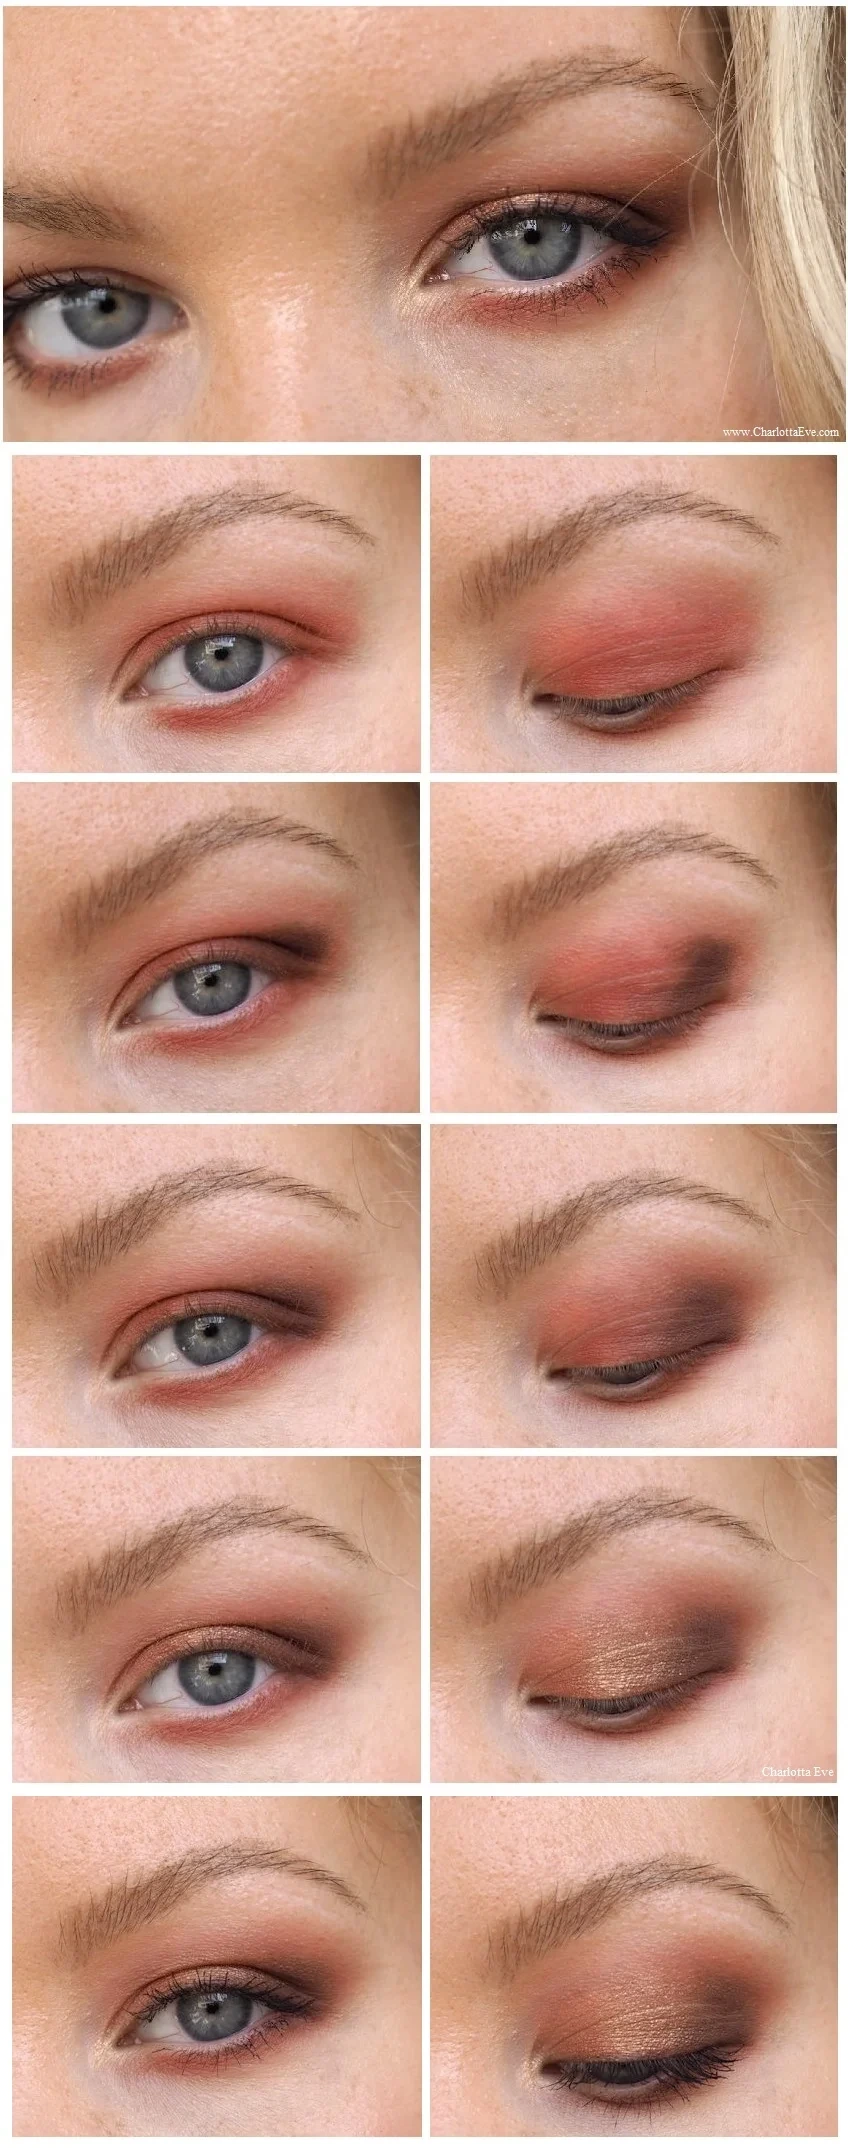
Now that you know the main dos and don’ts, here is the warm reddish brown eye look from the photos above.
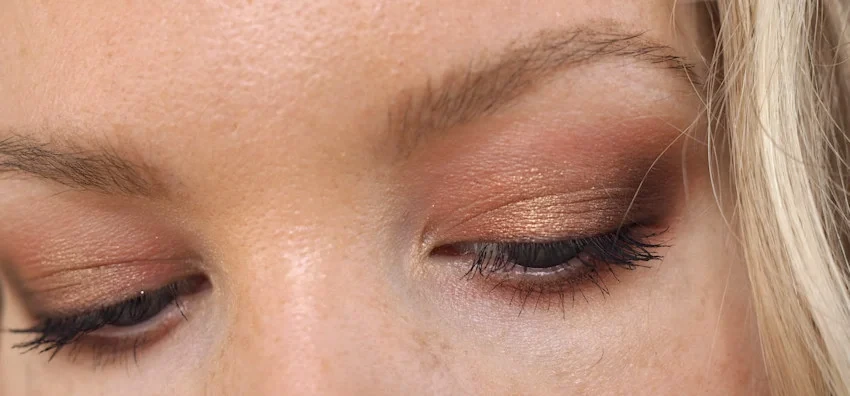
- Prime your eyes and add a matte color all over the eye. Bring it as high as you need to in order to hide the hood and soften the prominent area. Blend the edges until the shadow looks soft and lifted.
- Deepen the outer corner in a V shape so that your eye gets a nice lift. A matte dark color works well for this. Blend, but keep the outer corner slightly deeper.
- Add a touch of shimmer right on the center of the lid, where it is visible when your eye is open.
- Line the eyes lightly and add mascara. Done.
Best products for this technique
The products that make the biggest difference here are a good eye primer, blendable matte shadows, a little shimmer, and brushes that let you place color precisely.
- Eye primer: Urban Decay Primer Potion
- Palette option: Too Faced Born This Way The Natural Nudes Eyeshadow Palette
- Starter brushes: SEPHORA COLLECTION The Eye Brush Set
- Upgrade brush set: SEPHORA COLLECTION The Total Brush Set
Products used in the makeup:
- NARS Soft Matte Complete Concealer, Custard
- Madara Concealer, Vanilla
- Madara Skin Equal Soft Glow Foundation, 50
- Laura Mercier Translucent Powder
- Boho Bronzer, Sunkissed Glow
- Kjaer Weis Cream Blush, Above and Beyond
- Urban Decay Primer Potion
- Morphe 3502 palette
- Boho Lipstick, 204 Orchidee
FAQ
Where should eyeshadow go on deep set eyes?
Usually slightly above the area where the eye naturally sinks in, not only on the visible lid. Keep the eye open while mapping it so you can actually see the lift.
Should dark eyeshadow stay only on the visible lid?
No. On deep set eyes that often makes the eye look smaller and pushes the hood and brow bone forward even more.
Can deep set eyes wear shimmer?
Absolutely. A small amount on the visible lid can help the eye look rounder and brighter. The key is balancing it with matte structure above.
Does this work for lightly hooded or slightly downturned eyes too?
Yes. The same principles still help: eyes open, shadow placed a little higher, and the outer corner lifted instead of dragged down.
If you want more eye-shape tutorials next, start with the full makeup for eye shapes guide. Then read this eyeshadow trick for hooded and deep set eyes, my downturned-eyes guide, or this bolder deep-set eye look.
If you want help figuring out the most flattering makeup for your eye shape, come say hi on Instagram or contact me here.


