If your eye shadow disappears when your eyes are open, the usual crease placement may be too low. For hooded and deep set eyes, this eye shadow trick places the matte contour shade slightly higher, following the natural shadow below the brow bone so the color stays visible and the eye looks balanced.
This technique works especially well for hooded eyes, deep set eyes, monolids, or anyone with very little visible lid space. In this post I’ll show you where to place the shadow, how high to take it, and how to keep the eye looking lifted instead of heavy.
- Skip the natural crease if it sits too low.
- Place the matte shadow where your brow bone creates a natural shadow.
- Blend the lid color up to that shape and keep shimmer off the contour area.
Already know the placement and want the tools? Jump to the primer, palette and brush picks.
If your eye shape is a mix of several things, start with my makeup for eye shapes guide to compare the options in one place. I also recommend reading how to makeup for downturned eyes and broader deep set eyes dos and don’ts after this guide.
I learned this the hard way on my own eyes. My eyes have very little visible lid space, so the classic “put the dark shadow in the crease” advice never really worked for me. Once I stopped forcing my shadow into the crease and started following my actual bone structure instead, everything clicked.
And even though I’m a professional, my own eye shape has taught me a lot. Sometimes makeup looked exactly right, and other times I was just guessing. This trick was the moment the logic finally made sense to me.
How to apply eyeshadow on hooded and deep set eyes
Forget about the natural crease
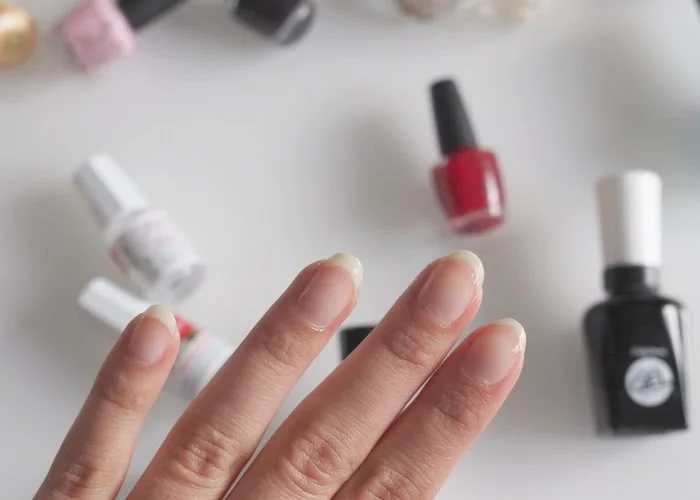
As you can see, my natural crease is very low. Deepening that crease only makes my eyes look smaller, so for this eye shape the crease is not the place I want to emphasize. If your eyes are hooded or deep set, it often helps to stop treating the natural crease as the automatic placement line for dark eyeshadow.

Follow your natural bone structure
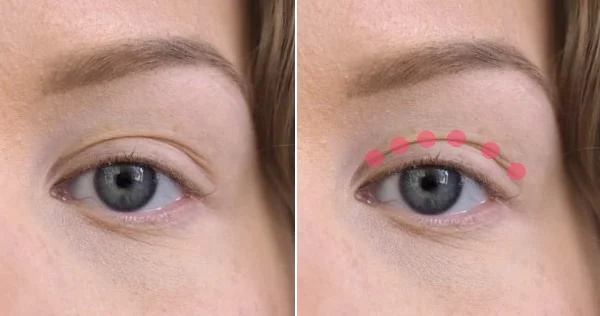
The better rule is to follow your natural bone structure, just like you would with contour and highlight. Put the shadow where it naturally occurs on the eye: right below the brow bone, where the eye starts to sink back. That placement looks softer, more flattering, and more believable because it works with the structure you already have.
If you want even more guidance for this eye area, my posts on bold eye makeup for deep set eyes and round deep set eyes show how the same logic changes slightly depending on the finished look and eye shape.
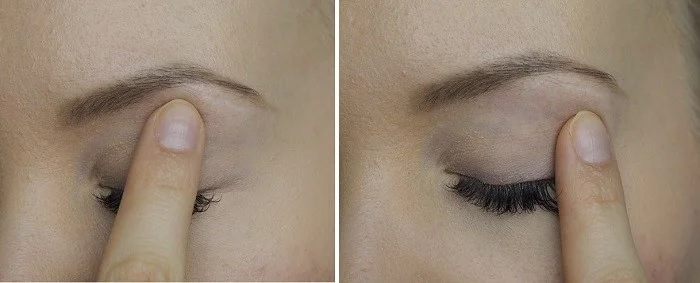
Find the natural shadow right below your brow bone
To get the placement right, find the exact spot with your finger or in slightly dim lighting. You can usually feel where the bone ends and the eye sinks in a little, and you can often see that shadow very clearly in softer light. I’ve literally taken my brush to the hallway, marked where that shadow hits, and then gone back to my makeup table to blend from there.
This is why the trick makes eyeshadow look better: the makeup sits where a shadow would naturally belong. The blend looks softer, the shape looks more lifted, and the eyeshadow stays visible instead of disappearing into the fold.
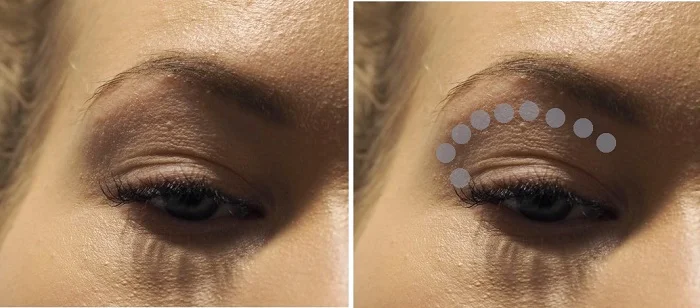
Here is a close-up so you can see how high the eyeshadow can actually go. It is nowhere near my natural crease.
Here is a simple tutorial using exactly this placement.
For a more colorful example with the same placement logic, see my easy blue makeup look tutorial.
Simple 3-step tutorial for hooded and deep set eyes

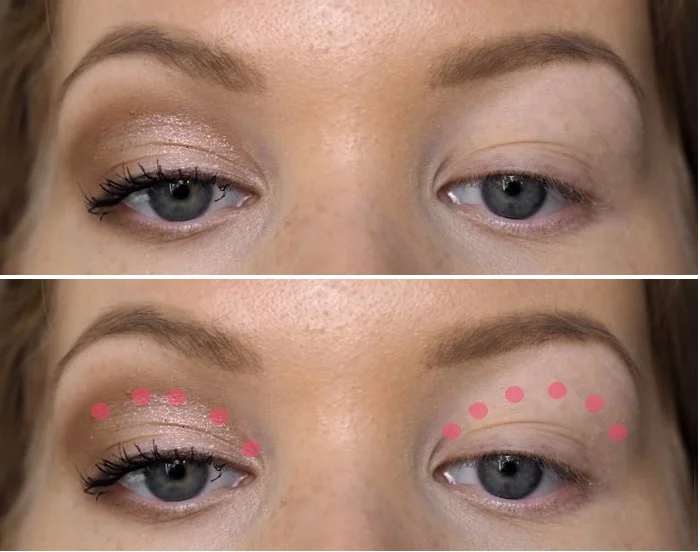
- Contour the eye by following your natural bone structure. Use a matte shade and create the “crease” where a natural shadow occurs. That is where the color should be darkest. Fill in the outer corner and blend well so the contour stays soft. Add some color to the lower lash line too, but keep it subtle unless you want more drama.
- Apply your lid color all over the lid up to the new contour shape. Blend the edges carefully so the transition looks soft. If you use shimmer, keep it mainly on the lid and do not take it over the matte contour area.
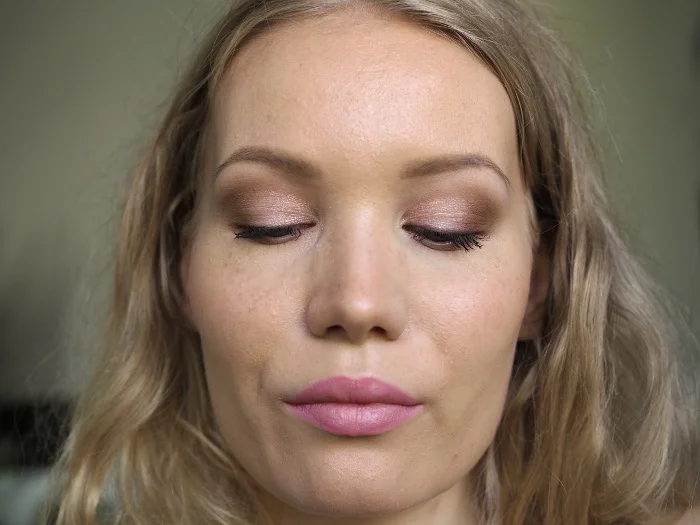
- Finish with inner-corner highlight, liner if you want it, and mascara. Here I used a soft blended liner with black eyeshadow.

Best products for this technique
You do not need a huge makeup bag for this. The most helpful things are a reliable eye primer, a soft matte contour shade, and a brush that blends without making the shadow patchy.
Links marked with * are affiliate links. I may earn a commission at no extra cost to you.
Best eye primer: *Urban Decay Primer Potion. This is the base I rely on when I want shadow to stay smooth and visible all day.
Best premium palette: *Anastasia Beverly Hills Soft Glam Eyeshadow Palette. Great if you want strong pigmentation and easy blending.
Best neutral palette: *Urban Decay Naked3 Soft Pink Eyeshadow Palette. This is a versatile everyday palette when you want flattering contour shades for this technique.
Best soft glam option: *Too Faced Born This Way The Natural Nudes Eyeshadow Palette. A nice pick when you want a little more softness or shimmer on the lid while keeping the contour matte.
Best blending brush: *SEPHORA COLLECTION PRO Crease Brush #19. This is the kind of soft blending brush I like for this technique on hooded and deep set eyes.
Best eye brush set: *SEPHORA COLLECTION The Eye Brush Set. A focused eye brush set is useful when you want clean placement and soft blending for hooded and deep set eyes.
FAQ
Where should eyeshadow go if your crease disappears when your eyes are open?
Usually higher than your natural crease. Place the matte contour shade where the brow bone creates a natural shadow so the color stays visible with the eyes open.
Should shimmer go above the crease on hooded eyes?
I usually keep shimmer on the lid and keep the contour area matte. That keeps the shape cleaner and stops the eye from looking puffier or heavier.
Does this work only for hooded eyes?
No. This also works for deep set eyes, monolids, and anyone whose visible lid space is limited. The exact placement changes slightly, but the principle stays the same: follow the structure you have instead of forcing a generic crease shape.
What should I read next if my eye shape is mixed?
Start with the full makeup for eye shapes guide if you want to compare the options in one place. Then read downturned eyes, deep set eyes do’s and don’ts, and round deep set eyes. Most people are not just one exact eye shape, so comparing a few close matches usually helps.
I hope this post helps you as much as this realization helped me. If you try the technique, send me a message on Instagram or tag me there so I can see your look.
And hey – happy Valentine’s Day! I’m going to do a little date night thing with Risto, eating dinner at home in candlelight. So cheesy, but so lovely.
Want more product-focused picks after this tutorial? Browse my beauty reviews and favorites.